
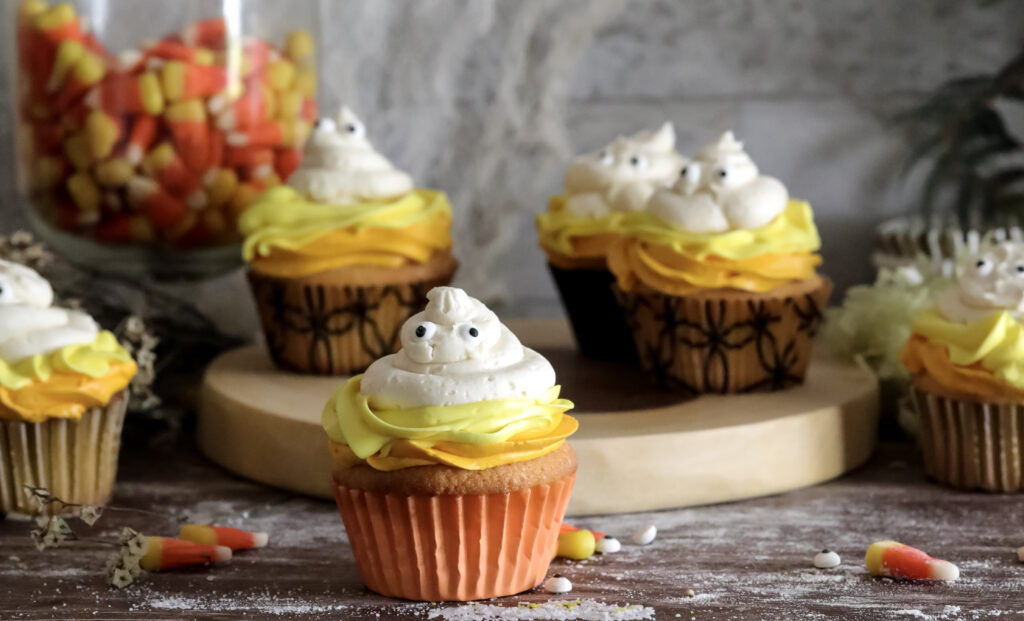
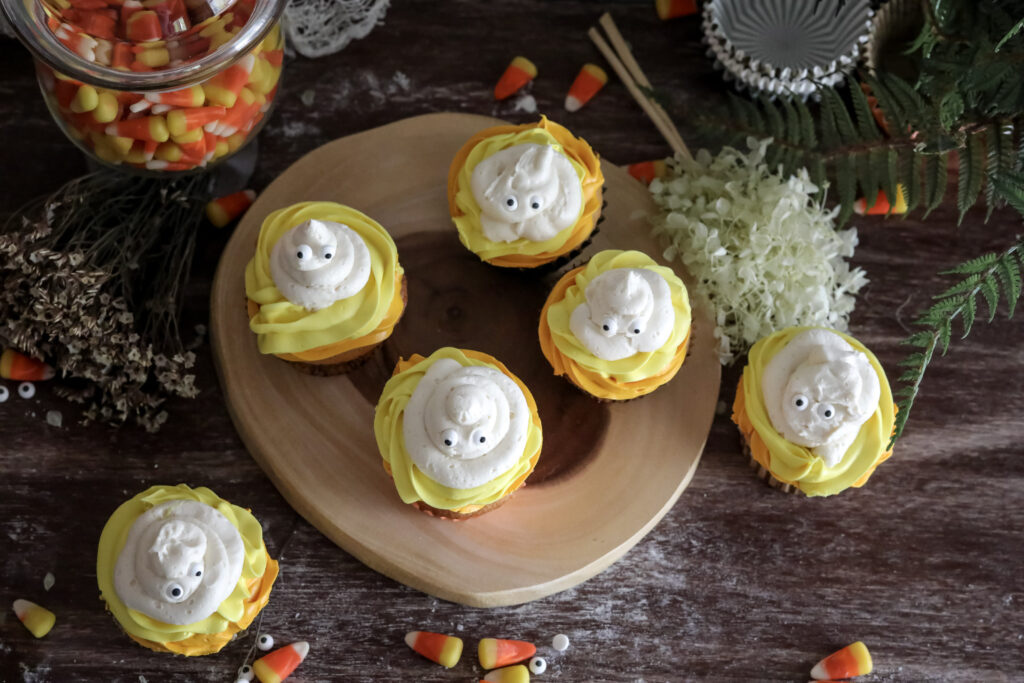
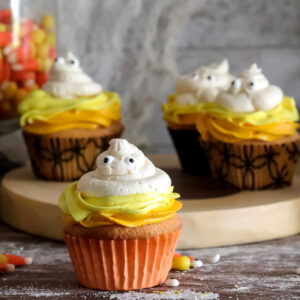
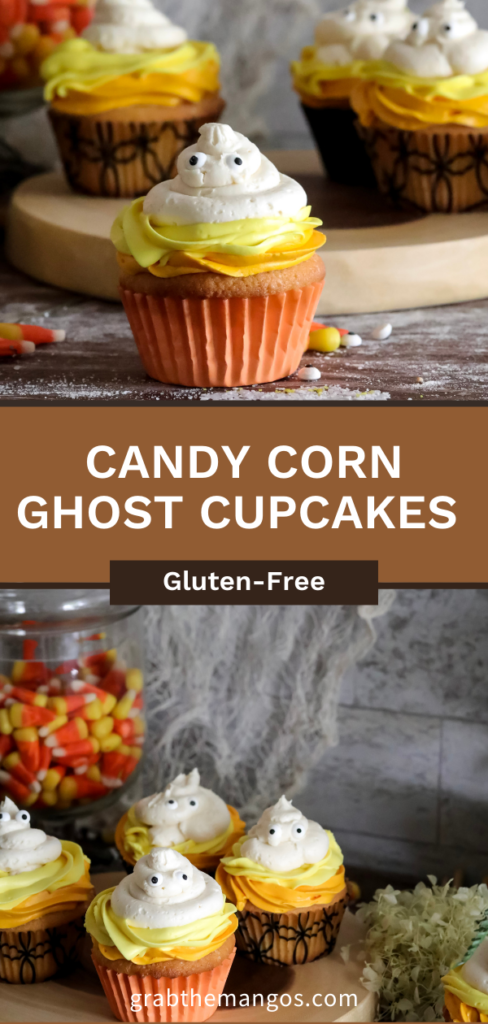
We love Halloween around here, don't you? These Gluten-Free Halloween Candy Corn Ghost Cupcakes are so cute and easy to make! This is the perfect recipe for a Halloween treat, especially if you love gluten-free baking. These cute Halloween cupcakes are light and airy, and the creamy, fluffy frosting is absolutely delicious!
Jump to Recipe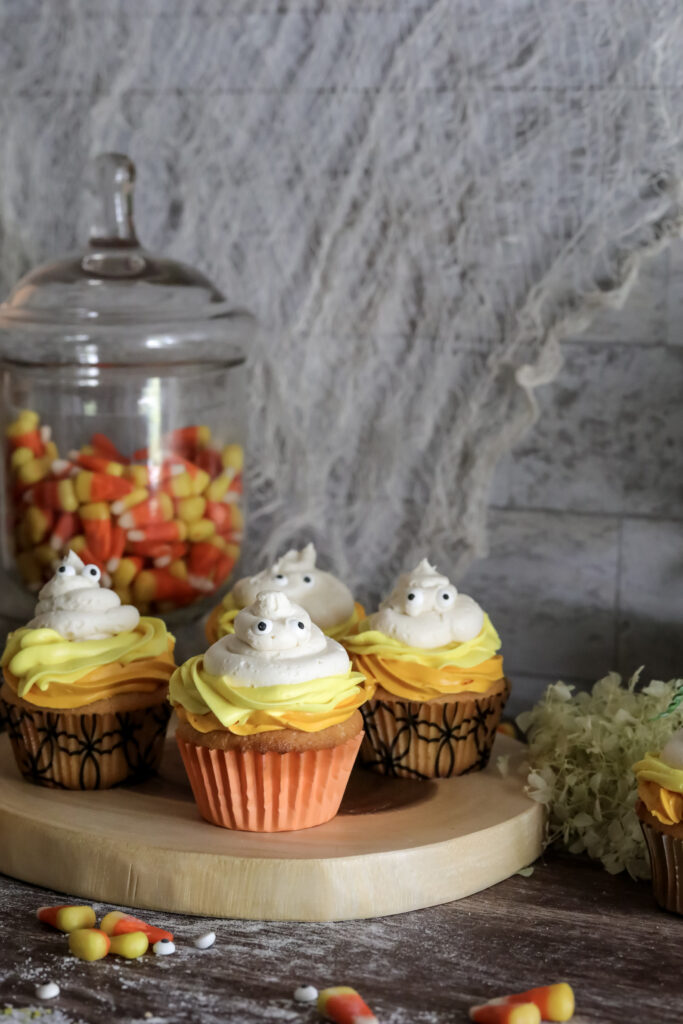
using Gluten-Free Flour
I like to use King Authors gluten-free measure for measure flour or Bob Red Mill's 1-1 Gluten-Free Flour both yield similar results. They are perfect for baking these gluten-free ghost cupcakes because they give the cupcakes a great gluten-free texture.
If you are familiar with gluten-free baking you know you usually have to add xanthan gum to gluten-free recipes to help bind the baked good together and it helps to replace the elasticity and texture of gluten. Well, both of these flours already have the xanthan gum in them, so you don't have to worry about that.
If you can't find either of these flours or you just want to use a different gluten-free flour that doesn't have xanthan gum you can add 1 teaspoon xanthan gum to the recipe. But make sure to check because adding xantham gum to flour that already has it in it will make your cupcakes very gummy.
Not all gluten-free flours are created equal. You may experience different baking results depending on the gluten-free flour blend you choose.
Equipment Needed To Make Cupcakes
- Cupcake pan - you can't make cupcakes without the pan!
- A hand mixer, stand mixer or whisk.
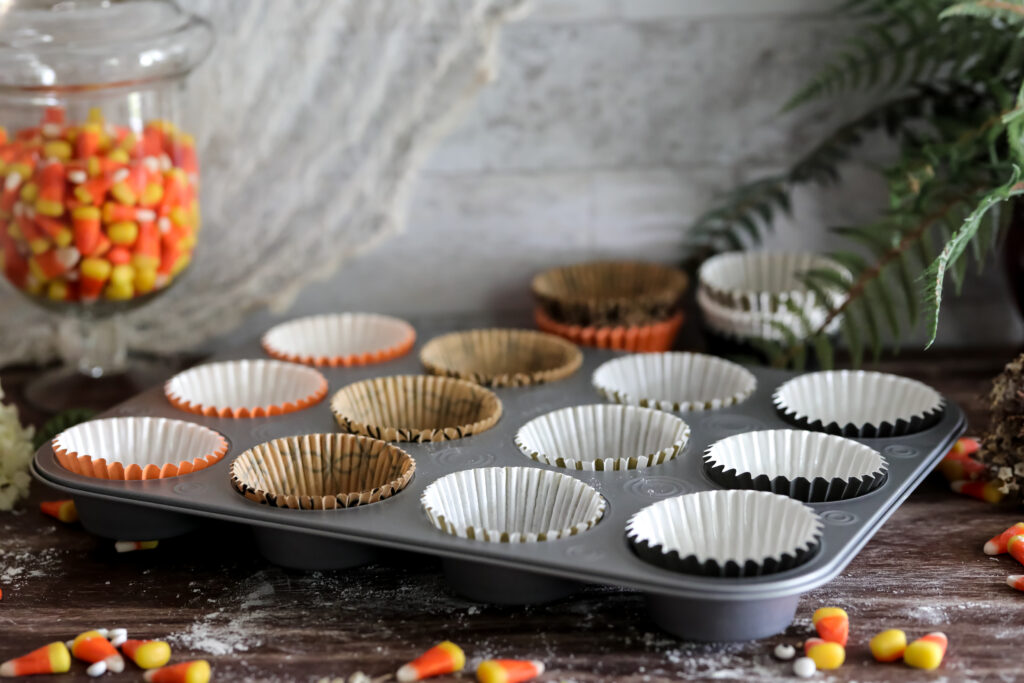
- I like to use cupcake liners so I don't have to worry about the cupcakes sticking and it helps with clean up. For this recipe, I used cute Halloween liners that I found at Target.
- I like to use a scoop to make all my cupcakes the same size so they bake evenly. For these cupcakes, I used a #20 scoop it is a standard cupcake size. Click here to find it on Amazon. (you can always use a tablespoon and to add the batter to each cupcake pan)
Tips for Making These The Best Gluten-Free Cupcakes
- Make sure you cream the butter and sugar completely. This will ensure that your cupcakes turn out perfect and that they’re not too dense.
- Let your cupcakes cool completely before you frost them. If you don’t let your cupcakes cool completely the buttercream will melt and all your pretty piping will be ruined. You want the frosting to stay smooth and velvety.
- Everyone’s oven is slightly different. I like to turn my pan halfway through baking and towards the end of the baking time I keep a close eye on the oven.
- Use Good Vanilla since it is one of the main flavors in this recipe I wouldn't skimp on it for these cupcakes.
- Make sure to measure your flour properly. You want to scoop your floor then use a knife to level it so you get the right amount.
- Use room temperature eggs and room temperature butter. At room temperature, egg yolks break more easily, allowing them to mix more evenly with the egg whites and other ingredients.
- Don't overfill your cupcake liners or they won't rise properly and you may end up with lopsided cupcakes.
Reasons To Use Room Temperature Eggs
I always like to use room-temperature eggs while baking. You will get better volume and achieve a lighter, fluffier texture in your baked goods. In addition, room-temperature eggs will whip up faster and more easily than cold eggs. Room temperature egg yolks are also easier to incorporate into the batter at the beginning of mixing, which further contributes to a light and fluffy product.
You can leave eggs out on the counter with your butter for about 30 minutes before baking. If you forget to take your eggs out of the fridge just put them in a bowl of warm NOT hot water for 10-15 minutes or so and they will be at room -temperature by baking time.
When a recipe calls for an egg-white like this one does first separate your egg white from the yoke while cold because it is easier when still chilled. Then let your egg white come to room temperature in the bowl before adding to your cake mixture.
Do not leave your eggs sitting at room temperature for more than 2 hours because bacteria can grow in them.
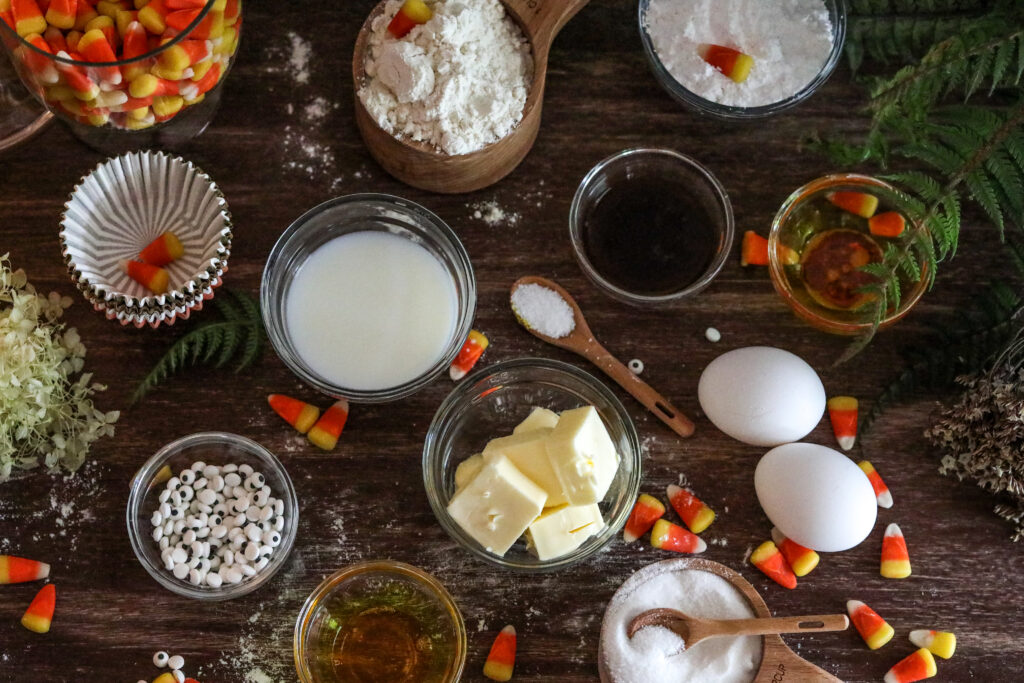
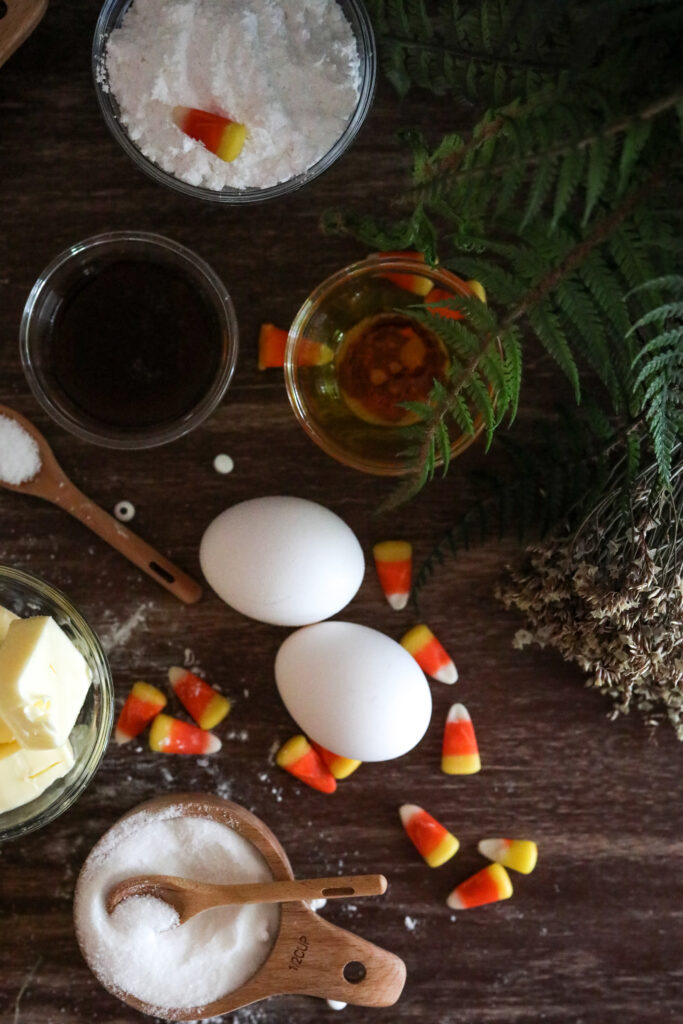
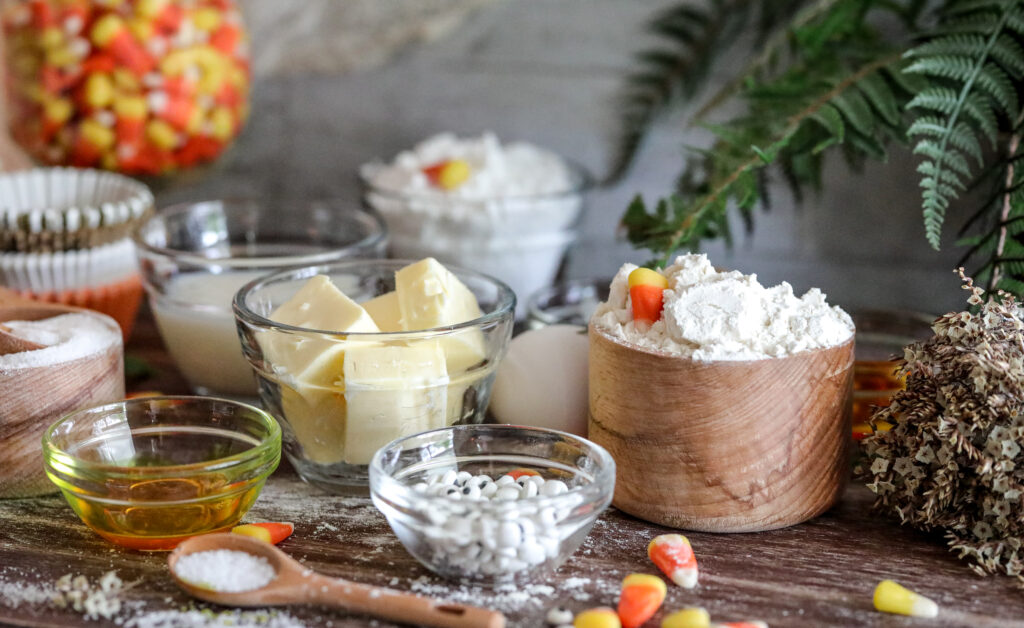
Ingredients For gluten-free Vanilla Cupcakes
- Gluten-Free One For One Flour
- Unsalted Butter - At Room Temperature
- Sugar
- Large Egg - At Room Temperature
- Egg White - At Room Temperature
- Baking Powder
- Pure Vanilla Extract
- Almond Extract (optional)
- Skim Milk - You Can Also Use Whole Milk or Almond Milk
- Kosher Salt
Making Your Candy Corn Ghost Cupcakes
Now let's get to baking these Halloween candy corn ghost cupcakes!
About 30 minutes before baking take out your eggs and butter for your cupcakes and frosting so it can soften. Go ahead and separate your egg white from the egg yolk because it will be easier to do while it's still cold.
Preheat your oven to 325 degrees with a rack in the middle of the oven and Line your cupcake pan with cupcake liners and set it aside.
Measure flour by scooping it into a measuring cup then use a knife to level flour off then add it to a small bowl. Combine the baking powder, and salt into the small bowl with the flour. Set flour mixture aside.
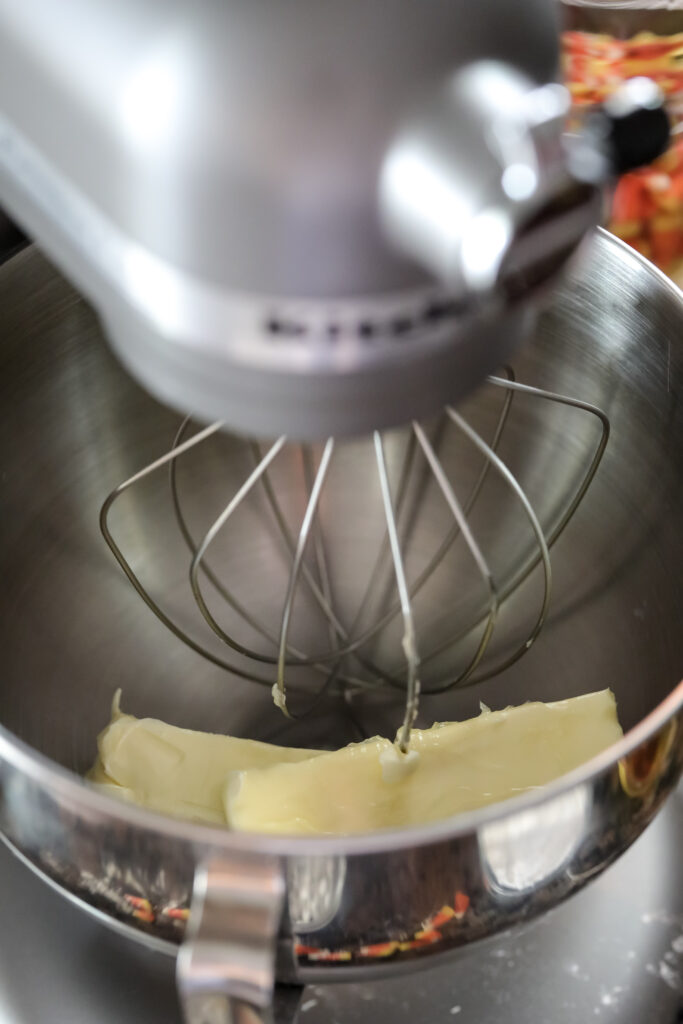
In a large mixing bowl, either using a stand mixer or an electric hand mixer with the whisk attachment beat butter and sugar until creamed and combined.
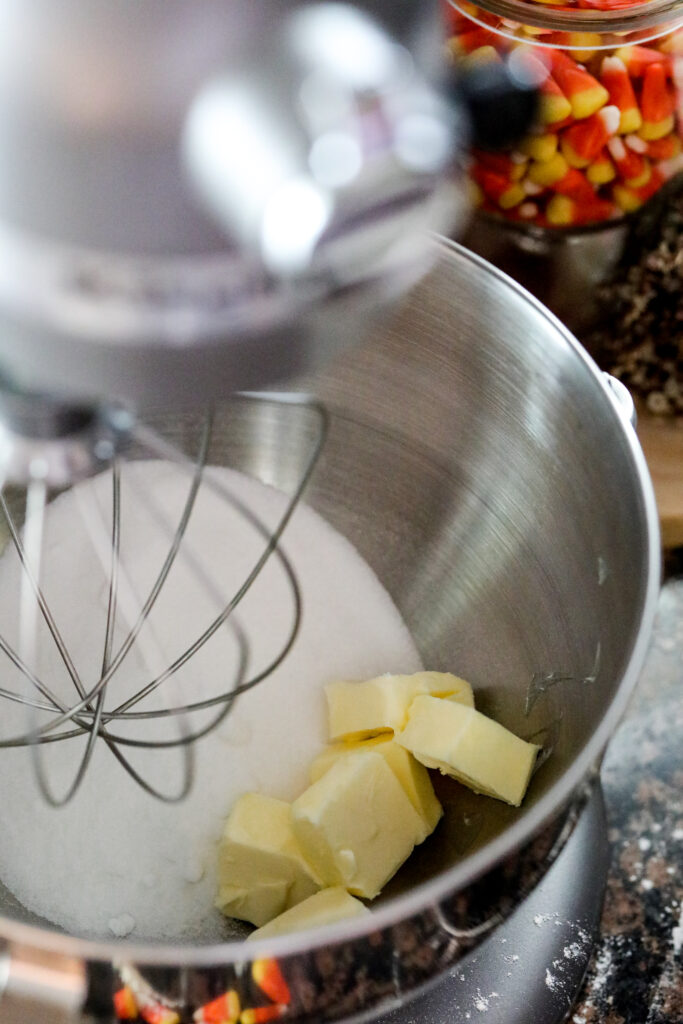
If your mixer doesn’t have a whisk attachment, beat for 5 minutes using the paddle attachment. If you only have a regular hand whisk mix quickly for 5-8 minutes until thickened.
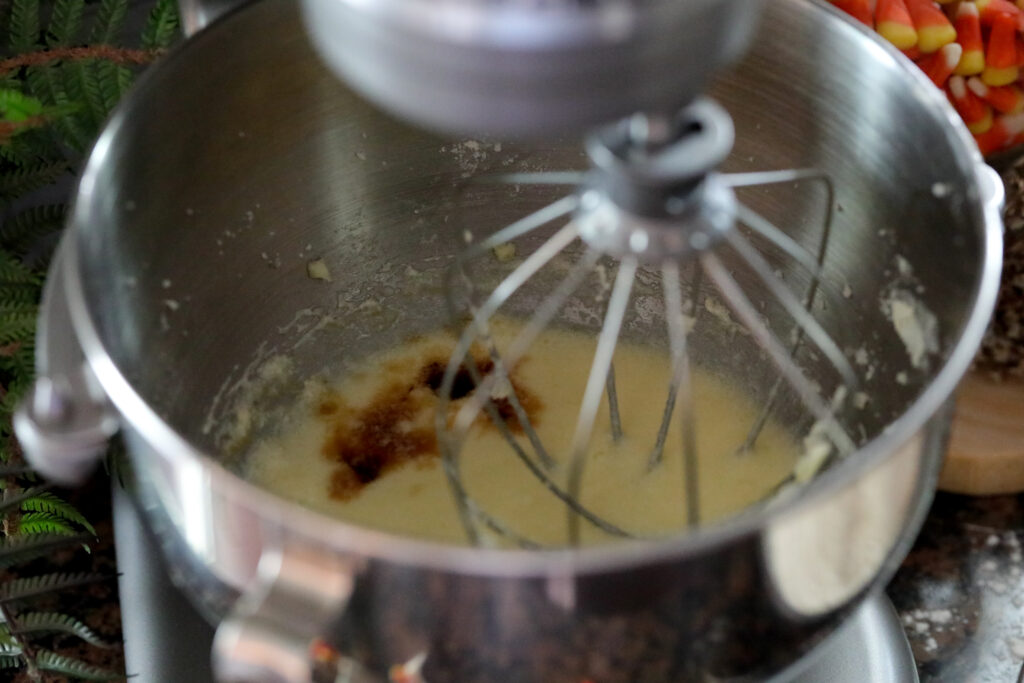
Add egg and beat on low for 30 seconds or so, add in egg white and continue to beat on low to combine. Add in milk, pure vanilla extract, and almond extract mix until thickened, about 2 minutes at medium-high speed.
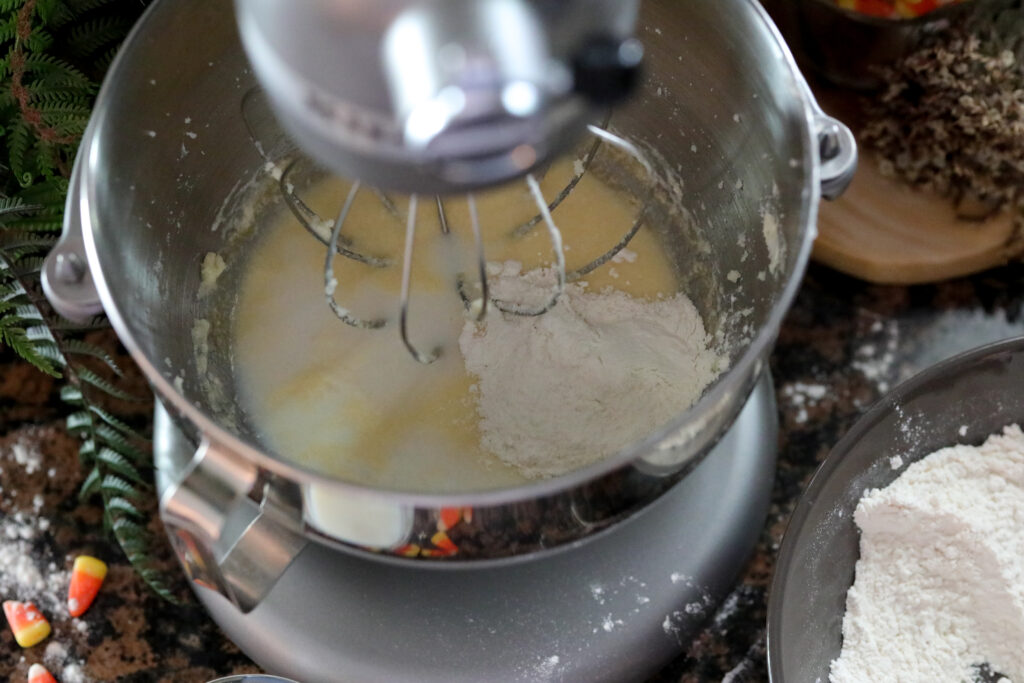
Add the flour mixture of dry ingredients to the bowl and mix by hand or on the low speed of a mixer until just combined. Scrape the bottom and sides of the bowl, then mix again only for a few seconds to fully incorporate. DO NOT OVERMIX your batter or it will become tough.
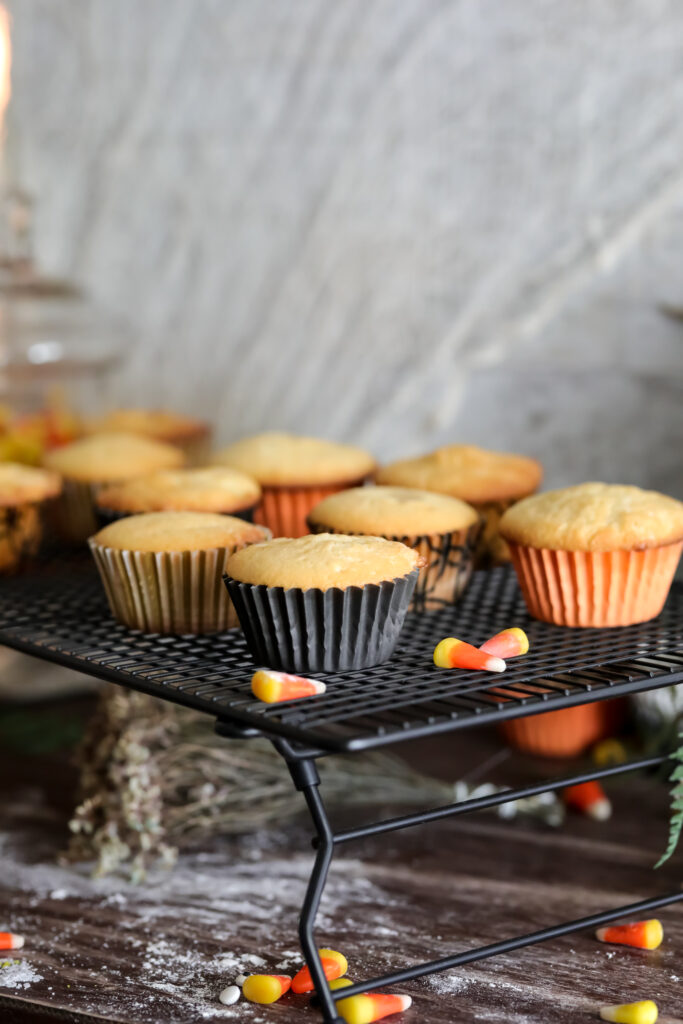
Pour batter evenly into the cupcake liners, filling them about ¾ of the way. I use a #20 scoop to get an even amount of batter each time. Bake for 18-20 minutes. Do a toothpick test at 18 minutes to check for doneness.
Once your cupcakes are done cooking let them cool completely before you frost them.
ingredents for buttercream frosting
- Unsalted Butter - softened
- Powdered Sugar
- Pure Vanilla Extract
- Almond Extract
- Heavy Cream
- Kosher Salt
- Yellow And Orange Food Coloring
- Royal Icing Eyes - for garnish
- Pastry Bags And Tips - Wilton #30 and Wilton #1A
Making vanilla buttercream frosting for candy corn ghost cupcakes
Place room temperate unsalted butter in a large bowl, you can use an electric hand mixer or stand mixer if you have one. Beat butter until it is creamed and fluffy (about 3-5 minutes) at high speed.
Lower the speed of the mixer. Add 1 cup of powdered sugar at a time alternately, beating after each addition of powdered sugar. Add cream, add salt, and add pure vanilla extract and almond extract to the bowl mix until combined. You can add in more heavy cream if needed for desired consistency.

Decorating Instructions for candy corn ghost cupcakes
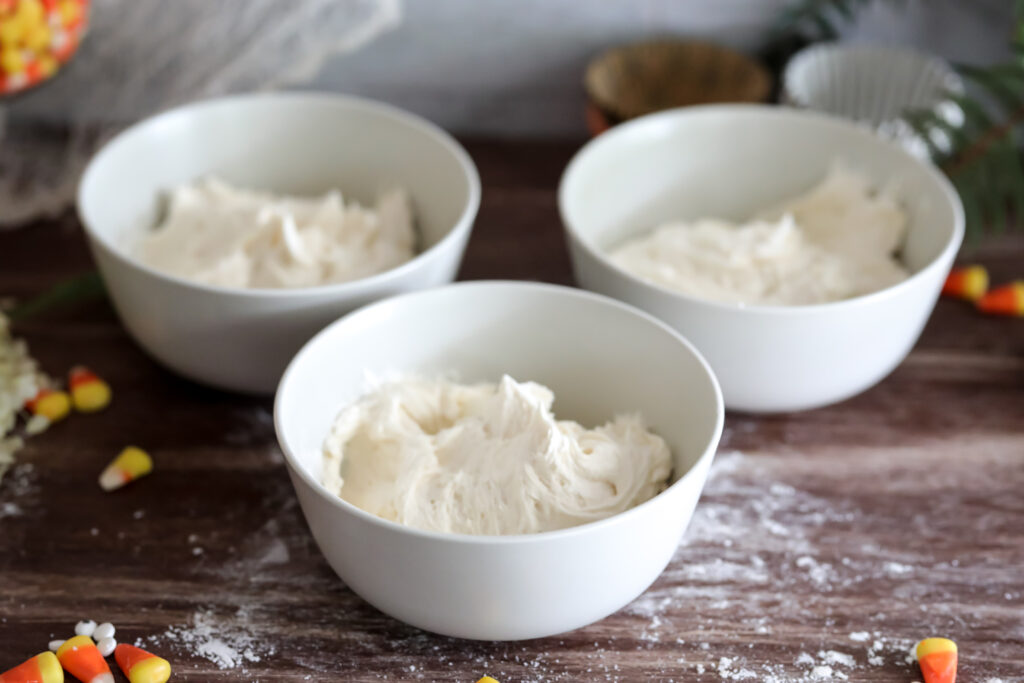
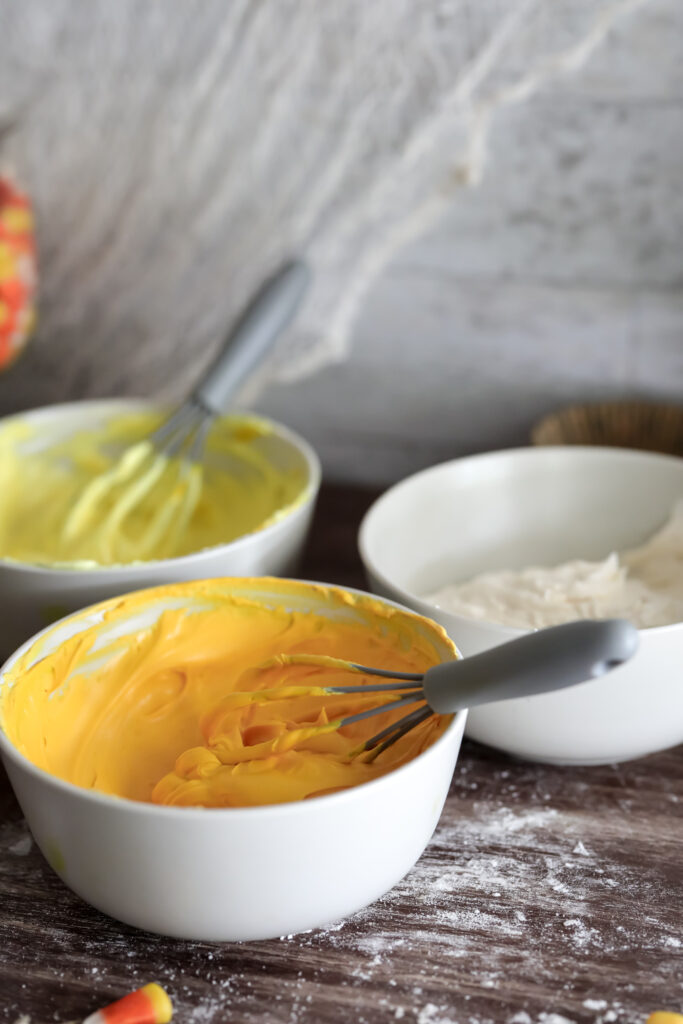
Evenly divide frosting into 3 separate bowls, color one bowl with the yellow food coloring drops and the other with the orange food coloring drops.
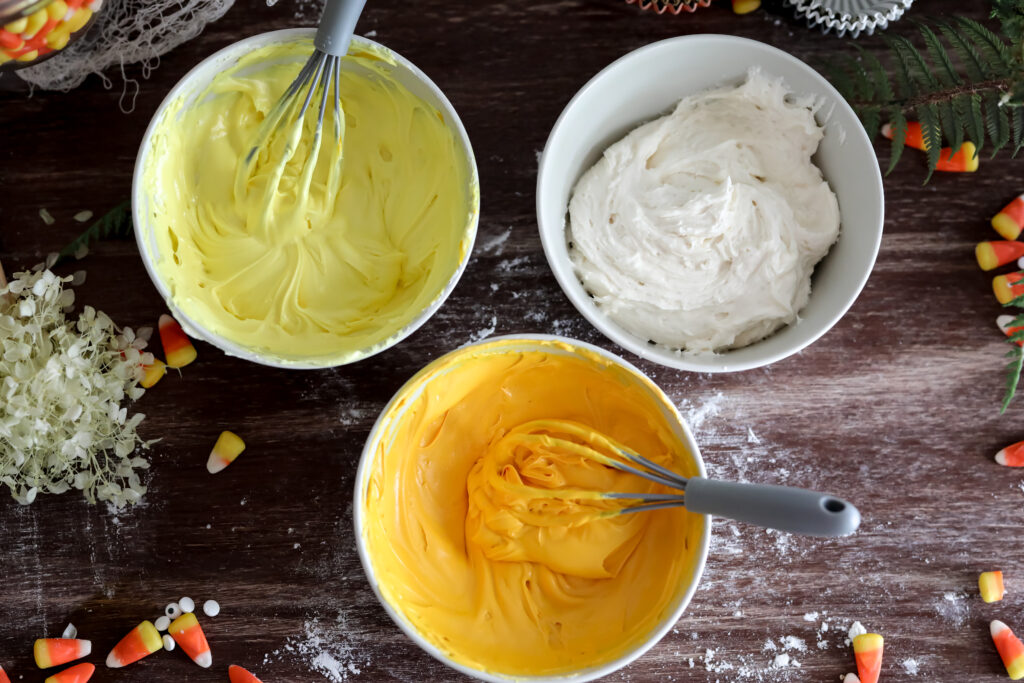
Fill 3 pastry bags with each colored frosting. For the yellow and orange frosting use a closed star tip (Wilton 30 tip) you can find it on amazon by clicking here. For the white frosting using a round tip (Wilton 1A) you can find it on Amazon by clicking here.
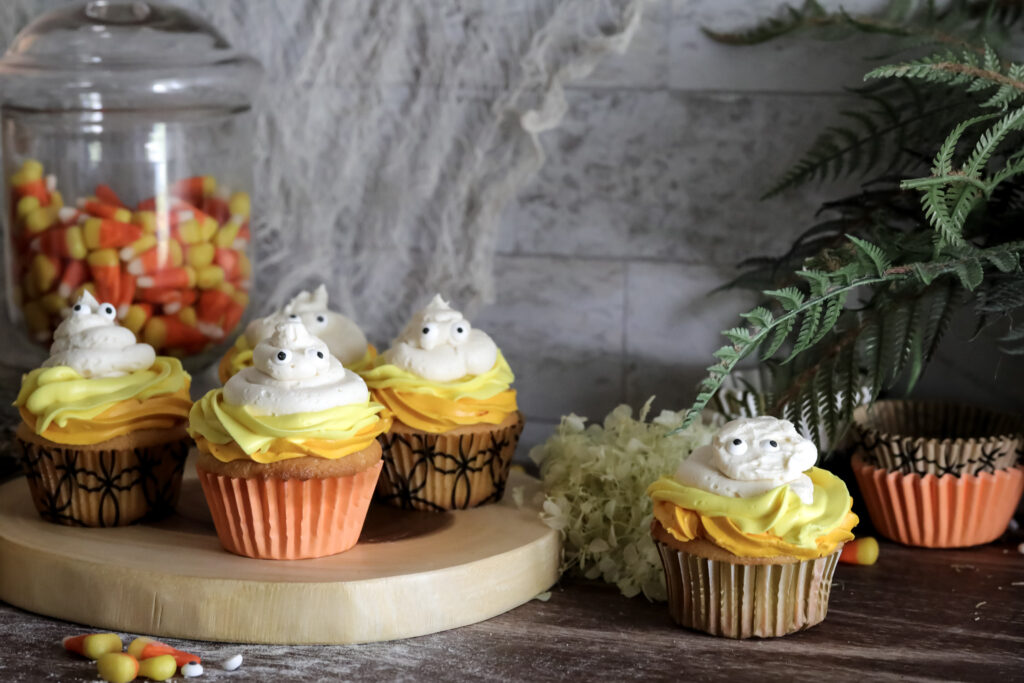
Use your orange pastry bag and go around the bottom of each of the cupcakes at an angle, then do the same thing with your yellow frosting layering it around the top of the orange frosting.
Take your white pastry bag of frosting and layer it on top of the yellow frosting going around the cupcake to make it look like a ghost. Last, Finish your cupcakes with royal icing eyes. Now you have the cutest little candy corn ghost cupcakes for Halloween.
How To Store Candy Corn Ghost Cupcakes
You can leave these cute cupcakes out on the counter covered for several hours but at the end of the day, if you still have some left it is best to store leftover cupcakes in the refrigerator tightly covered so the cake does not dry out, they will last up to 5 days.
If you are taking these cupcakes to a Halloween party, chilling them in the refrigerator for 20-30 minutes will make them more stable for transport.
You can find my favorite cupcake container on Amazon by clicking this link.
Some more Halloween recipes to try
NO-BAKE PUMPKIN CHEESECAKE MUMMY TRUFFLES (GLUTEN-FREE)
More Sweet Recipes TO try
ALMOND FLOUR DOUBLE CHOCOLATE MUFFINS
Gluten-Free Candy Corn Ghost Cupcakes
Ingredients
INGREDIENTS FOR CUPCAKES
- 1 ⅓ cup Gluten Free Flour
- 1 cup Sugar
- 1 ¼ teaspoon Baking Powder
- ½ tsp Salt
- 6 tablespoon Unsalted butter
- 1 large Egg
- 1 Eggwhite
- ½ cup skim milk (can substite whole milk or almound milk)
- 1 tablespoon Pure Vanilla Extract
- ½ teaspoon Almond Extract (optional)
INGREDIENTS FOR BUTTERCREAM FROSTING
- 1 cup Unsalted Butter
- 4 cups Powdered Sugar
- 1+ tablespoon Cream (can also use milk or almond milk)
- 1 pinch Salt
- 2 tablespoon Pure Vanilla Extract
- ¼ teaspoon Almond Extract (optional)
- 1 pack Royal Icing Eyes
- 2+ drops Yellow Food Coloring
- 2+ drops Orange Food Coloring
Instructions
BEFORE YOU START BAKING
- About 30 minutes before baking take out your eggs and separate your egg white from the yoke while still cold as it will be easier than when at room temperature. Take Butter out of the refrigerator for both cake and frosting let it get to room temperature on the counter with your eggs.
- Line your cupcake pan with cupcake liners and set it aside.
- Preheat your oven to 325 degrees with a rack in the middle of the oven.
HOW TO MAKE CUPCAKES
- Measure Flour by scooping it into a the measuring cup then use a knife to level flour off then add it to a small bowl. Combine the baking powder, and salt into the small bowl with the flour. Set flour mixture aside.
- In a large mixing bowl, either using a stand mixer or an electric hand mixer with the whisk attachment, beat butter and sugar until creamed and combined. Add egg and beat on low for 30 seconds or so, add in egg white and contunie to beat on low to combine. Add in milk, pure vanilla extract, and almond extract mix until thickened, about 2 minutes at medium-high speed. (see notes)
- Add the flour mixture of dry ingredients to the bowl and mix by hand or on the low speed of a mixer until just combined. Scrape the bottom and sides of the bowl, then mix again only for a few seconds to fully incorporate. DO NOT OVER MIX or your batter will become tough.
- Pour batter into the cupcake liners, filling them about ¾ of the way. I use a #20 scoop to get even amount of batter each time. Bake for 18-20 minutes. Do a toothpick test at 18 minutes to check for doneness.
HOW TO MAKE BUTTERCREAM FROSTING
- Beat butter until it is fluffy (about 3-5 minutes) on high speed, lower the speed to low, add in 1 cup of powdered sugar at a time alternately, beating after each addition.
- Add cream, salt, and vanilla extract, and almond extract to the bowl mix until combined. You can add in more heavy cream if needed for desired consistency. The mixture should be very fluffy.
HOW TO DECORATE CUPCAKES
- Evenly divide frosting into 3 separate bowls, color one bowl with the yellow food coloring drops and the other with the orange food coloring drops. Fill 3 pastry bags with each colored frosting. For the yellow and orange frosting use a closed star tip (Wilton 30 tip) for the white frosting using a round tip (Wilton 1A)
- Use your orange pastry bag and go around the bottom of each of the cupcakes at an angle, then do the same thing with your yellow frosting layering it around the top of the orange frosting.
- Take your white pastry bag of frosting and layer it on top of the yellow frosting going around the cupcake to make it look like a ghost. Finish your cupcakes with royal icing eyes.
HOW TO STORE CUPCAKES
- You can leave these cute cupcakes out on the counter covered for several hours but at the end of the day, if you still have some left it is best to store leftover cupcakes in the refrigerator tightly covered so the cake does not dry out, they will last up to 5 days.
Notes
Tag us on Instagram @grabthemangos and give us a rating and review right here in the comments! And don't forget to pin and save it for next time!
This post may contain affiliate links. If you click and buy, I may make a commission at no cost to you. See my policy for more information.


Leave a Reply