• Skip to primary navigation
  • Skip to main content
  • Skip to primary sidebar
  • Skip to footer
  • Recipes
  • Shop
  • About
  • Contact Me

Grab the Mangos

  • Recipes
    • Main Dish
      • Beef
      • Chicken
      • Seafood
      • Vegetarian
    • Breakfast
    • Side Dishes
    • Dessert
      • Cakes
      • Cookies
      • Brownies + Bars
    • Salads
    • Drinks
    • Snacks
    • Bread
    • Sauces
  • Healthy Living
  • About
  • Shop
    • Appliances
    • Baking
    • Beautiful Kitchen
    • BIPOC Owned Favorites
    • Dishware
    • Eco Healthy Kitchen
    • Food Photography
    • Foods You’ll Love
    • Kitchen Tools + Gadgets
    • Organizing
    • Pots and Pans
  • Contact Me
menu icon
go to homepage
  • Recipes
  • Shop
  • About
  • Contact Me
    • Facebook
    • Instagram
    • Pinterest
  • subscribe
    search icon
    Homepage link
    • Recipes
    • Shop
    • About
    • Contact Me
    • Facebook
    • Instagram
    • Pinterest
  • ×

    Recipes

    Chia Seed Peanut Butter Cookie Dough (Eat it 2 ways)

    July 24, 2019

    a ball of chia and peanut butter cookie dough covered in chocolate

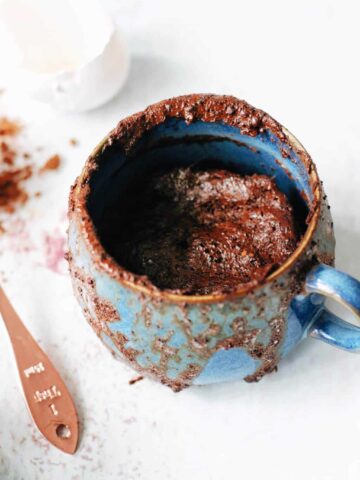
    Is there anything better than peanut butter and chocolate? I mean honestly, name a better duo. This chia seed peanut butter cookie dough is only 4 ingredients and so so yummy! Make it to be a no bake peanut butter and chocolate truffle or bake it to be the most chewy and delicious peanut butter cookies ever. Either one you make, this recipe is so crazy good, the dough may not even make it past the bowl stage.

    chia peanut butter cookies with chocolate

    Chia Seed Eggs

    So first things first, this recipe uses chia seed as an egg replacement. Think of eggs in baking like the glue that holds the dough together. This chia seed replacement does the same thing and adds a super delicious crunchy texture to the chewy cookie and to the soft truffle.

    Replacing normal eggs in this recipe adds a lot of benefits. Chia seeds are loaded with antioxidants, fiber, omega 3 fatty acids, and quality protein. Along with all the protein in peanut butter, these treats are super high in protein especially. I love using chia seed egg replacements when I have run out of eggs but still want some treats.

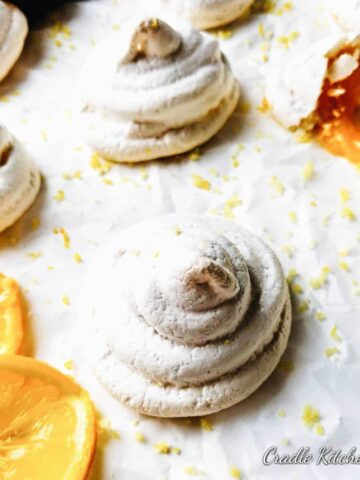
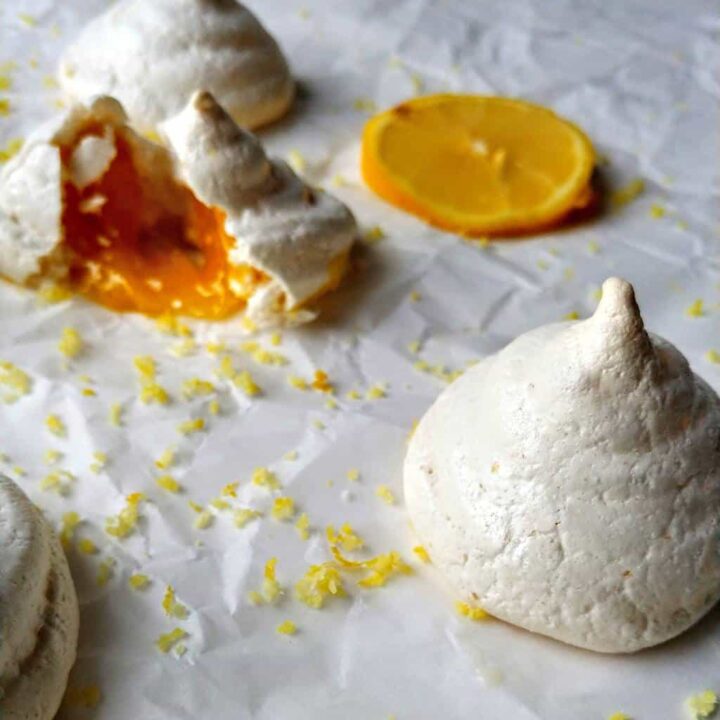
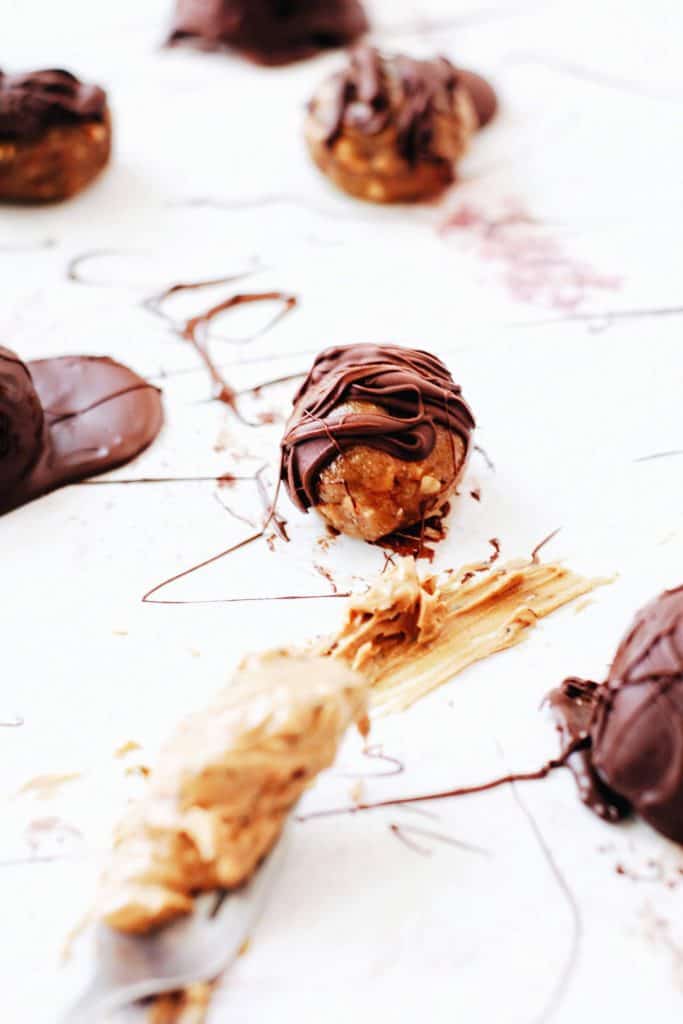
    Chia Seed Peanut Butter Cookie Truffles

    peanut butter balls with chocolate

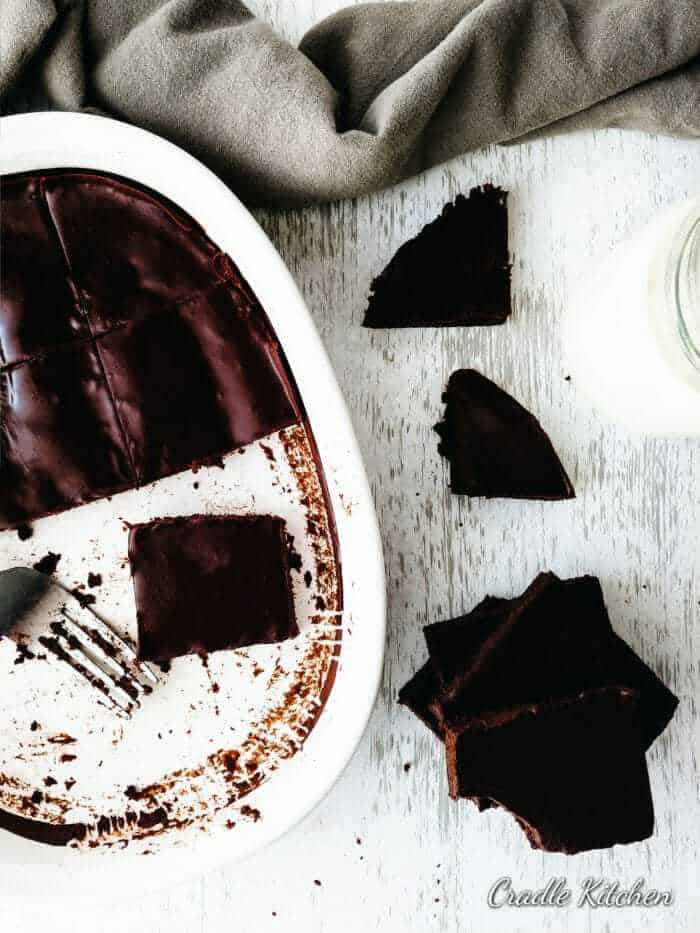
    It's summer and it is hot. All over people have been dealing with massive heat waves. No one wants to turn on the oven and bake just to have an amazing dessert treat. These little truffles are perfect for just this.

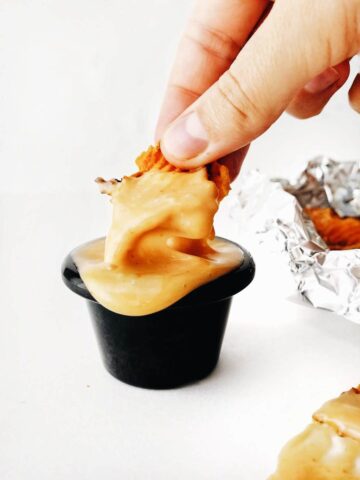
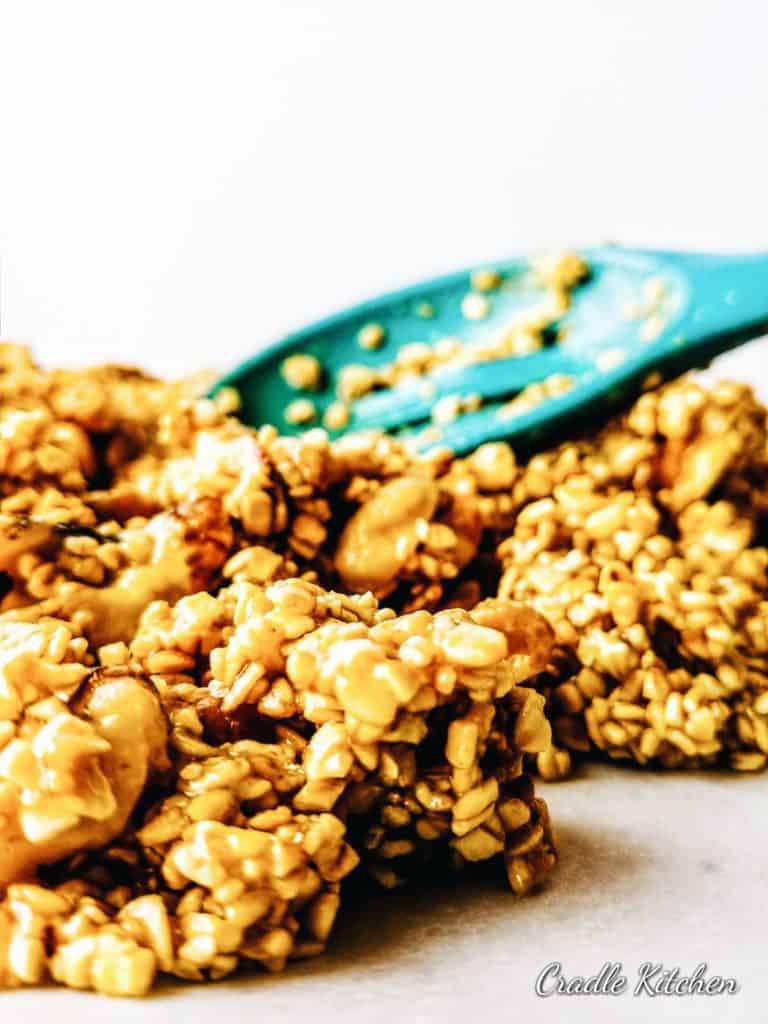
    No baking required. Mix your dough ingredients up well, peanut butter, chia seed eggs, sugar, and a little coconut flour and form little balls. Freeze the balls of dough for about 20-30 minutes until slightly set and easier to handle. Roll in melted chocolate and freeze for another 30 minutes. No oven, no baking, no heat. Super simple and easy, and absolutely yummy!

    bitten ball of peanut butter chia cookie dough

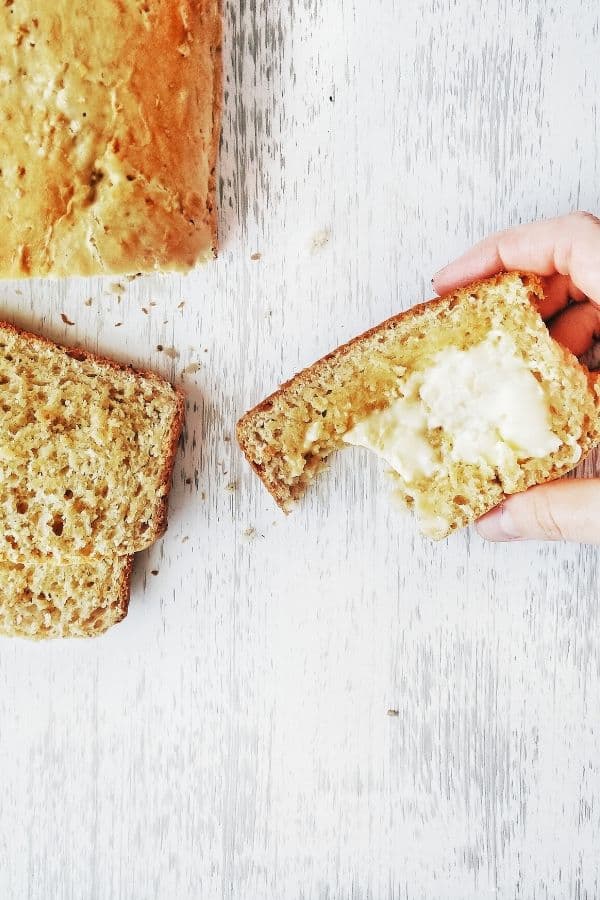
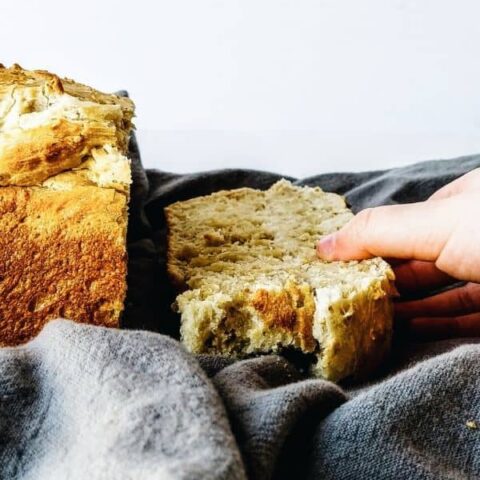
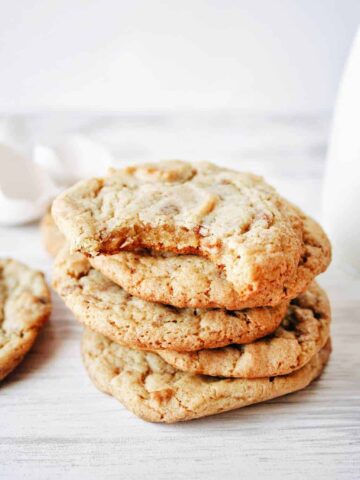
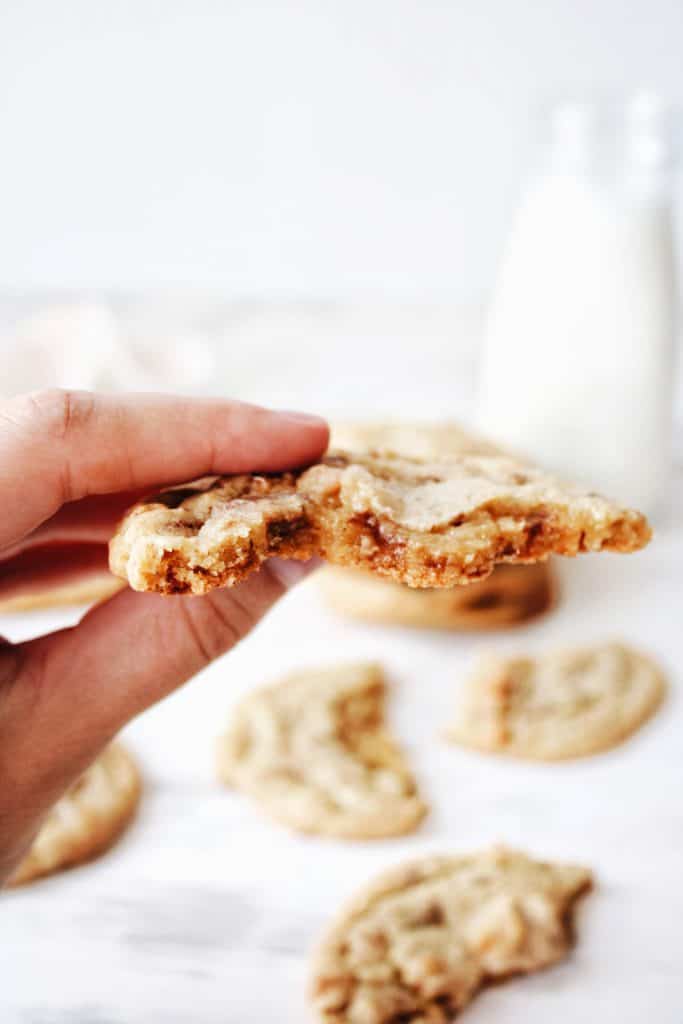
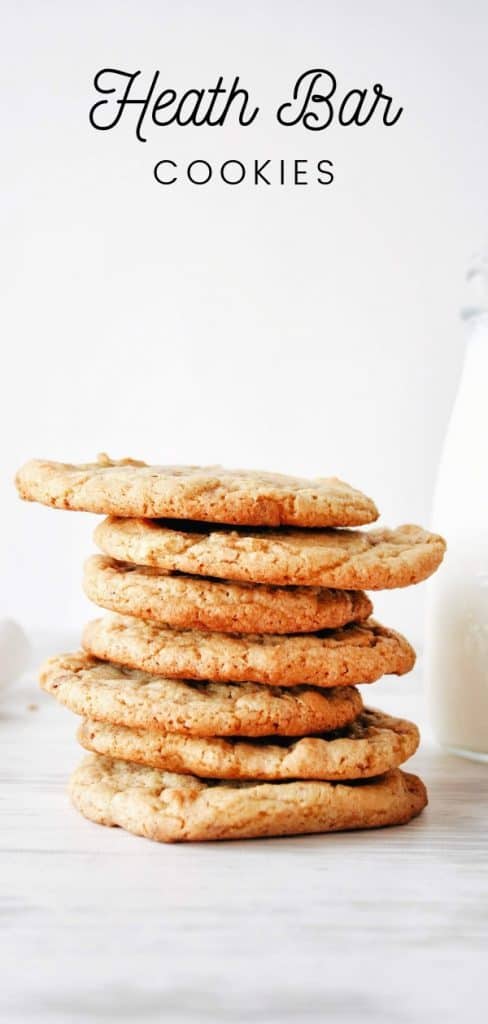
    Baking Chewy Peanut Butter Cookies

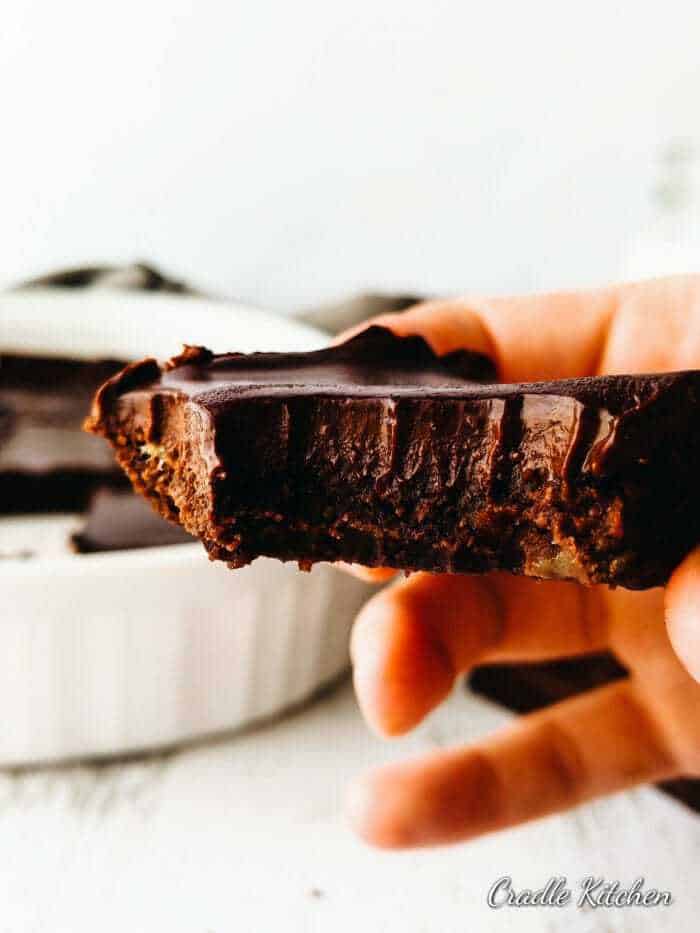
    If you just really want a cookie and don't care about turning your oven on, this dough gives you the most chewy and delicious cookies ever. Seriously so yummy!

    chia peanut butter cookies baked and covered in chocolate

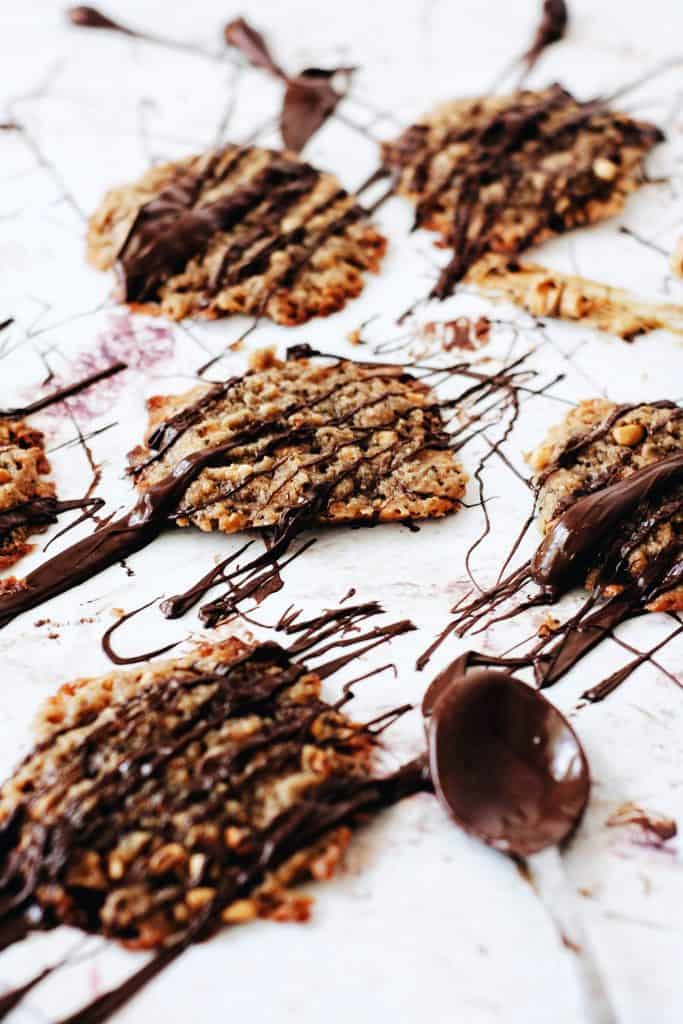
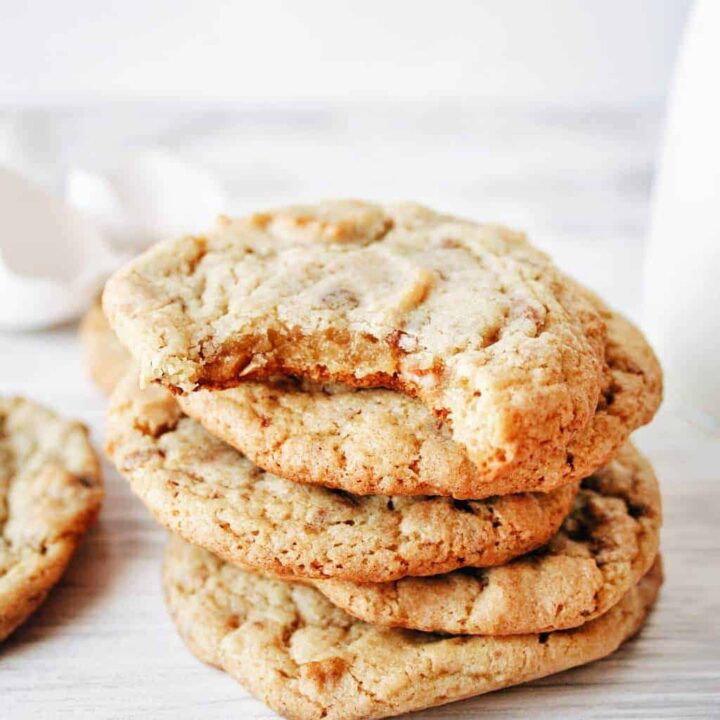
    Make the exact same dough, peanut butter, sugar, chia seed eggs, and a little coconut flour. This time place the dough balls onto a baking sheet lined with parchment paper. Using a fork, press the classic peanut butter cookie criss cross into the tops of them like a hashtag. The best way to do this without squashing or ruining the cookie is to press gently and then let the fork slide out instead of lifting it right out.

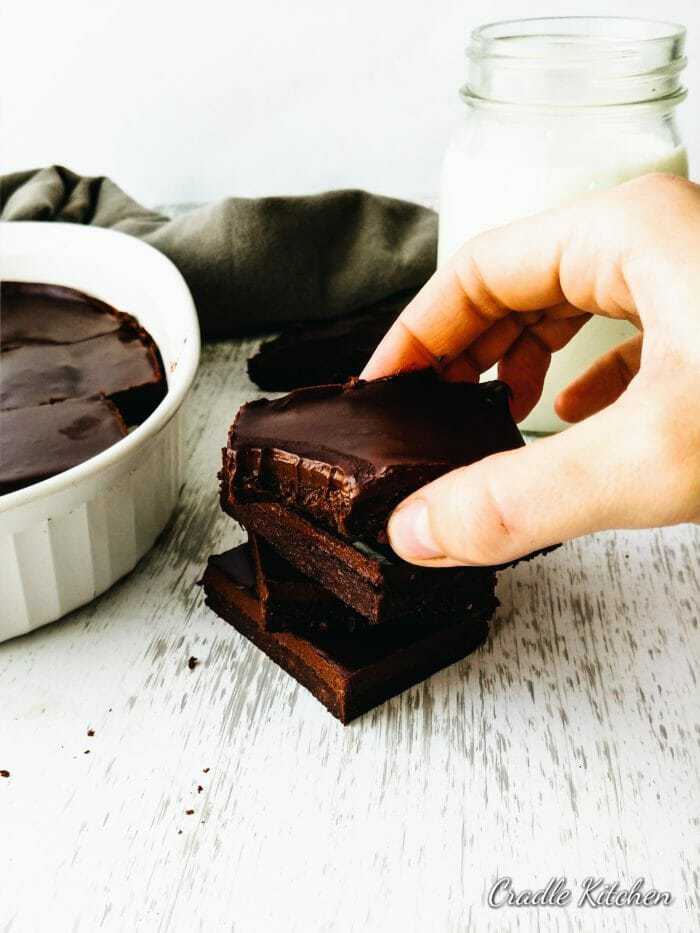
    Bake the cookies for about 10-12 minutes. They will spread so make sure you place them at least an inch away from each other. Once they are done baking, let them cool completely for about 20-30 minutes before drizzling melted chocolate over the tops and eating them up.

    bowl of melted chocolate

    Whether you make the no bake truffles or the delicious cookies, this 2 in 1 recipe for chia seed peanut butter cookie dough is going to be a favorite! It barely made it out of the bowl over here 😉

    Tag us on Instagram @grabthemangos and give us a rating and review right here in the comments! And don't forget to pin and save it for next time!

    If you love this recipe, definitely try out these other dessert options:

    • Cardamom Chickpea Blondies
    • Gluten Free Mug Cake
    • Gluten Free Apple Crumble
    peanut butter truffle with chocolate
    chia peanut butter baked cookie with chocolate

    Chia Seed Peanut Butter Cookie Dough

    Yield: 5 people
    Prep Time: 10 minutes
    Cook Time: 12 minutes
    Cool Time: 20 minutes
    Total Time: 42 minutes

    This chia seed filled peanut butter cookie dough can be made 2 ways, either into chocolate covered protein ball truffles or baked into chewy thin peanut butter cookies drizzled in melted chocolate. Either way they are only 4 ingredients and so easy and delicious 🙂

    Ingredients

    • 1 cup Crunchy Peanut Butter
    • 1 cup Sugar
    • 2 Chia Seed Eggs, SEE NOTES
    • 3 tablespoon Coconut Flour
    • 1 cup Chocolate Chips (for drizzling)
    • 1 tablespoon Coconut Oil

    Instructions

    1. FOR BAKED COOKIES:
    2. Pre-heat oven to 350.
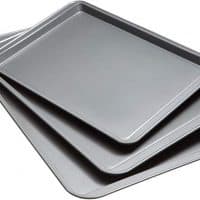
    3. Roll the dough into balls and place on a baking sheet lined with parchment paper about an inch or more apart to allow for spreading.
    4. Using a fork, make one imprint going one way across the dough ball and a second imprint going the other way across the dough ball (like a hashtag).
    5. Bake in the oven for 10-12 minutes.
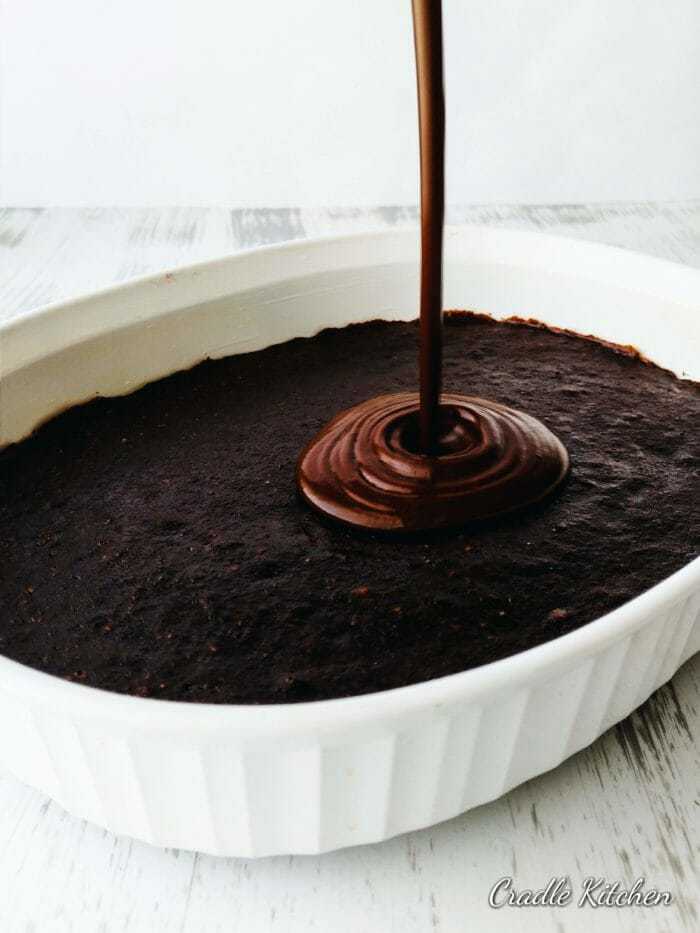
    6. While they bake, use the microwave to melt the chocolate chips with the coconut oil- 1 minute then stir, then 30 seconds-1 minute more and stir again.
    7. Let these cool completely (20-30 minutes) and then drizzle on the chocolate. Enjoy!
    8. FOR DOUGH BALLS:
    9. Make the cookie dough the same as above.
    10. Roll into balls and freeze for 20 minutes.
    11. Coat or drizzle in the coconut oil chocolate mixture, and freeze for another 10-15 minutes until set.
    12. Enjoy!

    Notes

    Making  A Chia Seed Egg:
    In a separate small bowl, mix 1 tablespoon Chia Seeds with 3 tablespoon Water.
    For this recipe you need 2 chia eggs so - 2 tablespoon Chia Seeds with 6 tablespoon Water.
    Stir and let that sit for a few minutes until it is thick and goopy like an egg. 

    © CradleKitchen
    Cuisine: American / Category: Dessert
    pinterest pin chia seed peanut butter cookie dough

    Infused Strawberry Iced Tea Recipe

    July 18, 2019

    sweet green iced tea with strawberries and crushed ice

    Growing up in Texas, I drank a lot of real sweet tea. I am a firm believer that if you order "Iced Tea" at a restaurant and they bring you cold leaf water, Send. It. Back. Not here for it. Iced tea should always be sweet and delicious. So this southern, sweet, super simple, strawberry iced tea recipe is perfect for anyone who agrees with me!

    Close up of green iced tea with strawberries

    Iced Green Tea

    This recipe uses green tea as it's base iced tea. Green tea is super good for you. It's packed with antioxidants and all the good benefits like, increased brain function, improved health, and improved physical health. I personally love it for the taste as well. I use the Wild Harvest brand of green tea and love it! But you're favorite brand will work too.

    The key to making iced green tea is to let the bags steep longer than an average cup of tea. I let the bags soak in the hot water for this tea for at least 10 minutes. This gets the flavor really nice and strong so that when you put ice into it, the flavor doesn't completely vanish.

    How to make Strawberry Iced Tea

    This sweet strawberry iced tea recipe could not be easier. There is no syrup, no crushing of the strawberries, and no sifting the strawberries out. Super simple and easy!

    Start by boiling the water and steeping your tea bags in it for at least 10 minutes. Once the tea bags are done and thrown away, add frozen strawberries and your sugar or honey. Make sure to add the strawberries and sweetener to the tea while it's still nice and hot. This helps the strawberries to really infuse those juices into the tea while it cools down. The sugar and honey also dissolve a lot easier.

    Let your tea with the strawberries cool off in the fridge for at least 4 hours. I will usually make this in the morning and have it ready to go with dinner. Our big 8 cup mason jar doesn't usually last more than one day in our house. Enjoy your delicious, refreshing, homemade, sweet strawberry iced tea!

    strawberry iced tea with green tea and fresh strawberries

    Tag us on Instagram @grabthemangos and give us a rating and review right here in the comments! And don't forget to pin and save it for next time!

    If you love this recipe, try out some of these other summer favorites:

    • Chocolate Strawberry Oatmeal Bake
    • Zesty Shrimp Tacos
    • Crock Pot Pulled Pork
    sweet green iced tea with strawberries and crushed ice

    Strawberry Iced Tea Recipe

    Yield: 8 cups
    Cook Time: 10 minutes
    Chill Time: 4 hours
    Total Time: 4 hours 10 minutes

    This strawberry iced tea recipe is so delicious and easy to make! The perfect summer drink for those warm nights on the patio 😉

    Ingredients

    • 7 cups Water, boiled
    • 4 Green Tea Bags
    • ⅔ cup Sugar or Honey, ½ cup for less sweet
    • 1 cup Frozen Strawberries

    Instructions

    1. Boil all 7 cups of water and in a heat safe pitcher, add the tea bags.
    2. Steep for at least 10 minutes.
    3. Remove the tea bags and add the sweetener and the frozen strawberries.
    4. Stir up until the sweetener is dissolved completely and place in the fridge to chill for at least 4 hours or until it's cold and ready to drink. Enjoy!
    © CradleKitchen
    Cuisine: American / Category: Drinks
    pinterest pin

    Gluten Free Chocolate Mug Cake

    July 12, 2019

    chocolate mug cake in a blue mug

    Talk about a quick and easy dessert, especially for those nights when you have a sweet tooth but not a lot of groceries or patience to cook something elaborate up. My kids love this gluten free chocolate mug cake recipe because they can make it themselves (yes it's that easy) and it's so cute and little sized, not to mention completely flourless. WIN!

    2 blue mugs filled with chocolate mug cake

    Quick and Easy Gluten Free Desserts

    Normally, when you think of a specialty recipe like "gluten free" you imagine all the weird ingredients you'll probably have to go buy or some elaborate time consuming process like "soak such and such for 3 hours." Um, who has that kind of time when you NEED that sweet treat and it's already 9pm. Not me. This recipe is the answer to my every night dessert prayers.

    2 blue mugs of chocolate mug cake with a tablespoon of unsweetened cocoa powder

    I actually came up with this gluten free chocolate mug cake idea because I needed some sweet treats after a long day. It was already late and I was tired AF. And to top it off, tomorrow was pay day so no groceries left in the house. It was the type of night where you start wondering what you can make with a bag of rice and blackberry jelly.

    I was not about to whip up an entire sheet cake just for myself. (I would eat a whole sheet cake myself, just to be clear). So this gluten free chocolate mug cake was born. So easy, quick, and fudgey delicious.

    Flourless Mug Cake

    Because I wanted to really go hard at this new-ish gluten free lifestyle we're living, I haven't bought flour in a long time. I am going to be ordering a nice big bag of Bob's Red Mill 1-1 ratio GF Flour today because I'd like to be able to bake basic things again. But, for this recipe, there was no flour in the house and no flour needed.

    close up of dense fudge chocolate mug cake

    This mug cake is super dense and fudge-tastic. It's amazing. I wouldn't add flour to it if I could. Top it off with a scoop of Ice Cream and maybe some caramel drizzle and you have a perfect single serve dessert!

    Gluten Free Chocolate Mug Cake

    Making this little cake is so easy and quick but there are little tricks to it to get it perfect. So, get a mug, the bigger the better if you want to avoid a mess. In your mug, using a whisk, combine all of your ingredients. Make sure to beat the egg first, then mix the almond milk into it to really smooth it out. Then you can add the other ingredients and stir really well to combine thoroughly.

    I highly recommend using a whisk and really making sure that everything is combined until smooth. Trust me you don't want to find weird chocolate scrambled egg on the bottom of your mug cake.

    close up of a whisk with chocolate batter on it

    Once everything is mixed well, microwave it over a paper plate for 1 minute and 20 seconds. You can check this little cake just like a normal cake, with a toothpick to see if it comes out clean. If it doesn't add another 10 seconds at a time to finish the cake.

    You may see the cake rise in the microwave and start to bubble over the edges. Don't freak out! This is normal and just part of the magic and fun of a mug cake 🙂 Eat right out of the mug or dump it over onto a plate and enjoy this delicious, gluten free, dairy free, easy peasy dessert!

    Tag us on Instagram @grabthemangos and give us a rating and review right here in the comments! And don't forget to pin and save it for next time!

    2 blue mugs full of chocolate cake

    If you love this recipe, make sure to try out some of these others:

    • Chickpea Cardamom Blondies
    • 3 Ingredient Brownies
    • Gluten Free Skillet Apple Crumble
    chocolate mug cake in a blue mug

    Gluten Free Chocolate Mug Cake

    Yield: 1 person
    Prep Time: 3 minutes
    Cook Time: 2 minutes
    Total Time: 5 minutes

    This gluten free chocolate mug cake recipe is so quick and easy to make! Just using unsweetened cocoa powder and eggs plus a few other key ingredients, you can microwave your own little slice of chocolate fudge heaven.

    Ingredients

    • 1 Egg
    • 1 tablespoon Vanilla Almond Milk, *see note
    • 1 tablespoon Sugar
    • 1 tablespoon Unsweetened Cocoa Powder
    • ¼ teaspoon Baking Powder

    Instructions

    1. In a large mug, beat the egg really well.
    2. Add in the vanilla almond milk and beat until smooth.
    3. Add the rest of the ingredients and combine really thoroughly.
    4. Microwave over a paper plate (or regular plate) for 1 minute and 20 seconds. Insert a toothpick in the center and if it comes out clean it is done. Otherwise just microwave for 10 more seconds.
    5. ENJOY 🙂

    Notes

    *Can use normal milk, or for a richer taste- cream.  You can also use plain almond milk with ½ teaspoon of Vanilla extract.

    © CradleKitchen
    Cuisine: American / Category: Dessert
    pinterest pin gluten free chocolate mug cake

    Skillet Gluten Free Apple Crumble

    July 2, 2019

    cast iron skillet full of apple crumble

    There is nothing like homemade apple crumble on those relaxing summer evenings with a big scoop of ice cream. Think of the fourth of July, watching fireworks, and eating a delicious helping of this gluten free apple crumble. Amazing right? Nothing quite says "July 4th" like apple desserts. Well let's make it so you can make this a reality!

    apple crumble with a sparkler on top

    Apples for Baking

    First things first, you will want to make sure you have a good baking apple for this dessert. Granny Smith are the go to in the baking world for this. I, however, loved using Honey Crisp. This apple keeps a bit of the crunch right in the middle that I love when baking things like apple pie, apple crisp, or this gluten free apple crumble. A few other options for the best baking results are:

    • Pink Lady
    • Jonagold
    • Braeburn
    • Mutsu
    • Winesap

    They each have their own unique qualities, textures, and flavors for baking that may make you prefer one over the other. Pink Lady apples have a good sweet and tart balance and tend to hold their shape better when cooked. Jonagold apples are nice and sweet with a honey like sweetness. They bake super well in desserts. Braeburn apples has a super strong taste and will hold their own when you dump all those warm spices on it. Mutsu apples are great pie apples. They hold their shape and firmness, but are less tart than the others. And finally, Winesap apples hold their shape as well as their strong cider flavor. They are the go to apple if you are cooking or baking with other fruits.

    hand eating apple crumble on a fork

    Gluten Free Apple Crumble

    This apple dessert is incredibly easy to make and, ta dah, it's gluten free of course. A perfect dessert option whether it's summer time fourth of July, like now, or in the fall after you've gone apple picking. Using all the warm apple spices like cinnamon and nutmeg, combined with a gooey and crisp oats and honey topping, this crumble is yummy!

    I used 8 Honey Crisp apples, peeled and sliced in this recipe. Because you may have different sized apples, you may only want to use 7 or you may want more and use 9. You do you, boo. Once your apples are peeled, cored, and sliced, you can dumb them into a bowl with the spices, coconut flour, and oil. The oil here can be replaced with equal amounts of melted butter if you don't have any dairy concerns like we do. The coconut flour is great in a recipe like this, because it absorbs super amounts of liquid. Adding it in here helps you get that sticky gooey finish instead of a watery mess.

    close up of gluten free apple crumble

    Mix all that goodness up and dump it right into a greased skillet. Again, butter or oil to grease the skillet. Up to you. Next up is the crumble part of the apple crumble. In a bowl, mix up your gluten free steel cut oats with a little oil (or equal parts melted butter), honey, and my favorite- chopped walnuts. Now, pecans work just as well here, but I love the taste of toasted walnuts. Spread this yummy mixture right over the top of your apples in the your cast iron skillet and sprinkle with bit of brown sugar. Bake this until it's nice and golden brown baked looking on the top.

    Serve it up, Eat it up

    We like to serve this up with some Vanilla Bean Ice Cream or our favorite non-dairy option, some Almond Milk Whipped Cream. Honestly though, we're all friends so I'll tell you. The best way to eat this is cold the next morning with a cup of coffee for breakfast. This is my absolute favorite way to eat any apple dessert but especially this skillet gluten free apple crumble. Talk about a good way to start the morning!

    plate full of gluten free apple crumble

    Tag us on Instagram @grabthemangos and give us a rating and review right here in the comments! And don't forget to pin and save it for next time!

    If you love this recipe, try our gluten free Cardamom Blondies for your next dessert or our gluten free Quiche if you need more delicious breakfast recipes 😉

    cast iron skillet full of apple crumble

    Skillet Gluten Free Apple Crumble

    Yield: 8 servings
    Prep Time: 20 minutes
    Cook Time: 35 minutes
    Total Time: 55 minutes

    This gluten free apple crumble recipe is made with brown sugar, honey, oats, and spices and is so easy to make! The coconut flour gives it that sticky gooey finish we all love and the honey crisp apples make it crisp and delicious.

    Ingredients

    Apple Filling

    • 8 Honey Crisp Apples , peeled, cored, and sliced
    • 2 teaspoon Cinnamon
    • 1 teaspoon All Spice
    • 1 teaspoon Nutmeg
    • ½ cup Brown Sugar
    • 3 tablespoon Coconut Flour
    • ¼ cup Olive Oil, (or melted butter)

    Crumble Top

    • 2 cups Steel Cut Gluten Free Oats
    • ½ cup Olive Oil, (or melted butter)
    • ½ cup Honey
    • 2 cups Chopped Walnuts, (or Pecans)
    • Extra Brown Sugar to sprinkle the top with

    Instructions

    1. Pre-heat oven to 350.
    2. Peel, core, and slice your apples and add them to a large bowl.
    3. Mix in the rest of the filling ingredients and dump into a greased cast iron skillet, spreading it out evenly.
    4. In a separate bowl, mix the topping ingredients up thoroughly.
    5. Spread the topping over the apples in the skillet evenly and sprinkle with a bit of extra brown sugar.
    6. Bake in the oven at 350 for 30-35 minutes until the top is lightly browned. Enjoy!
    © CradleKitchen
    Cuisine: American / Category: Dessert
    pinterest pin skillet gluten free apple crumble

    Flourless Cardamom Chickpea Blondies

    June 29, 2019

    cut up cardamom chickpea blondies with with white chocolate drizzled on top

    I cannot tell you how excited I am to tell you about these cardamom chickpea blondies. Seriously, this may be my new favorite dessert recipe. They are totally gluten free and so easy to make, not to mention addictive- holy wow! I mean, decadent and delicious cardamom flavors, brown sugar blondies, and a drizzle of white chocolate to top it off. Bake them now please!

    close up of blondies with drizzle and cardamom

    Gluten Free Chickpea Desserts

    A chickpea, also known as a garbanzo bean, is so great for making so many things especially in the gluten free world. We love it's most famous food result, hummus! So good, right? Well this dessert proved to me that chickpeas were actually incredibly versatile. These blondies made us completely forget about using regular flour to make dessert.

    This recipe uses canned chickpeas. Chickpeas are unlike canned vegetables in that, they don't lose their nutritional value by being canned. They are perfect for making this recipe nice and easy while adding all that good protein.

    45 angle of blondies with white chocolate drizzle

    Making Cardamom Chickpea Blondies

    Start with one can of chickpeas, drained. In a blender, or a bullet (what I used), blend your can of chickpeas with your olive oil. This will get a really nice smooth texture to work with. I tried to do this the first time by just using an electric hand mixer and the blondies came out with delicious flavor still but terrible texture. The chickpeas were still in chunks so it is definitely better to blend it up with the oil, trust me.

    drizzling white chocolate over cardamom chickpea blondies

    Once you have that creamy smooth blend of chickpeas, you can mix in all your other ingredients making that delicious blondie batter. Super easy and simple. When you're ready, bake at 350 for 20 minutes or so until the edges are golden. Let these beauties cool for a while before trying to cut into or drizzling your white chocolate.

    After they've cooled down, douse them in as much melted white chocolate as you want and eat them up! The cardamom flavor with that white chocolate is heaven in your mouth. Enjoy 🙂

    Tag us on Instagram @grabthemangos and give us a rating and review right here in the comments! And don't forget to pin and save it for next time!

    hand reaching for a big piece of blondie

    If you love this recipe and want more easy gluten free brownies, try out our 3 ingredient fudge brownies! They will make you drool.

    cut up cardamom chickpea blondies with with white chocolate drizzled on top

    Flourless Cardamom Chickpea Blondies

    Yield: 1 pan
    Prep Time: 10 minutes
    Cook Time: 25 minutes
    Total Time: 35 minutes

    These gluten free, flourless, nut free blondies are made with chickpeas and cardamom for an amazing drool worthy dessert! They are full of protein and all the best dessert traits- like white chocolate drizzle!! YUM, yes please 🙂

    Ingredients

    • 1 can Chickpeas , drained
    • ½ cup Extra Virgin Olive Oil
    • ½ cup Brown Sugar
    • 1 Egg
    • 1 teaspoon Baking Powder
    • ½ teaspoon Salt
    • 1 teaspoon Cardamom
    • 1 cup White Chocolate Morsels, for drizzling

    Instructions

    1. Pre-heat oven to 350.
    2. In a blender or bullet blender, blend the drained chickpeas and the olive oil together until smooth and creamy.
    3. Transfer the chickpea and oil mixture to a bowl and add the rest of the ingredients (except the white chocolate morsels), mixing thoroughly.
    4. Bake in a greased brownie pan at 350 for 20-25 minutes until a toothpick comes out clean and edges are golden brown.
    5. Let your chickpea blondies cool for at least 30 minutes before drizzling with your white chocolate.
    6. When you are ready to drizzle white chocolate, melt the white chocolate morsels in the microwave until completely melted. Then drizzle over the top. Enjoy!
    Nutrition Information:
    Yield: 8 Serving Size: 1 pan
    Amount Per Serving: Calories: 442Total Fat: 29gSaturated Fat: 8gTrans Fat: 0gUnsaturated Fat: 19gCholesterol: 37mgSodium: 421mgCarbohydrates: 42gFiber: 3gSugar: 33gProtein: 6g

    Nutritional information is not always 100% accurate.

    © CradleKitchen
    Category: Dessert
    pinterest pin flourless cardamom chickpea blondies with white chocolate

    Baked Spring Rolls with Chicken and Spinach

    June 24, 2019

    platter of baked spring rolls with spinach and shredded carrots

    These crispy baked spring rolls with chicken and spinach dipped in soy sauce (gluten free of course), hit all the right spots! I love spring rolls so so much. With dinners like shrimp fried rice or stir fry noodles, these spring rolls are the best addition! The best part though is that they are made with rice paper- aka gluten-free crispy goodness.

    cut open close up of baked spring rolls

    Gluten Free

    When we went gluten free in May, 2019 for my 3 year old it was a super big change in our house. So finding things that we loved previously that we could still eat now was really really nice. It definitely made the change a little easier to focus on the good things we could eat instead of the things we had to get rid of. Honestly going gluten free has been a great thing in our house. It's challenging the way we cook, the ingredients we use, and it's definitely making us healthier.

    Rice paper is wonderful. It's cheap and we still haven't finished the pack of rice paper I got last time I went shopping and we have made a few batches of spring rolls. I love that these are baked spring rolls, not fried, and so easy to put together as well.

    Let's talk Soy Sauce. I did not know that soy sauce had wheat in it., but I realized when I was making a meal (fried rice- you know it 😉 and I happened to glance at the ingredients. I had to just eat that meal myself over the week since I could not give it to my 3 year old. Now, of course, I have to get the gluten free soy sauce and the same goes for Worcestershire sauce. Check your sauces people!

    spring rolls stacked like jenga

    Gluten free soy sauce is actually called Tamari and it's a traditionally gluten free brew of soy sauce. It's actually becoming more and more popular. I am relieved that we live in a time where gluten free options exist everywhere for people like us who need it, right?

    Making Homemade Spring Rolls

    So making these little guys is super easy. Shred the chicken, slightly saute the spinach in a pan with a little olive oil, mix everything together in bowl. This filling is delicious, let me tell you! I ate it from the bowl with a spoon. No shame.

    filling inside rice paper

    Wrapping these up with the sticky, wet rice paper is the slightly tricky part but after the first one you get the hang of it. Think of wrapping a burrito.

    In a bowl of water, place the hard rice paper in the water completely only for a second, just to get it wet. Place about a tablespoon or 2 of filling a little to the side of center. Fold the edge of the rice paper over and roll once, then bring each side in. Continue to roll nice and tightly until it is closed all the way. This may take a few tries but honestly, they don't have to look perfect. They just have to taste great and you've got that covered 😉

    Once they're all rolled up, place them on a baking sheet lined with parchment paper and brush them with some olive oil. Bake at 400 for about 25-30 minutes until golden and crispy and dip them in some gluten free soy sauce!

    close up of the top spring roll in a stack

    Tag us on Instagram @grabthemangos and give us a rating and review right here in the comments! And don't forget to pin and save it for next time!

    pinterest pin baked spring rolls with chicken and spinach

    If you want something to make with these amazing and fun spring rolls, try out our Shrimp Fried Rice with Lemon or our Stir Fried Noodles!

    platter of baked spring rolls with spinach and shredded carrots

    Baked Spring Rolls with Chicken and Spinach

    Yield: 8-10
    Prep Time: 20 minutes
    Cook Time: 30 minutes
    Total Time: 50 minutes

    These baked spring rolls are gluten free made with rice paper and all the good things including chicken and spinach! Made in the oven and delicious.

    Ingredients

    • Rice Paper for Spring Rolls
    • 2-3 Chicken Breasts
    • 1 cup Spinach
    • 1 cup Shredded Carrot, about 2 carrots
    • 2-3 Garlic Cloves , minced
    • 1 tablespoon Gluten Free Worcestershire Sauce, (make sure it's gluten free if you need that)
    • 1 tablespoon Gluten Free Soy Sauce
    • 2 teaspoon Rice Vinegar
    • ½ Yellow Onion, diced
    • 2 Green Onions, diced

    Instructions

    1. Pre-heat oven to 400.
    2. In a pan, cook the chicken breasts until fully cooked through and then shred them up.
    3. Add the spinach to the pan with the shredded chicken and cook on medium-low heat until the spinach is wilted.
    4. Transfer the chicken and spinach to a bowl and mix in the rest of the ingredients.
    5. Get a shallow pan or bowl of water wide enough to dunk the rice paper rounds in for a second or 2 just to get them wet. They will become more sticky and pliable a few seconds after getting wet so don't hold them in the water forever.
    6. Begin by placing 1-2 tablespoon of filling to the side of the center of the rice paper. Begin to roll up from that same side. At about half way, fold in the sides. Finish rolling as tightly as you can.
    7. Place on a baking sheet lined with parchment paper and brush with some olive oil.
    8. Bake at 400 for 25-30 minutes until golden and crispy. Enjoy!
    © Grab the Mangos
    Cuisine: Chinese / Category: Side Dishes

    Oven Baked French Fries with Salt and Vinegar

    June 19, 2019

    Crispy oven baked french fries with salt and vinegar

    I'll be super honest here, I love french fries. Like, LOVE love them. I cannot stand it when they get tossed at the end of a meal or people don't finish them up because why on earth would you do that? Basically, I consider you a monster if you don't eat your dang french fries. These oven baked french fries are a staple in our house. They are super quick and easy to make and mmm they get nice and crispy and are just loaded with all the right flavors.

    Salt and Vinegar

    I use rice vinegar in a lot of my recipes these days. The flavor it gives is so crisp and tart and I just love what it does to my foods. These french fries, though, are my favorite recipe that uses rice vinegar. The salt and vinegar combination here is perfect! The fries come out not too tart but with just a hint of tang, and of course nice and salty. If you're nervous about the vinegar, trust me it basically enhances the salt and crispiness of the fries.

    Oven Baked French Fries

    Oven baking is the way to go with homemade french fries. I do love the flavor and everything about classic french fries fried up in a vat of oil - yum. But for everyone's health and well being, baking them in the oven has never been tastier.

    close up of crispy baked french fries

    I like to use either golden potatoes or red potatoes for these french fries. Cut them up match stick style (french fry looking). The golden potatoes are great for a rich buttery taste and the red ones have a lighter flavor and I think get a tad more crisp. Add them to a bowl and let's start seasoning!

    All you need for these deliciously simple fries is some extra virgin olive oil, rice vinegar, and salt, pepper, and parsley flakes. You can definitely add all your own favorite seasonings but honestly, these fries are so yummy with just these ingredients.

    Toss everything in a bowl and pop these babies in the oven to bake at 425 for about 30-40 minutes depending on how crispy you personally like your fries. Let them cool of course and then add a little extra salt and find you ingredients for our French Fry Dipping Sauce and eat the best snack, appetizer, yummy amazing thing of your life.

    Tag us on Instagram @grabthemangos and give us a rating and review right here in the comments! And don't forget to pin and save it for next time!

    If you love this appetizer recipe, try out our oven baked Bacon Wrapped Asparagus with Balsamic Glaze. So much yum!

    Crispy oven baked french fries with salt and vinegar

    Oven Baked French Fries with Salt and Vinegar

    Yield: 4 people
    Prep Time: 10 minutes
    Cook Time: 30 minutes
    Total Time: 40 minutes

    These oven baked french fries are extra crispy homemade and quick and easy! make them right in your oven at home with salt and vinegar and extra virgin olive oil. So yummy!

    Ingredients

    • 4-5 Red or Golden Potatoes
    • 2 tablespoon Olive Oil
    • 2 tablespoon Rice Vinegar
    • Salt and Pepper to taste
    • Parsley Flakes

    Instructions

    1. Pre-heat oven to 425.
    2. Slice potatoes into thin sticks and toss into a bowl
    3. Add oil, vinegar, and salt and pepper and toss to coat the potatoes well.
    4. Spread the potato slices out on a baking sheet on top of parchment paper and make sure they are spread out evenly.
    5. Sprinkle with parsley flakes and bake for 30-40 minutes depending on how crispy you like your fries.
    6. Enjoy!
    © CradleKitchen
    Category: Sides
    salt and vinegar oven baked french fries pinterest pin

    Crock Pot BBQ Pulled Pork

    June 8, 2019

    two forks shredding pork tenderloin

    Let's talk crock pot pulled pork! Crock pots are my favorite thing especially in the winter with 2 kids at home and crap load of things to get done living in a frozen tundra (Minnesota) where you have limited daylight in the winter. (I have a love-hate relationship with this state honestly). So the crock pot is my savior. Days where I need to go out all day or even just in the afternoon or I just know I won't have time in the evening for dinner (or if I'm just not about it that day), the crock pot gets pulled out and yummy things go inside to cook for me while I conveniently forget about them and can go about my day with one less thing to worry about.

    close up of forks shredding pork

    How to make Pulled Pork

    This crock pot pulled pork is a staple for those long days. We get the pork sirloin roasts at Costco super cheap and there are about 4 of them in a pack. Great deal and lasts the whole month, sometimes longer. So this is one of the things we do with them- make pulled pork.

    I like to cut into the pork first just to make sure all the yummy sauce flavor gets into the meat as far as it can go. I cut down the middle once and then across 2-3 times. Cut about half way down, not all the way. This really helps the meat get tender and fall apart ready, quicker.

    overhead shot of delicious pulled pork

    The BBQ sauce we use on the pulled pork is usually our own homemade Maple Chili BBQ sauce or the Carolina BBQ sauce linked in the recipe above. Either way this pulled pork is delicious. If you can, try to marinate it the night before you want to cook it to really increase the flavor. The longer it cooks the more pull apart/fall apart tender it will be. 5-6 hours is a really good time but longer is always ok too. If you are going to have it cooking for 8 hours or more, I would set it on low instead of high. Once it's done you will have pulled pork for sandwiches, tacos, pizza, soups, etc.

    Shredding Pulled Pork

    The best way that I've found to shred your crock pot pulled pork is just with two forks. In a different post for Asian Chicken Tacos, I use an electric beater to shred the chicken up really nicely and easily. That does not work with pork. Even though the meat is super tender by the end of this and it falls right apart, it's still too thick of a meat to just pulverize with the electric hand mixer. That's what I have found at least! If you have a trick to this, let me know in the comments 😉

    Tag us on Instagram @grabthemangos and give us a rating and review right here in the comments! And don't forget to pin and save it for next time!

    close up shot of delicious pulled pork

    Try this pulled pork on our BBQ Pulled Pork Pizza or on some hamburger buns with some Maple Chili BBQ Sauce! Whatever you use it for, enjoy this super easy meal of pork goodness all year long 🙂

    two forks shredding pork tenderloin

    Crock Pot BBQ Pulled Pork

    Yield: 6
    Prep Time: 5 minutes
    Cook Time: 5 hours
    Total Time: 5 hours 5 minutes

    Put your pork tenderloin in the crock pot with some BBQ sauce and let it sit and cook all day long. Come home to some tender fall apart pulled pork for tacos, pizza, burritos, sandwiches, anything!

    Ingredients

    • 1 Pork Sirloin Tip Roast
    • ½ cup Carolina BBQ Sauce

    Instructions

    1. On a large cutting board cut into the pork roast about half way through, all the way down the middle.  Make 3 notches across this so it looks like a grid.  (Optional: Marinate in the BBQ sauce of choice over night)
    2. Place into the crock pot with cut side up and pour the BBQ sauce over the top so that it flows into the cuts in the meat. 
    3. Set the Crock Pot on high for 5-6 hours. 
    4. Pull/Shred the pork with a fork.  Stir together with the juices and sauce in the pot and enjoy! 
    © CradleKitchen
    pinterest pin crock pot pulled pork

    Zucchini Noodles with Shrimp and Tomatoes

    June 3, 2019

    bowl of zucchini noodles with shrimp and tomatoes

    So recently we have gone gluten free in our house because my daughter is highly sensitive to it. These zucchini noodles with shrimp and tomato are such a great little mix up with this new lifestyle change. We already loved this recipe with the spiralized "zoodles" but now that we are gluten free it's such a nice easy care-free and gluten free meal.

    "Zoodles"

    These have definitely become something of a fad lately. Everyone is talking about zoodles right? Well, we love them. It took a bit of trying to get a recipe we actually all liked though. The first time we tried these out, they were soggy and gross. I realized, zucchini noodles really can't be cooked that much. They taste so much better left raw with whatever topping or sauces just tossed in. This way they retain their water and crisp crunch. This recipe with a really easy and delicious lemon, butter, and garlic sauce does just that.

    close up of zucchini noodles

    We made ours with halved cherry tomatoes, slightly sauteed, and some shrimp, because we love shrimp. It was a hit. Even the 3 year old was gobbling it up. The sauce is just a simple butter and garlic sauce with lemon juice for extra flavor. Honestly, zucchini noodles with shrimp and tomatoes like this is such a perfect summer dish. As much as I love normal pasta (Fettuccine Alfredo is my weakness), it can be too much on a hot summer day to make and dish up a bowl of steaming pasta. This dish keeps it light and zesty which I love. Add a nice glass of wine and you are set!

    How to make Zucchini Noodles

    I use an electrical, plug in- push the button, machine that can slice, shred, or spiralize my veggies whenever I need that done. It comes in super handy for this recipe obviously, but also for a few other recipes. It shreds my sweet potatoes super easily (and in record time) for my Quiche with Sweet Potato Crust and it makes me potato chips for our french fry dipping sauce. All good things right? Well this is definitely one of my favorite uses for it. The specific one that I use is the Cuisinart Prep Express Slicer, Shredder, Spiralizer which you can find on Amazon.

    I usually use the attachment that gives them the nice spaghetti spiral versus the wide, thin cut. After you've spiralized your zucchini, you may want to just cut them a bit, as they will be super long pieces. Leave them be once your done cutting them. Zucchinis carry a lot of water so be sure not to handle them too much. Let them be in a nice big bowl until your lemon butter and garlic sauce is ready to go.

    close up of zucchini noodles in a bowl

    Lemon Butter and Garlic Sauce

    This sauce is so simple and so delicious you may even wind up putting this on your regular pasta dishes as well. Basically, melt your butter in a pan. Add your fresh minced garlic and let it cook until aromatic but definitely be careful not to burn the butter or the garlic. Keep it over a low heat to do this. Then add in your halved cherry tomatoes and shrimp. Cook for about 3-5 minutes over that low heat and then toss into the zucchini noodles.

    fork twirling the zucchini noodles

    This dish is so vibrant, easy, and fun you'll want to add it to your weekly rotation right? We definitely did. If you are dairy free, you can always opt for a little olive oil or coconut oil as an alternative. Top your bowl of zucchini noodles with shrimp and tomatoes with salt and black pepper and if you're feeling fancy a little shredded parmesan. Like I said already, a little wine brings this dish from simple to super fancy pancy. So add the glass of wine (be legal please thanks) and enjoy!

    Get ready for some more gluten free recipes as well 🙂

    Tag us on Instagram @grabthemangos and give us a rating and review right here in the comments! And don't forget to pin and save it for next time!

    hand picking up the zucchini noodles with lemon butter sauce

    If you love this recipe and want to eat more yummy things, try out our Basil Pesto with Almonds or for dessert our 3 Ingredient Vegan Fudge Brownies!

    bowl of zucchini noodles with shrimp and tomatoes

    Zucchini Noodles with Shrimp and Tomatoes

    Yield: 4 servings
    Prep Time: 5 minutes
    Cook Time: 5 minutes
    Total Time: 10 minutes

    Learn how to make a simple and easy zucchini noodle dish in this recipe with shrimp and tomatoes! Add a lemon butter and garlic sauce and you'll be making this every week. So good!

    Ingredients

    • 3-4 Zucchini
    • 4 tablespoon Butter
    • 1 Lemon
    • 2 Cloves Fresh Garlic, minced
    • Cherry Tomatoes, halved
    • 1 cup Mini Shrimp
    • Salt and Pepper , to taste

    Instructions

    1. Using your spiralizing machine, turn your zucchini into spaghetti-like noodles and set aside.
    2. In a pan, melt the butter and garlic together over low heat and avoid burning.
    3. Add the shrimp and tomato halves and cook for about 3-5 minutes.
    4. Take off the heat and add the juice of half of a large lemon OR a whole small lemon.
    5. Toss over the "zoodles," add slat and pepper to taste, and enjoy!
    © Grab the Mangos
    Cuisine: American
    pinterest pin for zucchini noodles with shrimp and tomatoes

    Quick Pickled Red Onions

    May 28, 2019

    Jar of pickled red onions with lemon slice

    There are oodles, yes oodles, of topping choices out there for so many of our favorite meals. But if you are looking for that sweet, tangy, crisp red onion- look no further. This is such an easy and quick pickled red onions recipe. I actually made this for the first time when my kitchen was a disaster, the kids were about to explode, and everyone was hungry. That's how quick it is. I was able to whip this up with no trouble in the middle of a family emotional hurricane of hunger. The best part, it was ready right along with our pulled pork within 10 minutes.

    What do you need to make pickled onions?

    Honestly, if I have this in my currently sparse and sad kitchen, you probably have it too or at least it's not expensive at all. All you'll need is:

    • A mason jar with lid. Preferably a wide mouth.
    • One Onion.
    • Rice Vinegar
    • Sugar or Honey
    • Salt and Pepper

    Super easy. So the basics of making these quick pickled red onions are: soak the onion in vinegar and flavor additives; eat them up. Yum.

    hand pulling out some pickled red onions form a jar

    Flavors for Pickled Red Onions

    In this recipe we added our favorites, lemon and garlic. It gives it such a nice vibrant summer feel and flavor especially when you use it to top a BBQ'd sandwich or pulled pork or chicken, aka savory smokey flavors.

    So what can you do to make this your own? Well if you're a fan of heat (hell yes), add a sliced jalapeno to this recipe. Spicy pickled red onions are so so good! Try them out that way. Other options are fresh herbs like dill (think pickle), or even a couple of basil leaves is delicious. Let all your preferred spices and flavors soak together to create a jar of quick pickled red onions all for you.

    Now, we love red onions. The color alone is amazing! Red onions also have that extra crisp bite to them that, I think, makes them perfect for this. You can, though, also use normal yellow or even sweet onions and make a great batch from those.

    closed jar of quick pickled red onions with lemon and garlic

    How long should pickle onions?

    This depends entirely on you. The longer you let them pickle the more flavor they'll have. If you are in a hurry though, this recipe (as the name quick implies) is delicious after about 10-15 minutes.

    Usually, we'll make these right when we want them. We'll eat them within that 10-15 minutes and just save the rest for later so they get even more flavor as we go. If you are dying for all that intense flavor though, make them the day before and let them soak in the fridge over night. They keep in the fridge 1-2 weeks if they even last that long 😉

    close up of pickled red onions out of the jar

    Tag us on Instagram @grabthemangos and give us a rating and review right here in the comments! And don't forget to pin and save it for next time!

    Try these pickled onions on some of our other recipes like our BBQ Pulled Pork Pizza, our Watermelon Salad (so amazing in salad), or on those Asian Fusion Chicken Tacos ( YUM ).

    Jar of pickled red onions with lemon slice

    How to Make Quick Pickled Red Onions

    Yield: 1 Mason Jar
    Prep Time: 5 minutes
    Pickle Time: 10 minutes
    Total Time: 15 minutes

    These quick and easy pickled red onions will be your new favorite go to topping for tacos, pizza, Mexican food, salads, anything! So delicious and easy!

    Ingredients

    • 1 Red Onion, sliced
    • 3-4 Lemon Slices
    • 2-3 Garlic Cloves, chopped
    • 1 tablespoon Sugar or Honey
    • pinch Salt and Pepper
    • ½ cup Rice Vinegar, enough to fill your mason jar size
    • 1 cup Warm Water

    Instructions

    1. In a wide mouth mason jar, place your sliced and separated red onion and fill almost to the top. About ⅔.
    2. Add your sliced lemon and fit throughout the jar.
    3. Add garlic, sugar (or honey), and salt and pepper, plus any other additives that you'd like (jalapenos, dill, basil, parsley... etc). We like it just plain with lemon and garlic most of the time!
    4. Fill mason jar with the rice vinegar and water.
    5. Place the lid on and shake until sugar or honey has dissolved (a couple minutes).
    6. Let it sit for about 10-15 minutes for a quick pickled onion fix or over night for more flavor.
    7. Keep in the fridge.
    © CradleKitchen
    quick pickled red onions pinterest pin

    Easy Shrimp Fried Rice with Lemon

    May 24, 2019

    Lemon and Shrimp fried rice being served into 2 bowls

    Watching the pros make the fancy fried rice in the hibachi restaurants is always a treat. Watching the flames and the neat knife flipping tricks is so much fun right? Well if you can fit the neat tricks and the flying flames into your kitchen at home safely, please send me a tutorial! But even if you can't do all that, you can still eat all the delicious goodness that this easy shrimp fried rice recipe with lemon and garlic gives you.

    one bowl of fried rice with lemon wedges and shrimp

    Better than Take-Out Fried Rice

    Ever get to meal time and just really want some take out? Um, yes. So do we. Well I can say this stuff is even better than any cheap take out. A lot of times the take out gets that 'left out' and almost stale taste to it (I still eat it, no shame here). Fresh fried rice is surprisingly easy to make and even easier if you just do a little rice making ahead of time when you meal prep (if you do that thing).

    So making your rice ahead of time pretty much makes this recipe a 10 minute meal. Nice and quick and right up my alley when it's dinner time and two babes are going through a nice little 'witching hour' right? This easy shrimp fried rice has definitely become my 'what can I make quickly' go to. The other plus to this meal- it's totally customizable. I love shrimp with it because, well, shrimp and lemon just go together so well. But chicken or even vegetarian are amazing too. Throw all those random veggies in and see what happens!

    close up of fried rice with veggies and lemon

    Lemon Rice

    You may have never thought to add lemon to fried rice. I get that a lot with this recipe. Try it and you'll understand why it just works. It brightens up the dish and gives it a really fresh flavor to cut through the sweetness of the soy sauce.

    This recipe is super simple and I like it that way. It gives it a little more customization freedom.

    Start out with making your rice according to the instructions on the box/bag. Like I said, you can do this ahead of time and just store it in the fridge until you're ready for some delicious fried rice, or you can make right now. Once the rice is done, take the cap off and set it somewhere to cool off while you get the other ingredients going.

    Customizing

    Traditionally I love peas, shredded carrots, classic scrambled eggs, and some onion and a protein in my fried rice. As long as I have a few of those base ingredients, I'm good to go. Some of other favorite ingredient ideas are mushrooms, peppers, leeks, zucchini, the lists goes on and on. Whatever we have in the fridge that either needs to go or we just are curious. The must haves for this particular recipe are fresh garlic, lemon juice, soy sauce, and of course shrimp and rice.

    hand eating shrimp fried rice

    Making Easy Shrimp Fried Rice

    If you have a wok, definitely use that. I had one and it broke during a move. So sad. I am definitely going to get another one. They have them for a really good price at Ikea actually. If you don't have one, that's ok too. I have been doing ok without one and have just been using either my big pan or even my cast iron skillet does a nice job.

    In your pan or wok, heat some toasted sesame seed oil over medium heat with your veggies of choice, your shrimp, and your fresh chopped garlic cloves. Once you have a nice saute of veggies going, add your shrimp to cook.

    I like to do the eggs in a separate pan so they stay fluffy and nice and not slimy and coated to everything else. So, in a separate pan, scramble your 2 eggs. Nothing fancy, just the eggs.

    The fun part. Toss your cooked rice into the pan with the veggies and shrimp and begin to fry. I usually boost the heat here to medium/high so things really get sizzling. Continue to toss in the heat for a couple of minutes to warm things up, and then add your soy sauce.

    Finally, once you have the rice really thoroughly mixed in the pan and fried up well for about 5 minutes, add the eggs and then the lemon juice. The lemon juice I like to add at the very end like this to really keep that tart lemon flavor so none of it cooks out.

    And that's it! You did it. You made fried rice at home and you can eat take out without getting take out 😉

    shop sticks in a bowl of fried rice

    Tag us on Instagram @grabthemangos and give us a rating and review right here in the comments! And don't forget to pin and save it for next time!

    If you like this recipe, try out our Stir Fried Noodles because who doesn't need more Asian take out in their life? If you need an awesome dessert, because again who doesn't, go make the best Cookies you've ever had 😉

    Lemon and Shrimp fried rice being served into 2 bowls

    Easy Shrimp Fried Rice with Lemon

    Yield: 4 servings
    Prep Time: 10 minutes
    Cook Time: 10 minutes
    Total Time: 20 minutes

    This easy shrimp fried rice recipe is so simple and delicious! Better than take out! With sesame oil, egg, lemon, and your favorite veggies, you can have homemade fried rice anytime.

    Ingredients

    • 1 cup Rice (will be more than a cup once cooked), cooked according to box/bag
    • 1 tablespoon Sesame Oil
    • ¼ cup Soy Sauce
    • 2-3 Garlic Cloves, chopped
    • 2-3 Green Onion, chopped
    • 2 tablespoon Lemon Juice
    • 2 Eggs
    • 1 cup Tail Off Shrimp
    • Favorite Veggies (peas, shredded carrots, water chestnuts...etc)

    Instructions

    1. Cook your rice according to the box or bag it came in. Once cooked set aside to cool.
    2. In a large pan or wok, heat sesame oil over medium heat and add veggies to cook. Once they are thoroughly sauted, add the shrimp.
    3. In a separate pan, scramble the eggs.
    4. Add the cooked rice to the veggies and fry for about 2-3 minutes before adding soy sauce.
    5. Cook the rice, veggies, and soy sauce over medium-high heat for about 5 minutes stirring consistently.
    6. Add the eggs and stir. Add the lemon juice last and serve! Enjoy!
    © Grab the Mangos
    Cuisine: Japanese
    Shrimp fried rice with lemon pinterest pin

    Creamy Vegan Roasted Red Pepper Sauce

    May 21, 2019

    close up picture of vegan roasted red pepper sauce on a bowl of spaghetti

    This vegan roasted red pepper sauce is so yummy and easy to make that even if you aren't vegan or dairy-free, you'll want to give this one a try! We whip this sauce up for pasta all the time. It's creamy, light on your stomach, healthy, and just so flavorful. Definitely a go to for a busy night or a surprise visitors kind of situation.

    Roasted Red Pepper Sauce

    A good roasted red pepper sauce should be in everyone's "go to" pasta options in my opinion. The flavor is amazing and it's so much easier than I think a lot of people realize. This red pepper sauce is so creamy and flavorful, it'll have you drooling.

    a twirl of pasta with red pepper sauce on a fork

    A lot of people think "red pepper" and immediately think spicy heat. This sauce is pretty versatile. You can make it spicy if you want with some added red pepper flakes, or you can leave it be just creamy and flavorful but not too much heat. Red and green bell peppers are not spicy. They are what this recipe uses. They are more on the sweet side. For a pepper to be spicy hot, it has to have capsaicin (pronounced "cap-SAY-a-sin"). This is the chemical that sets off the "on fire" senses in our mouths. Bell peppers have zero capsaicin and so are always at the bottom of the spicy charts. But they are so so amazing for fresh jam packed flavor!

    How to Make Vegan Pasta Sauce

    So let's make this vegan roasted red pepper sauce! This sauce uses Extra Virgin Olive Oil, red and green bell peppers, onions, some diced canned tomatoes, fresh garlic, spices and coconut milk. Trust me, you cannot taste any strong coconut flavors with everything else going on in this sauce.

    two bowls of pasta with sauce

    Super easy, super simple. Roast up the peppers, onions, and chopped garlic in the olive oil. You can do this either in a pan on the stove top, or in the oven at 400F for 15-20 minutes. I usually just go for the stove top option. Add all your spices into the roasting process. This helps to really get that flavor into the veggies and releases all that aroma into the sauce even better. If you are like me and you love the extra bit of heat, use fire roasted diced tomatoes instead and mmm it is good, let me tell you!

    Once you've roasted up your veggies and spices in the olive oil, place them all nice and hot, into a blender or food processor with your coconut milk.

    I like to add the salt and pepper to taste at the end so you get that ratio just the way you like it. Once that's done, boom you've done it and you have an amazing delicious, creamy, totally vegan roasted red pepper sauce to show for it 🙂

    hand taking a bite of vegan roasted red pepper sauce on pasta

    Use this sauce as pasta sauce (our favorite), for some delicious homemade gnocchi as a dipping sauce for our homemade Naan Bread- so good. Or even as a pizza sauce! Yum!

    Tag us on Instagram @grabthemangos and give us a rating and review right here in the comments! And don't forget to pin and save it for next time!

    If you love this sauce, be sure to try our Basil Pesto with Almonds or our Cilantro Dipping Sauce! So much yum!

    close up picture of vegan roasted red pepper sauce on a bowl of spaghetti

    Creamy Vegan Roasted Red Pepper Sauce

    Yield: 1 Jar
    Prep Time: 5 minutes
    Cook Time: 15 minutes
    Total Time: 20 minutes

    This healthy vegan roasted red pepper sauce is so YUMMY! Easy to make, no cream involved, and good for pasta, as a dip, or anything else you can think of 🙂

    Ingredients

    • 1 Red Bell Pepper
    • 1 Green Bell Pepper
    • ½ Yellow Onion
    • 2-3 Garlic Cloves, halved or chopped
    • 1 can Diced Tomatoes , drained
    • 1 teaspoon Paprika
    • 1 teaspoon Chili Powder
    • 1 teaspoon Dried Basil
    • 1 teaspoon Onion Salt
    • 1 tablespoon Nutritional Yeast , Optional
    • Salt and Pepper , to taste
    • ¾ cup Coconut Milk (or cream for extra thickness)

    Instructions

    1. In a large frying pan, heat a drizzle of olive oil (1-2 Tbsp) and toss the peppers, onions, garlic cloves, tomatoes (drained), and the spices.
    2. Saute over medium heat for about 5-10 minutes until cooked and tender.
    3. Place the pepper mixture in a blender or food processor, add the coconut milk, and blend until smooth.
    4. Salt and pepper to taste and enjoy with pasta, pizza, or anything else!
    © Grab the Mangos
    Cuisine: Italian
    Vegan Roasted Red Pepper Sauce Pinterest Pin

    Savory Crepes Recipe with Smoked Salmon

    May 17, 2019

    savory crepes with smoked salmon and cream cheese

    Crepes are such a classic nice and fancy breakfast option. They may seem difficult to make but they are actually very simple and easy in this savory crepes recipe. While you can make them sweet with fruits and chocolates, this recipe has smoked salmon and cream cheese as it's stuffing and it is so so good! Move over nutella stuffed crepes.

    close up of smoked salmon in a crepe with cream cheese

    French Savory Crepes Recipe

    A savory crepe is more of a dinner crepe to me but honestly I'd also eat sweet crepes for dinner. I would obviously eat any and all crepes for breakfast as well. They're crepes- they're wonderful, dreamy thin French pancakes that you can stuff your favorite flavors into. What's not to love?

    There are a lot of different savory crepe recipes out there- chicken and garlic, spinach and mushrooms... etc. The delicious list goes on and on and don't worry we will be testing those recipes and writing them up probably always. But for now let's talk smoked salmon, because YAS.

    How to make Crepes

    Making crepes is not as difficult as it sounds. Starting with a big mixing bowl, combine all of your ingredents. For this particular recipe, mix in your fresh chopped rosemary as well.

    The best practice with making crepes if you have the time, is to chill the batter in the fridge over night to really get those air bubbles out. If you don't have that time (I almost never do, don't worry), tap the bottom of the bowl a few times firmly on the counter to try to dislodge those air bubbles yourself.

    Heat your non-stick skillet over medium-low heat with a little bit of butter melting on the pan.

    Cooking and Flipping

    • Hold the pan off the heat and pour a quarter cup of batter onto one side of the pan.
    • Begin to swirl the batter around the hot pan until the entire bottom is coated.
    • Place the pan back on the heat and let it cook for about a minute or two.
    • Flip gently and cook again for about a minute.
    • Take off the heat and begin to fill.
    a savory crepe with smoked salmon and rosemary

    Filling your Savory Crepes

    Once you've made your crepes like a boss, spread a thin layer of cream cheese (you can also use mayo if you're dairy free- tastes great still) on the inside of your crepe. Add some chopped chives and some onion salt on the cream cheese spread next. Layer smoked salmon right down the middle. Sprinkle with a little wedge of lemon juice and fold the crepe over the filling.

    Invite people over for brunch, lunch, or dinner, and show of your French skills you cool cat 😉

    smoked salmon filled crepe

    Keeping and Reheating Crepes

    If you manage to have any left over crepes, keep them covered and chilled in the fridge. When you are ready to reheat them, the best way to do this is in a pan over low heat until they are nice and warm again.

    If you love this recipe, you'll love our Dutch Baby Pancake recipe. Talk about an easy delicious sweet or savory meal 😉 Or try out our Extra Fluffy Pancakes. YUM! You can never have too many pancakes in my opinion.

    Tag us on Instagram @grabthemangos and give us a rating and review right here in the comments! And don't forget to pin and save it for next time!

    savory crepes with smoked salmon and cream cheese

    Savory Crepes Recipe with Smoked Salmon

    Yield: 6
    Prep Time: 5 minutes
    Cook Time: 3 minutes
    Total Time: 8 minutes

    These are the best easy crepes that you can make at home yourself! Feel like you're in Paris right in your kitchen. Savory French Crepes for breakfast, lunch, or dinner!

    Ingredients

    Savory Crepes

    • 1 cup All Purpose Flour
    • 1 cup Milk
    • 2 Eggs
    • 2 tablespoon Melted Butter
    • 2-3 tablespoon Fresh chopped Rosemary
    • ¼ teaspoon Salt

    Crepe Filling

    • Smoked Salmon
    • Cream Cheese
    • Fresh chopped chives
    • Onion Salt
    • Lemon Wedge

    Instructions

    1. In a large mixing bowl, combine the ingredients for the crepes and mix well.
    2. Cover and chill over night.  If you can't do that, make sure to gently but firmly tap the bottom of the bowl on the counter to get the extra air bubbles out of the batter.
    3. Heat a non-stick pan over medium-low heat with some melted butter to coat the bottom.
    4. Pick pan up off the heat and scoop ¼ cup of batter onto 1 side of the pan.  Swirl the batter around to coat the whole bottom and place back on the heat.
    5. Cook for about a minute (maybe a  little longer) until it has firmed up. Flip and cook other side for about a minute as well until golden.
    6. Once your crepes are made and your ready to fill, start out by spreading a thin layer of cream cheese on the inside.
    7. Sprinkle your fresh chopped chives and onion salt on to taste, and layer the smoked salmon on top down the middle.
    8. Squeeze a fresh lemon wedge over the top and fold it all up. Enjoy this delicious savory crepe 🙂
    Nutrition Information:
    Yield: 6 Serving Size: 1 crepes
    Amount Per Serving: Calories: 305Total Fat: 14gSaturated Fat: 7gTrans Fat: 0gUnsaturated Fat: 5gCholesterol: 125mgSodium: 821mgCarbohydrates: 33gFiber: 4gSugar: 1gProtein: 13g

    Nutritional information is not always 100% accurate.

    © CradleKitchen
    Cuisine: French / Category: Breakfast
    Smoked Salmon Crepes, savory crepe recipe
Pinterest Pin

    Easy Asian Chicken Tacos Recipe

    May 14, 2019

    Asian Chicken Tacos with limes and avocados

    When you take an amazing Mexican creation and some delicious Asian flavors and combine them in a taste explosion in your mouth, what do you call that? Asian chicken tacos of course. And these are amazing! These are easily our favorite 10 minute tacos these days. So flavorful you don't even need any toppings. But some of our creamy coleslaw, some avocado, and maybe some red onions definitely wouldn't hurt this bad boy. YUM.

    Fusion Tacos

    There are so many different types of fusion foods out there. But I think one of the most popular, if not THE most popular has got to be Mexican and Asian foods.

    close up of asian chicken in tortillas with cabbage and carrots

    They both have so many similar ingredients in their foods (garlic, honey, peppers, rice... etc) that when you marry the two, it just works. I mean think about it: sweet and savory Asian chicken packed into a taco (the perfect food if we're being honest). It's a match made in heaven. I think Asian fusions are so popular because, well let's be real, they have been practicing this art for centuries and it's pretty amazing. They know good flavors and how to use them. Combine that with something close to home (at least here in America) that is on it's own delicious and you've got a flavor melting pot. Isn't that how all good things are created? See what happens when you mix two good things.

    These fusion tacos were inspired by just wanting something a bit different than our regular week night beef or chicken tacos (which are fabulous but still). And let me tell you, these are the easiest things I've ever made.

    Asian Chicken Tacos

    Everything about this recipe is incredibly easy to make. It's the perfect week night taco recipe. I make it when I just seem to have run out of time and energy but still need to make up some dinner.

    cilantro and some chicken tacos with teriyaki

    Easy Way to Shred Chicken Fast

    Whenever I make a recipe that needs shredded chicken, I use this trick. It saves me time and the annoying process of sitting their exhausting your fingers as you pull the chicken apart with two forks tediously.

    Once you've cooked your chicken breasts all the way through, place them into a bowl. Get your electric hand mixer out. Now, fair warning, this works super well with a good mixer. I tried to do this with a really really old hand mixer and it didn't work quite as well (but that thing didn't do anything quite as well).

    Starting on low-medium, begin to beat the chicken until it's shredded. If you want a little bit of a guard on the top of the bowl to prevent anything getting out, poke the beaters through a paper plate. Works like a charm.

    The trick to beating your chicken into shreds is remembering that you are not mixing it. Keep coming down on the top of the big pieces of chicken instead of going in circles around the bowl.

    You can increase the speed if you need to but usually I'll get it all pretty shredded and then just pull apart by hand any pieces that just weren't break apart for me.

    There you have it. This shredding technique takes maybe 3 minutes vs the tedious job of two forks pulling until your hands cramp up.

    Asian Chicken Taco Flavors

    This recipe is my favorite because these are sauces and ingredients I almost always have on hand. I hate running to the store to grab one thing on a weeknight when all I want is some easy good food.

    delicious asian fusion chicken tacos with lime and cilantro

    With a little soy sauce, Worcestershire sauce, fresh garlic, and teriyaki, this Asian taco meat comes together nice and quickly. The teriyaki can also be replaced with Trader Joe's Soyaki which is amazing! But generally we use regular teriyaki. Fresh garlic is key. Don't use it from the jar, it leaves a slightly bitter taste in the dish. You can mince or finely chop your garlic if you don't like the bigger slices that we use. We usually just get the bag of plain coleslaw mix (pre-shredded cabbage and carrots) to mix into this cooking chicken. It really helps to give these Asian chicken tacos some extra body and a little crunch.

    Let this marinade of sauce and flavors simmer together with the shredded cabbage mixed in for about 10 minutes, usually just while you get all your toppings together and maybe mix up some margaritas. This just helps all that flavor get nicely infused into the chicken.

    When you're ready to eat, stuff a warmed soft tortilla with all this goodness. Top with red onions, avocado (obviously), and if you're into the heat some hot sauce or, my favorite, sriracha. Eat up and enjoy your new Asian chicken taco Tuesday (or everyday because these are sooo good)!

    Tag us on Instagram @grabthemangos and give us a rating and review right here in the comments! And don't forget to pin and save it for next time!

    If you love this recipe and want some more types of tacos try out our zesty shrimp tacos. Or if you want the best taco topping ever, try out this creamy cilantro sauce. You won't be disappointed 😉

    Asian Chicken Tacos with limes and avocados

    Easy Asian Chicken Tacos Recipe

    Yield: 12
    Prep Time: 10 minutes
    Cook Time: 10 minutes
    Shredding Time: 3 minutes
    Total Time: 23 minutes

    This easy Asian chicken taco recipe makes the quickest yummiest dinners and can be made in tortillas or lettuce wraps for the best weeknight meal! These are the BEST 🙂

    Ingredients

    • 2-3 Chicken Breasts, shredded
    • ¼ cup Soy Sauce
    • ¼ cup Teriyaki Sauce, (or soyaki from trader joe's)
    • 3 tablespoon Worcestershire Sauce
    • 2-3 Garlic Cloves, sliced or finely chopped
    • 2 cups Shredded Green Cabbage or Plain Coleslaw

    Instructions

    1. In a large skillet, cook the chicken breasts over medium heat with a drizzle of olive oil until fully cooked through.
    2. Shred up your chicken either using the classic fork method on a cutting board OR using the electric mixer trick written about above 😉
    3. Place the shredded chicken back into the skillet and mix in your cabbage/coleslaw along with the rest of the ingredients.
    4. Let the mixture simmer over low heat for about 10-15 minutes while you get whatever toppings you want (like this easy coleslaw recipe or this creamy cilantro sauce).
    5. Once your ready to eat, stuff your chicken into a soft tortilla and top with nothing at all or everything and anything and enjoy!
    © CradleKitchen
    Cuisine: Chinese
    Asian fusion chicken tacos pinterest pin

    Healthy Banana and Oatmeal Pancakes

    May 10, 2019

    Pouring honey over delicious banana oatmeal pancakes

    Is there anything more comforting than a fresh batch of Banana Oatmeal Pancakes in the morning? These Soft and fluffy pancakes made with just 4 ingredients, mashed bananas, rolled oats, an egg, and cinnamon. Make these pancakes for a perfect weekend breakfast and brunch for family and friends! A little butter and warm maple syrup on top... mmm yum!

    Healthy Bananas

    We always wind up with those over ripe- need to use them now- bananas on our shelf. Of course we normally love to make some yummy chocolate chip banana bread with our over ripe bananas, but a lot of the time we don't feel like waiting an hour and half for something good to eat so we whip these babies up instead.

    stack of banana oatmeal pancakes cut open to see the fluffy inside

    These banana and oatmeal pancakes are nice and healthy which is always a plus for delicious food especially in the morning. Start the day off right with these. Bananas are a great thing to eat in the morning.

    • They metabolize amino acids.
    • Metabolize carbs and fats, turning them into energy for the day.
    • Remove unwanted chemicals from places like the liver and kidneys.
    • Help to maintain a healthy nervous system.

    And let's be real, bananas are pretty cheap and are so good at sweetening things, you don't need to add any sugar to these. If you don't believe how good bananas are at sweetening things- check out our 3 ingredient fudge brownies 😉 You won't be disappointed!

    topside picture of banana oatmeal pancakes

    Banana and Oatmeal Pancakes

    Let's make pancakes ya'll. Making these could not be easier. Mash up your over ripe bananas in a bowl, stir in the rolled oats, an egg, and your baking powder. I definitely recommend using rolled oats for these pancakes. The texture comes out much better than steel cut oats in my opinion. But hey you do you!

    Oats are nice and healthy in the morning just like bananas. They are great at filling you up so you don't feel the need to eat more food soon after breakfast. Awesome right? Especially if you are like me and are too busy to be hungry all the time.

    Once you've mixed up your simple banana and oatmeal pancake batter, use a ¼ cup to scoop onto a frying pan (we like to fry in a little melted butter but olive oil works too) over low heat. Because these pancakes don't have flour, the structure is a bit loose so you'll want to cook them smaller and over lower heat for 2-3 minutes before flipping. Cooking them with a lid on helps them to cook through a bit more before flipping them so they don't fall apart.

    And that's it! So simple right? Top with some butter and warm maple syrup, grab some coffee and have an awesome day ya cool kid.

    close up shot of a bite of banana oatmeal pancakes

    Tag us on Instagram @grabthemangos and give us a rating and review right here in the comments! And don't forget to pin and save it for next time!

    If you love these pancakes and want more pancakes (who doesn't?), check out our amazing extra fluffy cinnamon pancakes too!

    Pouring honey over delicious banana oatmeal pancakes

    Healthy Banana and Oatmeal Pancakes

    Yield: 4 servings
    Prep Time: 5 minutes
    Cook Time: 4 minutes
    Total Time: 9 minutes

    These easy and healthy banana oatmeal pancakes are only 3 ingredients plus bananas of course 😉 No flour in this recipe- gluten free dairy free and delicious!

    Ingredients

    • 2-3 Over Ripe Bananas, mashed
    • ¼ cup Rolled Oats
    • ¼ teaspoon Baking Powder
    • 1 Egg

    Instructions

    1. Mash your over ripe bananas in a mixing bowl. Add the rest of the ingredients and mix thoroughly.
    2. Heat butter or olive oil in a pan over low heat.
    3. Use a ¼ cup to scoop the banana oatmeal batter into the pan and place the lid on for 2-3 minutes.
    4. Gently check with a spatula to see if they are cooked enough to flip. Give them another minute to cook if they need it before flipping, otherwise flip and cook for another minute or 2 under the lid.
    5. Serve warm with butter and maple syrup or honey and enjoy!
    Nutrition Information:
    Yield: 4 Serving Size: 2
    Amount Per Serving: Calories: 116Total Fat: 2gSaturated Fat: 1gTrans Fat: 0gUnsaturated Fat: 1gCholesterol: 47mgSodium: 49mgCarbohydrates: 24gFiber: 3gSugar: 11gProtein: 3g

    Nutritional information is not always 100% accurate.

    © CradleKitchen
    Cuisine: American / Category: Breakfast
    healthy 4 ingredient banana oatmeal pancakes recipe gluten free and dairy free

    English Cucumber Sandwiches

    May 6, 2019

    stacked cucumber sandwiches with a bite in one

    What could be more perfect for a spring brunch or a picnic at the beach than delicate, tasty, fresh English cucumber sandwiches? These are so easy, SO yummy, and won't weigh you down. They might just be the perfect summer day sandwich. Cucumber sandwiches are so fresh, light, and crisp tasting, not to mention how cute and posh they are? Have fun with these cuties!

    cucumber sandwiches side by side

    Traditional Cucumber Sandwiches

    Cucumber sandwiches are those dainty little sandwiches found in places like English tea parties and country clubs. Now I've never actually been to either of those places because, well, I don't have fancy things. But I do love cucumber and savory, tasty little sandwiches like these are right up my non-posh alley.

    The traditional English cucumber sandwiches are made with a thin coat of butter on each slice of bread and thinly sliced cucumber. That's exactly what we like to use on ours, but another popular option is cream cheese in place of the butter- more of an american option. We technically have to be dairy free for the sensitive stomachs around here, so we skip out on the cream cheese but we do still keep some real butter in our diet. We generally get a big roll of Amish butter from our local grocery store and it's amazing. (If you're in Minnesota it's at Cub- you're welcome)

    thinly sliced cucumbers with butter and bread

    Seasoning

    There are so many ways to season up your cucumber sandwiches. And let's be real the seasonings are what make the sandwich more than veggies and some bread so make them count right?

    This recipe is super simple but so so fresh, bright, and tasty! Some sea salt, fresh pepper, chopped fresh mint, and chopped chives. So freaking simple and good. And honestly, my kids gobble these up when we make them in the summer. I always bring them to the beach, snack time at the library, all the places you guys.

    bread with butter and cucumbers and seasonings

    Dainty English Cucumber Sandwiches

    Ok, so traditionally these English cucumber sandwiches are cut into dainty little finger tea sandwiches. I usually just take some pretty cookie cutters if I'm making these for a tea party or brunch or party and cut them up that way- easy peasy.

    If I'm just making these at home- way more realistic- I definitely just make them like a normal sandwich. Crusts on for sure. Who has the time to cut them every time? More often than not though, my daughter will cut them with her little cookie cutters anyways. So either way we have some fun sandwiches to take out.

    sliced bread with cucumbers and mint

    Alternatives

    So if you don't want to use butter or just want something different to try, definitely try using chive and onion cream cheese instead. You can also use plain cream cheese obviously, but the onion and chive flavor is so so good! Maybe take it easy on the extra chives in this recipe but definitely keep the mint and seasonings.

    Tag us on Instagram @grabthemangos and give us a rating and review right here in the comments! And don't forget to pin and save it for next time!

    If you love these cute tasty little sandwiches, try out some of our other lunch and brunch ideas like our Tahini Walnut Granola or our Classic Gnocchi!

    stacked cucumber sandwiches with a bite in one

    English Cucumber Sandwiches

    Prep Time: 5 minutes
    Total Time: 5 minutes

    These ADORABLE super easy, simple, and tasty cucumber sandwiches are the best!  This traditional english cucumber sandwich recipe has fresh ingredients and is such a perfect appetizer or recipe for a tea party. 

    Ingredients

    • 1 English Cucumber
    • Butter, room temp
    • Sea Salt
    • Fresh Ground Black Pepper
    • Mint, finely chopped
    • Chives, finely chopped
    • Your Favorite Sliced Bread

    Instructions

    1. Put a thin layer of butter on each slice of bread.
    2. Thinly slice the cucumber up and place it on the buttered slice of bread.
    3. Add sea salt and pepper to taste and sprinkle on your mint and chives.
    4. Top with the other slice of bread and enjoy! 
    5. Option: cut the crusts off if you want! 🙂
    © CradleKitchen
    Cuisine: English / Category: Sides
    english cucumber sandwiches pinterest pin

    French Fry Dipping Sauce

    April 30, 2019

    dipping a sweet potato chip into some dipping sauce

    Ever want something better than just ketchup for your fries? This french fry dipping sauce is the absolute best and we never eat fries without it anymore. Sweet and a little spicy with a slight tangy-ness, it is so delicious- drool here.

    Fry Sauce

    Fry sauce is an actual thing in Utah and I've heard it's amazing but I've never actually had it. It's composed of mayo, ketchup, and some pickle juice apparently which sounds interesting right? If I'm ever in Utah I'll give it a go 😉

    I had actually never heard of the Utah Fry sauce when I decided to make our french fry dipping sauce. We just like yummy delicious things especially when it's dipping and dunking goodness.

    The inspiration for this dipping sauce actually came from the fact that my daughter and hubby dude are dairy free and we wanted some creamy things for our food still.

    tin foil holding sweet potato fries/chips and a dipping sauce

    French Fry Dipping Sauce

    This sauce is made up of mayo, ketchup, some sriracha for that heat kick, and some honey, rice vinegar and Worcestershire sauce for that tangy- almost smokey- sweetness. I seriously cannot get over the unique and delicious flavor of this sauce. It's crave worthy.

    We love to dip sweet potato chips and french fries in this dip especially. Now, I usually am not a fan of sweet potato fries actually. Give me real good fries any day. But with this dip, sweet potato fries are AMAZING. I mean really, really, unbelievably good. It tastes amazing with regular fries too don't worry!

    Making It

    So this is super easy and simple to make. Mix all the ingredients together in a bowl and go to town!

    Sweet potato fries/chips with a french fry dipping sauce

    Tips and Notes for French Fry Dipping Sauce

    • Ketchup- get the good kind AKA not made with corn syrup. Ketchup is super sugary if you are getting the gross regular kind. Just check the labels and try to get some that doesn't have corn syrup and has good real ingredients. The taste difference is real.
    • You can use normal vinegar or apple cider vinegar BUT rice vinegar has a really amazing tangy flavor that works the best in this sauce.
    • Mix it with a whisk or a fork for a minute or 2 to get it really thoroughly incorporated and smooth.
    • If you have the time, let it sit in the fridge in a Tupperware or container over night to get those flavors jiving real good together.

    Tag us on Instagram @grabthemangos and give us a rating and review right here in the comments! And don't forget to pin and save it for next time!

    You may also LOVE our bacon wrapped asparagus with balsamic glaze if you love this great recipe! Or try out our Shrimp Tacos that come with a creamy coleslaw recipe 🙂

    dipping a sweet potato chip into some dipping sauce

    French Fry Dipping Sauce

    Yield: 4 people
    Prep Time: 5 minutes
    Total Time: 5 minutes

    This french fry dipping sauce recipe with mayonnaise, ketchup, and couple other ingredients is so so creamy and delicious. Pair with some oven baked fries or chips and crave this spicy, sweet, and tangy sauce every time! 

    Ingredients

    • ¼ cup Mayonnaise
    • ½ tablespoon Worcestershire Sauce
    • 1 tablespoon Honey
    • 1 tablespoon Sriracha
    • 1 teaspoon Rice Vinegar

    Instructions

    1. Mix all the ingredients together in a bowl really well until smooth and creamy! 

    Sweet Potato French Fries

    1. Cut your sweet potatoes into wedges or use a slicer/spiralizer to cut thin slices like the ones pictured.  Toss in a drizzle of olive oil and salt and pepper to taste and bake at 400 for 20- 30 minutes depending on how crispy you want them.  Let them cool and enjoy!
    Nutrition Information:
    Yield: 4 Serving Size: 4 people
    Amount Per Serving: Calories: 116Total Fat: 10gSaturated Fat: 2gTrans Fat: 0gUnsaturated Fat: 8gCholesterol: 6mgSodium: 212mgCarbohydrates: 6gFiber: 0gSugar: 5gProtein: 0g

    Nutritional information is not always 100% accurate.

    © CradleKitchen
    Cuisine: American / Category: Sides
    french fry dipping sauce pin pinterest

    Super Easy Pizza Dough

    April 26, 2019

    rolled out pizza dough

    This super easy pizza dough recipe is just that, super freaking easy. We make this just about every week because, well, we love pizza and I always have these simple ingredients on hand so why not make an amazing pizza?

    Super Easy Pizza Dough

    This pizza dough only requires about 30 minutes of time and is made out of flour, water, yeast, salt, and some olive oil for greasing. That's it!

    Start with a large bowl and lukewarm water. When you are using yeast, temperature matters. Make sure the water you use is nicely warmed, not hot, and not cold. You want the yeast to be able to activate and grow to help your dough to rise properly. If the water is too hot the yeast will die, if it's too cold they can't activate and grow. Think, nice warm soaking water.

    Add the INSTANT yeast into the water and stir gently until completely dissolved and creamy looking.

    yeast dissolving in warm water

    As soon as the yeast is dissolved in the water, add the flour and salt and combine into a dough ball. This will first form a shaggy dough that you can knead into an elastic dough ball. I usually knead the dough right in the bowl to really get everything incorporated but you can then turn it onto a clean surface to knead it together too. This takes about 5 minutes of working the dough until everything is combined well.

    hand holding a pizza dough ball

    Rising Pizza Dough

    Once you've got your pizza dough to come together, take a little bit of olive oil and grease the inside of a clean bowl. Place the dough ball in and cover with a damp towel. Place on the counter near your oven in a place that gets warm but not hot. Then pre-heat the oven to 400.

    The warmth from the oven as it pre-heats will help the dough to rise quicker and easier. Just make sure the spot you placed the dough in doesn't overheat and wind up cooking.

    Leave your dough to rise for about 20 minutes (you can go longer if you want) until just about doubled in size. If you want a thinner crust, 20 minutes is definitely all you need.

    Gently take the dough out and onto a floured surface and start rolling into a nice big pizza circle. Use as much sprinkled flour as you need to prevent sticking. Make sure to use a fork to poke holes all through the dough before adding your toppings.

    little hands rolling out dough

    Pizza Topping Ideas

    • Try out our favorite pulled pork pizza- so delicious oh man!
    • Margarita Pizza- red sauce, dollops of mozzarella, and fresh basil leaves- definitely one of my favorite classics.
    • Another favorite- our homemade Basil Pesto and some goat cheese and Parmesan- seriously to die for yummy!
    • Top the classic pepperoni pizza with garlic powder, oregano, and a little basil and you have upped your pizza game right there!

    Tag us on Instagram @grabthemangos and give us a rating and review right here in the comments! And don't forget to pin and save it for next time!

    rolled out pizza dough

    Super Easy Pizza Dough

    Yield: 1 pizza
    Prep Time: 10 minutes
    Cook Time: 15 minutes
    Rising Time: 20 minutes
    Total Time: 45 minutes

    This super easy quick and crispy pizza dough recipe is amazing! Can be made fluffy or thin crust but definitely is the best recipe. Homemade and no mixer needed 🙂

    Ingredients

    • ¾ cup Warm Water
    • 1 teaspoon Instant Yeast
    • 2 cups Flour
    • 1 teaspoon Salt
    • 2 tablespoon Olive Oil , for greasing

    Instructions

    1. In a large bowl, combine the yeast and warm water and stir until dissolved and creamy looking.
    2. Add the flour and salt and mix until a shaggy dough forms.  Then knead until an elastic dough ball forms and everything is incorporated. 
    3. Pre-heat the oven to 400 and place the dough ball in a greased bowl covered with a damp cloth near the warmth of the heating oven  (like the counter next to your oven).
    4. Let it rise for at least 20 minutes. (30-40 for fluffier crust)
    5. Roll it out on a floured surface and transfer to a pizza pan.  
    6. Poke with some fork holes to let the air escape and top with your favorite toppings.
    7. Bake at 400 for 15-18 minutes. Enjoy!
    © CradleKitchen
    Category: Bread
    step by step pizza dough pinterest

    Basil Pesto with Almonds

    April 24, 2019

    jar of basil pesto sauce made with almonds

    Who doesn't want a good pesto sauce to replace that boring red sauce from the preggo jar you've been grabbing every time you make pasta? Well this recipe for basil pesto with almonds instead of pine nuts is so simple, easy, and delicious, you'll want to put it on everything.

    Basil Pesto with Almonds

    Traditional pesto sauce recipes are made with fresh basil and pine nuts, but in this recipe we use almonds. Why? I like the flavor better and honestly I can never find pine nuts for some reason. The store always has every kind of almond you can think of but for the life of me, I can never find pine nuts. Go figure. But, this recipe tastes better than any store bought pesto sauce so I'll keep my almonds thanks!

    Ok, this basil pesto with almonds sauce could not be any easier to make. If you have a blender or better yet, a food processor, you are good to go. Through everything in there and let it do the work for you. Amazing pesto ready for anything in 5 minutes.

    close up of creamy basil pesto with almonds

    Pesto Ingredients

    So making this sauce is super easy and quick right? Let's talk what makes it spectacularly next level. As with all good recipes, the ingredients need to be great to make the recipe everything and then some.

    Olive Oil

    Olive oil is a tricky ingredient. Most olive oils out there are not real olive oil. They are blends of other crappy oils that are sold to you as olive oil. If you want really good, authentic olive oil, look at the label. If the oil is from multiple different places- red flag- don't get it. You want to buy olive oil that says it's made in one place. Otherwise you are getting a mixture of oils from all over- not pure, real, olive oil.

    Always buy "extra virgin." Don't bother with virgin, light, or any other labels that honestly don't mean very much at all. If you can find one with a label that says EVOO made in Australia or Chile, that's the one to get. Australia has the highest standards for quality olive oil and they do not allow mix over from previous harvests. It's going to be fresh and authentic from both countries.

    Garlic

    Please. please, don't settle for minced garlic in a jar. Get fresh cloves of garlic and throw them in the blender or food processor. It's simple and easy and makes SUCH a big difference.

    Jar garlic is very very sour tasting compared to the aromatic and wonderfulness that is fresh garlic.

    Almonds

    I love to toast my almonds a little in the oven before adding them to the blender for the sauce. I think it adds a bit more flavor. Simply pre-heat the oven to 400 and toast them up for 5-10 minutes. Or, better yet, put them in your toaster oven for 5 minutes or so on the toast setting. But, this part of the process is totally optional. You can also buy pre-toasted almonds if you want.

    I would get the sliced almonds. They tend to blend better without leaving chunks behind.

    Basil Pesto with Almond Uses

    This basil pesto with almond sauce is definitely amazing on more than just some fresh pasta. We use it on naan bread pizza (omg YUSS please), our homemade Gnocchi recipe, grilled chicken, even some toast with tomato and mozzarella (hello yummm). There are so many ideas for a good pesto sauce like this one.

    Tag us on Instagram @grabthemangos and give us a rating and review right here in the comments! And don't forget to pin and save it for next time!

    If you LOVE this recipe, try out our easy homemade Naan bread to make a pesto pizza with or our homemade gnocchi recipe to slather in pesto 🙂

    jar of basil pesto sauce made with almonds

    Basil Pesto with Almonds

    Prep Time: 5 minutes
    Total Time: 5 minutes

    This homemade easy basil pesto sauce recipe made with almonds will be your new favorite for pasta, pizza, chicken, and any other pesto ideas you have! Only 5 minutes and delicious pesto for your meals.

    Ingredients

    • 2 cups Fresh Basil Leaves
    • ½ cup Extra Virgin Olive Oil
    • ½ cup sliced Almonds
    • 2-3 Garlic Cloves
    • Salt and Pepper, to taste
    • Grated Parmesan , to top

    Instructions

    1. In a blender or food processor, add all ingredients and puree until smooth.  That's it!! You're amazing and you just made pesto at home 😉
    Nutrition Information:
    Yield: 8 Serving Size: 1 Servings
    Amount Per Serving: Calories: 165Total Fat: 17gSaturated Fat: 2gTrans Fat: 0gUnsaturated Fat: 14gCholesterol: 1mgSodium: 49mgCarbohydrates: 2gFiber: 1gSugar: 0gProtein: 2g

    Nutritional information is not always 100% accurate.

    © CradleKitchen
    basil pesto with almonds pinterest

    Bacon Wrapped Asparagus with Balsamic Glaze

    April 19, 2019

    dish of bacon wrapped asparagus with balsamic glaze brushed over the top

    If you are looking for a quick, super easy, and extra fancy sounding appetizer to throw into your meal plan, these bacon wrapped asparagus with balsamic glaze are it! Wrap em, glaze em, and bake em until they're delicious and crispy.

    Bacon Wrapped Asparagus

    Doesn't everything get better with bacon? I love asparagus by itself- ok that means roasted with butter and garlic of course- but with bacon, it's like it leveled up 10 levels.

    Using fresh asparagus and a good brand of bacon is always a good idea. So if you are a crispy crispy kind of bacon lover, definitely use the normal sliced bacon. We love thick sliced bacon so that's what we use to make these. It works great, but it has a crispy outside and chewier inside so it definitely comes down to personal preference.

    Make sure the asparagus has the butts cut off. By pressing the tip of the asparagus to the end of a piece of bacon, begin to wind the bacon around the asparagus until you get to the bottom. Really firmly pressing it into the asparagus will help it to stick.

    spear of asparagus wrapped in bacon with balsamic glaze brushed over it

    Balsamic Glaze

    Bacon wrapped asparagus on it's own is amazing right? Bacon wrapped anything is amazing. But adding this balsamic glaze is just so so over the top yummy. And let's be real, now it's fancy.

    Balsamic glaze is so easy to make. Using balsamic vinegar and a sweetener, my favorite is some honey. Maple syrup or brown sugar work well too.

    Mixing up the honey and balsamic vinegar you've got yourself a balsamic glaze. Balsamic vinegar, honestly, should be a staple in your pantry. You can make dressings, glazes, and so many dishes become amazing with the addition of some balsamic.

    Brush the balsamic glaze right onto your bacon wrapped asparagus and pop them in the oven to get crispy and delicious. At 425, these spears of goodness will get cooked nicely. Cook them up for about 12 minutes and then flip them over for another 10-12 minutes. If you want them crispier after that, let them keep cooking for another couple of minutes.

    If you want a little more balsamic flavor, feel free to just drizzle a little more on after they are done baking.

    Storing and Re-heating

    The whole thing with bacon is you want it to be crispy vs. soggy right? So these can definitely be made ahead of time, but don't scrimp on re-heating. Use the oven to reheat them at 425 for a few minutes again or even a toaster oven works super well. Good things are always better in the oven vs. the microwave.

    Tag us on Instagram @grabthemangos and give us a rating and review right here in the comments! And don't forget to pin and save it for next time!

    If you LOVE this recipe, try out our watermelon goat cheese salad or if you want some more savory recipes try out our zesty shrimp tacos!

    dish of bacon wrapped asparagus with balsamic glaze brushed over the top

    Bacon Wrapped Asparagus with Balsamic Glaze

    Yield: 4 servings
    Prep Time: 5 minutes
    Cook Time: 24 minutes
    Total Time: 29 minutes

    This bacon wrapped asparagus made in the oven with a honey balsamic glaze is so crispy and delicious!  Keto friendly, this recipe is a great side dish to make quickly and easily. 

    Ingredients

    • Asparagus
    • Bacon, thick cut or normal
    • ¼ cup Balsamic Vinegar
    • 3 tablespoon Honey

    Instructions

    1. Pre-heat the oven to 425.
    2. Wrap one piece of bacon per on stalk of asparagus starting at the tip and winding all the way down to the bottom.
    3. Place asparagus on a baking sheet on top of tin foil.
    4. Combine the honey and balsamic vinegar together well in a small bowl or mason jar.
    5. Brush the glaze on the bacon wrapped asparagus.
    6. Place in the oven for 12 minutes, then flip and bake for another 10-12 minutes until it's as crispy as you want.
    7. Optional: drizzle a little more balsamic glaze over the finished bacon wrapped asparagus if you want! 
    Nutrition Information:
    Yield: 4 Serving Size: 3 spears
    Amount Per Serving: Calories: 80Total Fat: 1gSaturated Fat: 0gTrans Fat: 0gUnsaturated Fat: 1gCholesterol: 3mgSodium: 57mgCarbohydrates: 17gFiber: 0gSugar: 16gProtein: 2g

    Nutritional information is not always 100% accurate.

    © Grab the Mangos
    Category: Side Dishes
    pinterest bacon wrapped asparagus with balsamic glaze recipe

    Refreshing Watermelon Goat Cheese Salad

    April 12, 2019

    pouring red wine vinaigrette into a watermelon salad

    This honestly is the most refreshing watermelon goat cheese salad with walnuts and sometimes fresh mint in the mix.  Insert heart eyes and drooling here.  Top this spring mix off with a homemade red wine vinaigrette and you've got a summer staple here.

    watermelon goat cheese and walnuts in a salad bowl

    Refreshing Watermelon

    I stumbled on the idea of watermelon salad last summer.  All I had was watermelon in my fridge, and being ridiculously pregnant, I of course only wanted watermelon because what the heck else do you eat when you're 36 weeks preggo.  This salad helped to switch things up and get some other ingredients in my belly.  But everyone else wound up loving it as well.

    Watermelon has so many good things going on.  First of  all, it is incredibly hydrating.  Got a hang over in Mexico?  Start drinking your watermelon juice people!  It helps to lower blood pressure, is jam packed with vitamins that are especially heart healthy, and my favorite- watermelon is so good for your skin.

    Watermelon Goat Cheese Salad

    watermelon salad with spring mix and goat cheese being tossed

    The goat cheese in this salad is what makes the dish in my opinion.  The vinaigrette gives that robust flavor and acidity, the watermelon gives some sweetness of course, and the goat cheese brings it all together with a nice creamy texture as it gets tossed in.  You can substitute Feta cheese in place of the goat cheese but you won't get the same creaminess in the mixture.  Still tasty though!

    Watermelon Goat Cheese Salad Ideas

    A lot of watermelon salads have fresh chopped mint leaves thrown in as well.  I love the addition of mint in a good summer salad like this one, but I have found that it's 50-50 when it comes to everyone else liking it.  It can come on strong, so make sure if you add it in, do it a little at a time until you get the right amount for your taste buds.

    Walnuts are my favorite and I always have the Costco sized bag of them in my pantry.  They go PERFECTLY in this refreshing watermelon salad.  The walnuts add a bit of a crunch which is really nice to have in a dish that is overall, pretty soft and watery (ya know- from watermelon).

    Making and Storing

    This salad is super easy to throw together.  If you are making it for a party or get together, make it right beforehand.  The watermelon tends to leak water which can make the salad watery if you leave it out at room temp for too long.  If you pop it in the fridge, it helps a lot but make sure to toss lightly or add the watermelon in right before you are about to actually eat it.

    This salad will last for about a week in the fridge but honestly we usually gobble it up the day we make it.  So so yummy!  Enjoy your summer with this amazing watermelon goat cheese salad!

    If you love this salad recipe, try out some of our other apps like our Deep Dish Pizza Cups or if you want more salad ideas, try our Creamy Cilantro Sauce for everything! You won't be disappointed 😉

    Be sure to tag us @cradlekitchen on Instagram if you made this recipe, or let us know in the comments! We love hearing from you 🙂

    pouring red wine vinaigrette into a watermelon salad

    Refreshing Watermelon Goat Cheese Salad

    Yield: 4
    Prep Time: 10 minutes
    Cook Time: 5 minutes
    Total Time: 15 minutes

    This amazing watermelon salad recipe with goat cheese and walnuts is so refreshing.  Add in mint, cucumber, basil, or whatever other ideas you have and top it off with our red wine vinaigrette for an amazing summer salad recipe! 

    Ingredients

    Watermelon Goat Cheese Salad

    • 1 Large Bowl Spring Mix Salad , Spinach, Arugula, Greens
    • 2 cups Diced Watermelon
    • handful Walnuts, optional-reccomended
    • ½ cup Crumbled Goat Cheese

    Red Wine Vinaigrette

    • ⅓ cup Olive Oil
    • 1 tablespoon Honey
    • 2 tablespoon Red Wine Vinegar
    • Salt and Pepper, to taste
    • 1 teaspoon Onion Salt

    Instructions

    1. In a large salad bowl, toss the greens, goat cheese, walnuts, and watermelon.
    2. In a mason jar shake up all the vinaigrette ingredients together until well combined. 
    3. Pour the red wine vinaigrette over the salad and toss.  Enjoy 🙂
    © CradleKitchen
    Category: Side Dishes

    Watermelon goat cheese salad with red wine vinaigrette

    Carrot Cake Cupcakes With Cream Cheese Frosting

    April 10, 2019

    carrot cake cupcakes with cream cheese frosting on a marble countertop

    It's that time of year when everyone wants everything bunnies, pastels, and carrots. It's springtime! And the perfect way to celebrate is these made-from-scratch classic carrot cake cupcakes with the BEST cream cheese frosting! So easy to make, it will quickly become one of your favorite carrot cake recipes!

    Carrot cake cupcakes with cream cheese frosting on a marble counter top

    ingredients for carrot cake

    ingredients for carrot cake on a cutting board. Carrots, milk, flour, spices, sugar, baking soda, olive oil, and apple cider vinegar.

    This recipe has two contributing factors, olive oil and buttermilk! Olive oil goes so well with the flavors of carrot cake which is basically a spice cake, it has strong flavors so the olive oil will not overpower the cupcakes. Plus using olive oil also makes this cake the tiniest bit more healthy, since olive oil has less saturated fats than most other oils.  But what olive oil really brings to this cake is moisture and texture. The buttermilk gives it a little tang that goes well with the spices of the cake as well as giving the cupcakes a softer texture. I made my own buttermilk in this recipe since I know a lot of people won't have buttermilk on hand. You can easily make your own by mixing vinegar with milk, in this case, I used apple cider vinegar because the flavors go so well with the cinnamon, allspice, nutmeg, and ground cloves that are added to carrot cake.

    How to make carrot cake batter?

    First things first, pre-heat the oven to 375 and then peel and shred up your carrots. This recipe uses about 2-3 carrots for about 2 ½ cups of shredded carrots. Use a small grater side of the box grater to finely grate carrots.

    Then make your buttermilk by mixing milk and apple cider vinegar. Set that aside as well.

    From here you do all the normal batter-making things. Mix the dry ingredients in a bowl (flour, baking soda, salt, spices). Mix the wet ingredients in a bowl (sugar, eggs, oil, vanilla). Right before combining both dry and wet ingredients, add in the buttermilk. Then you can proceed to mix the dry ingredients into the wet mixture. Fold in the shredded carrots and boom, you're done making carrot cake batter. Easy peasy right?

    Carrot cake mix in a clear glass bowl with a whisk on a cutting board

    Now prepare your cupcake tin with cupcake liners and fill about ¾ the way full. Next, bake for 20-25 minutes until a toothpick inserted in the middle comes out clean.

    carrot cake cupcakes in a muffin tin with muffin tin liners on a cutting board

    How to make Cream Cheese Frosting?

    Nothing goes better with carrot cake than cream cheese frosting! I mean seriously, is there anything better? I'm not gonna lie- after frosting the cupcakes, I definitely ate the rest of this frosting with a spoon. Not even mad about it either. Live a little.

    ingredients for frosting. Sugar in a glass bowl, a package of Philadelphia cream cheese, unwrapped butter, vanilla. and a teaspoon on a cutting board

    Use block full-fat cream cheese! Reduced-fat cream cheese and cream cheese spread has higher liquid content and can result in softer, runnier frosting. So use a block of full-fat cream cheese.

    Make sure butter is softened. Butter should be softened before beating it with cream cheese or you may end up with lumpy frosting. Take the butter out of the refrigerator about an hour before making frosting to let it get to temperature. Or, use the correct microwave setting to soften butter. (Consult your manual.)

    Do not over-beat. Make sure not to beat the cream cheese and sugar for too long. Powdered sugar actually helps bring the liquid out in the cream cheese so beating it for too long will result in runnier frosting. Beat butter and cream cheese first, and then add powdered sugar and beat just until incorporated. 

    Cream cheese frosting in a metal mixing bowl with the mixer whisk

    How to store carrot cake cupcakes

    Frosted Carrot Cake Cupcakes should be stored in the refrigerator because the frosting is dairy-based and should not be left at room temperature for longer than a couple of hours. Place frosted cupcakes in an air-tight container with a lid and keep refrigerated. 

    carrot cake cupcakes with cream cheese frosting on a marble counter top

    Let us know if you made this recipe by tagging us on Instagram @grabthemangos and #grabthemangos we love seeing all the things you've tried!

    Connect with Grab The Mangos!

    Be sure to click below and follow me on my social media, so you never miss a recipe.

    • Facebook
    • Pinterest
    • Instagram
    Carrot Cake Cupcake with cream cheese frosting on a marble counter top

    Carrot Cake Cupcakes

    Yield: 18 cupcakes
    Prep Time: 20 minutes
    Cook Time: 25 minutes
    Cooling Time: 20 minutes
    Total Time: 1 hour 5 minutes

    These made from scratch, easy, moist carrot cake cupcakes with homemade cream cheese frosting are absolutely delicious! 

    Ingredients

    Super Moist Carrot Cake Cupcakes

    • 2 ½ cups Shredded Carrots, about 2-3 carrots
    • 2 cups Flour
    • 2 teaspoon Baking Soda
    • 2 Eggs
    • 1 ¼ cups Sugar
    • ½ cup Olive Oil
    • ¾ cups Milk
    • 2 tablespoon Apple Cider Vinegar
    • pinch salt
    • 3 teaspoon Cinnamon
    • 2 teaspoon All Spice
    • 1 teaspoon Nutmeg
    • ¼ teaspoon Ground Cloves
    • 1 teaspoon Vanilla

    Cream Cheese Frosting (double recipe if using a piping tip)

    • 8 oz Cream Cheese
    • ½ cup butter, softened
    • 3 cups Powdered Sugar
    • 2 teaspoon Vanilla

    Instructions

    Super Moist Carrot Cake Cupcakes

    1. Preheat the oven to 375.
    2. Shred about 2-3 carrots with the small side of a box grater and set aside. 
    3. In a glass measuring cup, combine the milk and apple cider vinegar and set aside. 
    4. In a mixing bowl combine the dry ingredients- flour, baking soda, salt, and spices.  
    5. In a separate large mixing bowl combine the wet ingredients- eggs, sugar, vanilla, olive oil, and the buttermilk mixture. 
    6. Pour the dry mixture into the wet slowly mixing together well.
    7. Fold in the shredded carrots thoroughly. 
    8. Prepare your cupcake tin with cupcake liners and fill about ¾ full.  
    9. Bake for 20-25 minutes until a toothpick inserted in the middle comes out clean. 

    Cream Cheese Frosting (see notes)

    1. In a large bowl, beat the butter, vanilla, and cream cheese until silky.
    2. Slowly, 1 cup at a time, add in the powdered sugar until fully combined. 
    3. Frost and enjoy!

    Notes

    I used a Wilton 1M piping tip to frost these cupcakes. If you plan on using a piping tip instead of just spreading it on you will want to double the frosting recipe as it tends to use more frosting.

    © Grab the Mangos
    Category: Dessert


    Creamy Everything Cilantro Sauce

    April 5, 2019

    a creamy, healthy, mustard cilantro sauce perfect for everything

    Cilantro. Love it or hate it? I'm assuming you love it because you're here. Well this creamy cilantro sauce is literally (and yes I do mean literally) good on everything- all kinds of tacos, burritos, burgers, chicken sandwiches, to dip grilled chicken in, for enchiladas, the list is endless. It is amazing and that's all there is to it!

    We have had to go mostly dairy free recently and so our enchilada, taco, and burrito sour cream and cheese toppings have disappeared. Yes, there were tears. But then I came up with this creamy cilantro sauce for EVERYTHING, and between this sauce and our homemade sriracha yum yum sauce, I honestly don't think we'd go back if we could. These sauces are better than CHEESE. That's how good they are.

    Cilantro Sauce Ingredients

    This cilantro sauce has a secret ingredient- whole grain mustard. In a pinch regular dijon mustard will work fine BUT to make this sauce as incredible as we know it is, get the whole grain mustard ASAP. It is amazing on sandwiches, in dips and sauce like this, and just adds so much extra flavor wherever you use it.

    Let's talk mayo. There is only one tablespoon of mayo in this sauce. A lot of people think that mayo is super bad for you when actually it's a delicate dance with this condiment. Basically, mayonnaise has very similar benefits to avocados. Loaded with healthy fats and oils, the trick is making sure you don't cross the line into just a ton of calories. About a tablespoon (ahem- like what's in this recipe) is actually very good for you and doesn't cross that calorie line. So it's the perfect creamy ingredient.

    Making the Sauce

    This sauce whips up in about 5 minutes making it even more of a staple in our house. I like to use my bullet blender for this sauce and, let's be honest, pretty much everything else that needs blending. If you don't have one, get one! So worth it, not that expensive, and can be used everyday. The bullet blender is smaller- ideal for my small SMALL kitchen. It's light weight and makes 1-2 servings vs. an entire pitcher that will just go bad. All in all, I've been using mine for 6 years now and I still love it!

    To make this cilantro sauce, place all the ingredients in the blender and puree until fully blended and delicious. I would definitely salt and pepper it last to make sure you have the right amount for your taste buds.

    That, my friends, is all you have to do! Drizzle over fish tacos, shrimp tacos, chicken or beef tacos, burritos, sandwiches, enchiladas, EGGS even. Oh my gosh the ideas for this sauce are all good and endless. Pour this stuff on everything and be a happier person for it. This creamy cilantro sauce will change your life.

    jar of cilantro sauce next to red peppers and whole grain mustard

    Storing Your Sauce

    This sauce will store in a mason jar or Tupperware in the fridge for about 2 weeks.

    If you are super into making all your foods amazing with homemade sauces, check out and try our Maple Chili BBQ Sauce. Or for something sweeter, our Strawberry Sauce- perfect for breakfast foods.

    Tag us on Instagram @grabthemangos and give us a rating and review right here in the comments! And don't forget to pin and save it for next time!

    a creamy, healthy, mustard cilantro sauce perfect for everything

    Everything Creamy Cilantro Sauce

    Yield: 8 oz
    Prep Time: 5 minutes
    Total Time: 5 minutes

    This creamy healthy cilantro sauce recipe is amazing on everything! From fish tacos to veggies and salads to bean and rice- add it to every appetizer and meal. 

    Ingredients

    • 1 bunch Fresh Cilantro, ~1 cup
    • 1 tablespoon Whole Grain Mustard
    • 1 tablespoon Mayo
    • 2 teaspoon Rice Vinegar
    • ½ cup Water
    • 1 teaspoon Honey
    • 1-2 cloves Garlic, to taste
    • Salt and Pepper, to taste

    Instructions

    1. Place all the ingredients in a blender and puree.  That's it, you're all done and you have an amazing cilantro sauce for everything! 
    Nutrition Information:
    Yield: 8 Serving Size: 8 oz
    Amount Per Serving: Calories: 18Total Fat: 1gSaturated Fat: 0gTrans Fat: 0gUnsaturated Fat: 1gCholesterol: 1mgSodium: 72mgCarbohydrates: 1gFiber: 0gSugar: 1gProtein: 0g

    Nutritional information is not always 100% accurate.

    © CradleKitchen
    Category: Sides
    creamy cilantro sauce for everything pinterest


    Easy Buttermilk Naan

    April 1, 2019

    Buttermilk Naan bread fried in Ghee and seasoned

    Who wouldn't like some fresh and easy buttermilk naan bread right in their own home whenever they want? This Indian bread is so yummy and versatile. We eat it all the time with soups, turned into pizza, as a wrap, and mostly as a dipper for hummus- super yummy! Whatever you do with it, it's amazing and a super simple recipe right here.

    Buttermilk

    Naan traditionally is made with a acidic dairy fat (like yogurt or buttermilk) to give it that amazing flavor and chewiness. This Naan recipe has a buttermilk mixture that you make right in the recipe- no need to run out to get buttermilk, yay!

    By combining the apple cider vinegar and the milk, you create a buttermilk mixture that will give this naan recipe a crazy amount of heavenly flavor and texture. Seriously, so good!

    So what does buttermilk actually do? It helps to give the bread flavor sure, but one of the best things it helps to do in breads is tenderize the gluten. The acidity that comes from the buttermilk does this which helps give the bread more body and a softer texture. It also helps the bread to rise. Win win!

    stacked buttermilk naan bread with onion salt and feta cheese

    Easy buttermilk naan dough

    Using a glass measuring cup, mix the milk and apple cider vinegar together to form the buttermilk and set aside. Then, in a nice big mixing bowl, combine the warm water, yeast, and sugar. The sugar helps the yeast to do it's job even better by being a food for the yeast. It also, of course, adds flavor. Stir and let sit until it becomes fully dissolved and creamy looking.

    Add the flour plus one egg and a tablespoon of Ghee or olive oil (our preference is ghee) and the buttermilk to the yeast and sugar mixture and combine to make a dough ball. Place the dough ball into a greased bowl and cover with a damp towel to rise until doubled in size (about 30 minutes).

    As soon as the dough has risen, punch it down- yes literally make a fist and punch that sucker right back down. Take the dough you just beat up out of the bowl and divide into 6-8 pieces.

    buttermilk naan dough divided

    Shaping naan dough

    On a clean, lightly floured surface, take a piece of dough and roll it out flat. We like ours to be larger and thinner, because we like the crisp edges and use it for wraps. But, depending on what you have in mind for your naan bread, you may want to keep it a little smaller and thicker for things like naan dippers and hummus.

    Once you've rolled them all out, heat some ghee or olive oil in a cast iron skillet. Again our preference is ghee for the flavor but olive oil is super good too if that's more your jam. Now, a normal frying pan works as well, BUT if you don't have a skillet and just aren't sure what to do with one- trust me it will change your life. I had no clue what to do with mine when I first got it. As soon as I got one, though, it became very clear why they are an ESSENTIAL kitchen tool for so many. They can do it all believe me, and the flavor they give the dish is spectacular.

    easy buttermilk naan bread frying

    Frying Naan Bread

    So we LOVE cooking and baking with ghee. My husband and kids have some dairy intolerance's but ghee seems to work really well still. However, you can definitely sub in some olive oil if you don't have ghee on hand or just aren't feeling it.

    Heat the ghee or olive oil in a skillet on medium heat. Carefully place one of your buttermilk naan dough pieces into the pan to fry for about 1-2 minutes on each side or until you start to see it bubble up and get golden brown.

    Once all your naan has been cooked you can top it with seasonings like onion salt, garlic, or even just salt and pepper, or hey leave it plain! Either way, enjoy this amazing and easy to make buttermilk naan bread 🙂

    easy buttermilk naan bread

    If you LOVE this easy buttermilk naan recipe and want more bread eat, try our Oatmeal Honey Bread Machine Bread. Or if you want something to go with this amazing Naan bread, try out our Split Pea Soup. YUM!

    Buttermilk Naan bread fried in Ghee and seasoned

    Easy Buttermilk Naan

    Prep Time: 10 minutes
    Cook Time: 2 minutes
    Rising Time: 30 minutes
    Total Time: 42 minutes

    This easy Indian Naan Bread recipe made with buttermilk and yeast will rock your world! Made with no yogurt but loads of flavor, use it for pizzas, wraps, complete quick easy dinners and meals, dip in hummus.  So many ideas to use naan bread for! 

    Ingredients

    • ½ cup Water , Luke Warm
    • 2 teaspoon Yeast
    • 1 teaspoon Sugar
    • ¼ cup Whole Milk
    • ½ tablespoon Apple Cider Vinegar
    • 2 ½ cups All Purpose Flour
    • 1 Egg
    • 2 tablespoon Ghee or Olive Oil, plus more for frying

    Instructions

    1. In a glass measuring cup mix together the whole milk and apple cider vinegar and set aside.
    2. In a nice big mixing bowl, combine the water, yeast and sugar and stir until fully dissolved and creamy looking.
    3. Add the flour, egg, ghee (or olive oil), and the buttermilk mixture from earlier and combine to form your naan dough.
    4. Place the dough ball in a greased bowl and cover with a damp cloth to rise until doubled. (about 30 minutes)
    5. Punch the dough down once doubled and divide into 6-8 pieces. 
    6. Roll each piece out flat on a clean and lightly floured surface.
    7. Fry each piece in a hot skillet with ghee or olive oil over medium heat.  About 1-2 minutes each side or until golden brown.
    8. Top with whatever seasonings or toppings you love best and enjoy as dippers in hummus, naan bread pizza, or whatever other ideas you can come up with! 
    © CradleKitchen
    Cuisine: Indian / Category: Sides
    buttermilk naan bread recipe pinterest

    3 Ingredient Vegan Fudge Brownies

    March 25, 2019

    3 ingredient vegan fudge brownies, easy recipe, no flour, no eggs, dairy free

    3 ingredient vegan fudge brownies are healthy, dairy free, flour free, egg free, and refined sugar free but don't let any of that fool you into thinking they must taste like cardboard. These brownies are like fudge and just melt in your mouth. They are easy peasy to whip up in only 30 minutes and honestly, we make them more than regular brownies at this point!

    3 ingredient vegan fudge brownies.  dairy free. egg free. flour and gluten free. easy and fast recipe.

    Why make 3 ingredient vegan fudge brownies?

    My 3 year old daughter, Darby, recently found out she couldn't eat dairy anymore. Super sad right? My husband is lactose intolerant, but he would still eat a gallon of ice cream and say it was worth it when he felt sick. We normally would have dairy every single day in some way so this was definitely a big change, probably for the better for all of us. She is fine eating it in baked goods so our normal brownie recipe was actually fine to eat but, well, we eat a LOT of sweets which we love and also try to curb as much as we can. So, after craving brownies one night but realizing we did not need the extra sweets that night, I went in the kitchen to figure out a recipe that just didn't have dairy or as much sugar and flour. Let me tell you, I am so glad I did that because these brownies are no guilt heaven. (I don't think you should ever feel guilty about dessert anyways but these are nice for cutting some sugar out 😉 )

    3 ingredient vegan fudge brownies, dairy free, egg free, flour free, sugar free.  Stacked fudge brownies.

    Making the brownies:

    Ok so let's whip these up! Mash up 2 or 3 over ripe bananas. Bananas have the most flavor and natural sugars built up when they are in that turning brown stage so make sure to let them ripen before using them in baking. Add in the cocoa powder and your favorite nut butter. Our favorite one that we always have on hand is almond butter but we have also used peanut butter.

    We like to add in some honey or maple syrup but it's not a necessity. These brownies still taste amazing and fudgey without it. Spread the brownie mixture in a greased 9 inch baking pan. You can use coconut oil, olive oil, or if you aren't actually dairy free or vegan, a little butter to grease the pan. If you don't want any of these some parchment paper on the bottom would be a good idea just to be safe- no one like's stuck to the bottom brownies.

    Bake them in the oven at 350F for about 20 minutes or until a toothpick inserted in the middle comes out clean. Let them cool before digging in if you can wait.

    3 ingredient vegan fudge brownies.  egg free, dairy free, flour and gluten free. 30 minutes fast and easy.

    Chocolate Ganache:

    We like to take these vegan fudge brownies to double fudge level with a covering of chocolate ganache. Heat ½ cup of coconut milk in the microwave for about a minute. Add in a cup of chocolate chips and stir until melted completely and silky smooth.

    We use a dairy free, vegan, version of chocolate chips that taste amazing (linked). And of course the coconut milk instead of cream in this ganache keeps it that way. But if you don't care about that, the same measurements work for regular chocolate chips and cream!

    This optional ganache really bring that chocolatey flavor front and center which is why we love to add it.

    Pour the coconut milk ganache (you can use cream instead if you prefer), right over top of the brownies and let it set for a couple hours in the fridge before cutting and eating.

    coconut milk ganache poured over easy vegan brownies.

    If you love these brownies and are looking for a dairy free dinner for after dessert 😉 try out our dairy free, gluten free, Quiche with Sweet Potato Crust that was featured on the Feed Feed. Or if you just want to try out some regular, but beyond delicious, brownies- try out our Skillet Cheesecake Brownie Swirl. Enjoy!

    Tag us on Instagram @grabthemangos and give us a rating and review right here in the comments! And don't forget to pin and save it for next time!

    3 ingredient fudge brownies vegan and healthy recipe pinterest
    3 ingredient vegan fudge brownies, easy recipe, no flour, no eggs, dairy free

    3 Ingredient Vegan Fudge Brownies

    Yield: 1 pan
    Prep Time: 5 minutes
    Cook Time: 20 minutes
    Total Time: 25 minutes

    These homemade 3 ingredient vegan fudge brownies are the easiest recipe to make from scratch! With cocoa powder, bananas, and your favorite nut butter (peanut butter, almond butter, etc) these brownies are healthy too.  YUM!

    Ingredients

    Brownies

    • 2-3 Bananas, over ripe
    • ⅓ cup Nut Butter, (almond butter, peanut butter, etc.)
    • ¼ cup Cocoa Powder
    • 3 tablespoon Maple Syrup or Honey, Optional

    Ganache (optional)

    • ½ cup Coconut Milk
    • 1 cup Chocolate Chips

    Instructions

    Brownies

    1. Pre-heat oven to 350 F.
    2. Mash bananas in a mixing bowl.
    3. Add in the cocoa powder and your favorite nut butter (and honey or maple syrup if you are adding that too). Mix together well.
    4. Spread evenly in a 9 inch baking pan.
    5. Bake for 20 minutes or until a toothpick comes out clean. 
    6. Let cool before cutting for best results.

    Ganache (optional)

    1. Heat coconut milk in the microwave for about 1 minute.
    2. Add chocolate chips to hot coconut milk and stir until fully melted and silky smooth.
    3. Pour over the brownies and let chill for a couple hours in the fridge before cutting into.  Enjoy!

    Recommended Products

    As an Amazon Associate and member of other affiliate programs, I earn from qualifying purchases.

    • Wilton Perfect Results Premium Non-Stick 8-Inch Square Cake Pans, Set of 2
      Wilton Perfect Results Premium Non-Stick 8-Inch Square Cake Pans, Set of 2
    Nutrition Information:
    Yield: 1 Serving Size: 1 pan
    Amount Per Serving: Calories: 2047Total Fat: 115gSaturated Fat: 64gTrans Fat: 0gUnsaturated Fat: 43gCholesterol: 31mgSodium: 257mgCarbohydrates: 274gFiber: 27gSugar: 194gProtein: 27g

    Nutritional information is not always 100% accurate.

    © Miriam Reeves
    Cuisine: American / Category: Dessert

    Homemade Cinnamon Sugar Bagels

    March 19, 2019

    homemade cinnamon sugar bagel

    Homemade cinnamon sugar bagels. Mmm can you think of anything better?! This recipe is simple and easy and a great weekend baking project. Get the kids involved if you have them, by letting them form the bagel shapes and add their own toppings and you have a fun activity for a cold or rainy day with delicious results!

    Traditional Bagels:

    Ever wondered where these amazing breakfast commodities come from? Or maybe you know the general place but not much else? Well bagels are traditionally a Jewish thing originating in Poland and actually go back as far as the 17 century. They are formed from a yeast and wheat dough (like this recipe), and formed by hand. You boil them first and then bake them.

    Commercial bagels are usually steamed instead of boiled but when you're making them at home, I think traditional is always the way to go plus who has a commercial steamer in their house just ready to go?! A pot of boiling water is much more likely.

    So even though this is a pretty traditional bagel recipe, the toppings can be anything but. We LOVE our cinnamon sugar bagels. Warm, fresh out of the oven, and that classic sweet cinnamon caramelized on top- YES PLEASE!

    homemade cinnamon sugar bagels

    You can definitely go a different route, though, if cinnamon sugar isn't your thing. Honestly, make a few different toppings and do them all so you can have a different one for every mood.

    • Poppy Seeds
    • Everything Bagels- so yummy!!
    • Sesame Seeds or Black Sesame
    • Sea Salt
    • Onion Salt
    • etc...

    Homemade Bagels:

    Let's make some bagels! This recipe is honestly, simple, easy, and to the point. It's a basic wheat and yeast dough. So:

    • Make the dough.
    • Knead to form gluten.
    • Rise.
    • Form the shape.
    homemade cinnamon sugar bagels

    The part that's different and unique to bagels is the next step. Boiling the bagels in a sugar water. The longer you boil, the chewier the crust will turn out after baking them. The boiling water can have malt syrup, molasses, or even honey. This recipe calls for brown sugar to enhance that cinnamon sugar caramelized flavor and help them brown up beautifully in the oven, but feel free to switch it up with the same measurement. And don't forget the baking soda 😉 This helps them to get really soft and fluffy.

    Bagel Dough and Shaping:

    When you've made the dough, knead it for about 20 minutes or so until it doesn't break so easily (window pane test works here- stretch the dough between your fingers and if it rips right away keep going a little more until it stretches instead of breaking). Let it rise for about 2 hours or until it's doubled in size. I always cover the bowl in plastic wrap to really trap those gasses from the yeast in there well helping all the science-y stuff happen that makes a good bread.

    Once that is done, punch the dough down- yes literally punch it down with your fist, and you can start cutting into pieces and forming that classic bagel shape.

    homemade cinnamon sugar bagels

    Get your boiling water going and the oven preheated to 425 while you are having fun making bagel shapes and getting toppings ready.

    Boil the bagels for about a minute on each side and remove with a slotted spoon.

    Dip the tops of the bagels into the toppings of choice (our favorite is the cinnamon sugar of course). Once they are lined up on a baking sheet with parchment paper, bake in the oven for 15-20 minutes until they start to get golden brown.

    homemade cinnamon sugar bagels

    Enjoy eating these delicious homemade bagels up!

    Tag us on Instagram @grabthemangos and give us a rating and review right here in the comments! And don't forget to pin and save it for next time!

    If you like this recipe try out our homemade Oatmeal Honey Bread Machine Bread!

    homemade cinnamon sugar bagel

    Homemade Cinnamon Sugar Bagels

    Prep Time: 2 hours 40 minutes
    Cook Time: 20 minutes
    Total Time: 3 hours

    This simple easy homemade bagel recipe will be your go to breakfast! Make sandwiches, cover in cream cheese, eat plain... whatever you're feeling! Choose your own toppings like our classic cinnamon sugar (or try blueberry, sesame seeds, everything bagels...etc.) and get baking!

    Ingredients

    Bagel Dough:

    • 1 cup + 2 tablespoon Warm Water
    • 1 tablespoon Yeast
    • 2 tablespoon Sugar
    • 4 cups Flour
    • 2 tablespoon Melted Butter or Olive Oil
    • Pinch of Salt

    Boiling:

    • 4 Qt Water
    • ½ cup Brown Sugar
    • 1 tablespoon Baking Soda

    Cinnamon Sugar (optional):

    • ½ cup sugar
    • 2 tablespoon Cinnamon

    Instructions

    1. In a large mixing bowl, combine the water, yeast, sugar, and butter/oil.
    2. Once the yeast has dissolved all the way into the creamy mixture, add the flour and salt and form the dough.
    3. Knead the dough for about 20 minutes or so to form the gluten. Dough should be nice and elastic.
    4. Let it rise in a greased bowl under plastic wrap for about 1.5- 2 hours or until doubled in size.
    5. Close to the end of the 2 hours, start boiling the water with the brown sugar and baking soda and preheat the oven to 425.
    6. When the dough has risen, punch it down and turn out onto a lightly floured surface.
    7. Cut into 6 pieces for extra large bagels, or 8 pieces for medium/regular sized bagels.
    8. Take each piece of dough and shape it gently into a circle, then poke your finger through the center and make the bagel hole nice and wide.
    9. Once all of them are shaped, boil 3 at a time for about 1-2 minutes on each side.
    10. Using a slotted spoon, take the bagels out of the pot and onto a baking sheet lined with parchment paper.
    11. Dip the tops into the cinnamon sugar mixture and bake for 15-20 minutes until golden brown and cooked through. Enjoy!
    © CradleKitchen
    Category: Breakfast

    Easy Walnut Tahini Granola

    March 15, 2019

    easy walnut tahini granola

    Who has made homemade granola before? There are so many different kinds around these days but this Walnut Tahini Homemade Granola is hands down our favorite.  It has clusters for days, some chocolate if you want (umm yes, who doesn’t), and some dried blueberries for added flavor… I can’t say enough about how good this is.  We make it almost every weekend!

    Homemade granola is so easy to make and honestly I love it because one bag of each ingredient makes so many batches of granola.  Store bought doesn't even compare in taste and you never get as much for the price. Homemade granola is a win win!

    clusters of walnut tahini granola

    Ingredients:

    Let's talk ingredients. Tahini is amazing. It is so versatile and can be used in baking just like peanut butter or almond butter, or even in sauces or granola! It's basically like almond butter but made from sesame instead of almond. So you get a slightly different nutty taste. We also make a lot of salad dressings with it (recipe for that coming soon- subscribe to get it when it goes live 😉 . But if you've never tried tahini, I highly recommend it. So so yummy! You can find it in the link on Amazon and you don't even have to go on a hunt through the store for it. Score!

    Easy Granola:

    So let’s go- easiest recipe!  Start off with a nice big mixing bowl and preheat the oven to 250.  This heat gives the granola a really nice toasty bake. Mix the oil (we like olive oil the best but hey, it all tastes amazing), honey, and tahini together to make sure it can be nice and evenly distributed throughout the oats and nuts.  Stir the liquid mixture together with the oats and walnuts. We like the steel-cut oats the best in this recipe but rolled oats work well too. Steel-cut just makes it a bit more crunchy.

    uncooked walnut tahini granola

    Spread the granola onto a baking sheet lined with parchment paper to bake in the oven for an hour and a half.  While the granola is baking, every half hour or so stir it up a bit and spread it out evenly again. Basically, you’re just turning over some of it to make sure it all bakes evenly.  

    Customize:

    Once the granola is done and nice and toasty, you can add some chocolate chips and dried blueberries, or really any dried fruit you like best. Our favorite is blueberry, it just goes so well with the chocolate and tahini. Give it a toss into the granola and pop it back into the oven for about 5 minutes just to let everything come together. Let your walnut tahini granola cool down completely and then enjoy the clusters, flavor, and easy deliciousness.

    clusters of homemade easy walnut tahini granola

    Use this easy walnut tahini granola to top ice cream, yogurt, smoothies, pour milk in, and enjoy as cereal in the morning.  Honestly, I just eat it by the handful as my munchy snack most of the time. Enjoy!

    Tag us on Instagram @grabthemangos and give us a rating and review right here in the comments! And don't forget to pin and save it for next time!

    If you love this recipe, you'll love our Carrot Cake Overnight Oats.

    easy walnut tahini granola

    Easy Walnut Tahini Granola

    Yield: 64 oz
    Prep Time: 5 minutes
    Cook Time: 1 hour 30 minutes
    Cool Down: 1 hour
    Total Time: 2 hours 35 minutes

    This easy healthy homemade granola is full of delicious chunky clusters.  With some honey and tahini and walnuts, this granola recipe is amazing!! 

    Ingredients

    • 2 cups Steel Cut Oats
    • 2 ½ cups Walnut Halves
    • ½ cup Honey
    • 2 tablespoon Tahini
    • ¼ cup Olive Oil or Coconut Oil
    • ¾ cup Dried Blueberries
    • ½ cup Chocolate Chips

    Instructions

    1. Pre-heat oven to 250°F
    2. In a large mixing bowl, combine the Oil, Honey, and Tahini and mix well.
    3. Add in the oats and walnuts.
    4. Spread the mixture evenly on a baking sheet lined with parchment paper.
    5. Bake for 1 ½ hours, stirring it up a little every 30min or so to help it bake evenly.
    6. Once done, option to add the dried blueberries and chocolate chips (highly recommended- sooo yummy) and bake for another 5 minutes just to let the chocolate melt.
    7. Let it sit and cool completely for about an hour or until completely cooled.
    8. Enjoy!
    © CradleKitchen
    Category: Breakfast

    Decadent Fudge Hazelnut Espresso Cookies

    March 11, 2019

    fudge hazelnut espresso cookies

    These Decadent Fudge Hazelnut Espresso Cookies are phenomenal!! They have become some of our go to favorite cookies. I mean who doesn't love these flavors? It's honestly hard to make these last even a few days in our house.  They go so well with some morning coffee… you know, if you're into that whole dessert for breakfast thing like you should be!

    Cookies:

    Cookies may just be one of the most perfect desserts created for children.  Honestly they are easily hideable, easily splittable, and come in set portions already for them.  Needless to say we love baking cookies in our house.

    We started these off thinking we could just make some chocolate chip cookies to satisfy our cravings.  My daughter decided she wanted actual chocolate cookies though and who am I to argue with that? So we sat in our kitchen picking the flavors we wanted for our cookies.  Of course it was a mess and the kitchen pretty much exploded with ridiculous things coming out of the fridge and pantry for “what we should put in the cookies mom.” But hey that's life!

    So it finally got narrowed down to the flavors here- fudge, hazelnut, and coffee.  Our 3 most favorite things (we have a bit of a Gilmore Girls coffee obsession in our house) and let me tell you these cookies turned out better than even I could have imagined.  So so good!

    fudge hazelnut espresso cookies

    Making and Baking:

    These fudge hazelnut espresso cookies are simple and easy cookies but with so much more magical amazing flavor than a basic cookie.

    Pre-heat the oven to 350°F.  In a glass bowl or a glass liquid measuring cup (anything heat safe and microwave safe), melt the semi sweet chocolate chips and butter in the microwave for a minute on high.  Stir together and if you need to, give it another 30 seconds to a minute in the microwave until fully melted and combined. As soon as it's fully melted add the instant hazelnut coffee.  So I love using hazelnut coffee packets and one packet is about 2 teaspoons. They are amazing added to anything chocolate baked. Coffee is a really good way to bring out more of that chocolate flavor and hazelnut is such a great compliment.  Definitely worth having on hand in your pantry!

    In a large mixing bowl, add the wet ingredients (brown sugar, granulated sugar, eggs, vanilla) and the melted butter fudge mixture you just made.  Mix it all well with an electric mixer or by hand.

    In a separate bowl, combine the dry ingredients (flour, baking powder, and salt).  

    Gradually mix the flour mixture into the wet mixture either with an electric mixture or by hand.  Once that's combined fully into your cookie dough, fold in some more chocolate chips because who doesn't need more chocolate chips in your cookie!

    Using a cookie scooper or the old two spoons to scoop and scrape off trick, drop your cookies onto a baking sheet with either parchment paper on it or (my favorite) a silicone baking mat.

    Having a silicone baking mat is amazing!  It creates a mess free, stick free, even heat distribution for whatever you are baking.  Silicone baking mats are also washable so you can just keep reusing it vs. parchment paper.  I super highly recommend grabbing one of these babies if you love baking. You'll get an even bake and less mess.  So nice!

    Bake your fudge hazelnut espresso cookies for about 10-11 minutes.  Let them cool for as long as you can stand not gobbling them up. Then proceed to gobble these amazing cookies up with some Netflix and your feet up because you deserve it! Enjoy 🙂

    fudge hazelnut espresso cookies

    Tag us on Instagram @grabthemangos and give us a rating and review right here in the comments! And don't forget to pin and save it for next time!

    If you love this, head over and try out our Heath Bar Cookies!

    fudge hazelnut espresso cookies

    Decadent Fudge Hazelnut Espresso Cookies

    Yield: 24 cookies
    Prep Time: 10 minutes
    Cook Time: 10 minutes
    Total Time: 20 minutes

    Warm, thick, brownie like, fudgy cookies with a hazelnut espresso flavor to take it to the next level! You'll want to make these every week!!

    Ingredients

    • 1 cup Semi-Sweet Chocolate Chips
    • ¾ cup Butter
    • 2 teaspoon Hazelnut Instant Coffee
    • ¾ cup Brown Sugar
    • ½ cup Granulated Sugar
    • 2 Eggs
    • 1 teaspoon Vanilla
    • 2 cups Flour
    • 1 teaspoon Baking Powder
    • ½ teaspoon Salt
    • 1 Cup Chocolate Chips

    Instructions

    1. Pre-heat oven to 350°F.
    2. In a glass/microwave safe bowl or measuring cup, melt the butter with the semi sweet chocolate chips in the microwave for about 1-1.5 minutes, stirring after to melt and combine completely.
    3. Add the Instant Hazelnut Espresso to the melted butter and chocolate mixture and stir to dissolve.
    4. In a large mixing bowl combine the melted mixture with the brown sugar, granulated sugar, eggs, and vanilla.
    5. In a separate bowl combine flour, baking powder, and salt.
    6. Mix the flour mixture into the liquid ingredients.
    7. Fold in the chocolate chips.
    8. On a baking sheet with parchment paper or a silicone baking mat, scoop your cookies about 1 inch apart.
    9. Bake for 10-11 minutes until done.
    10. Enjoy the yummiest, most decadent cookies ever 🙂

    Recommended Products

    As an Amazon Associate and member of other affiliate programs, I earn from qualifying purchases.

    • Tramontina Gourmet Stainless Steel 5-qt Mixing Bowl
      Tramontina Gourmet Stainless Steel 5-qt Mixing Bowl
    Nutrition Information:
    Yield: 24 Serving Size: 24 cookies
    Amount Per Serving: Calories: 204Total Fat: 11gSaturated Fat: 6gTrans Fat: 0gUnsaturated Fat: 4gCholesterol: 31mgSodium: 124mgCarbohydrates: 27gFiber: 1gSugar: 18gProtein: 2g

    Nutritional information is not always 100% accurate.

    © Miriam Reeves
    Cuisine: American / Category: Dessert

    Orange Onion and Chive Butterflied (Spatchcock) Roasted Chicken

    March 8, 2019

    orange onion and chive butterflied roasted chicken

    This Orange Onion and Chive Butterflied Chicken is our new obsession! Roasting a whole chicken has never been more delicious or easy or quick- yes quick! This recipe only takes about an hour and a half which is pretty fast for a whole roasted bird.  The spatchcock technique is what does that. It also gives it that super crispy delicious skin all over because more skin is able to show in the oven. Win win win for sure.

    spatchcock chicken in a cast iron pan with onions and whole chives

    Butterflied (Spatchcock):

    This special technique may sound daunting but it is actually pretty easy and definitely a little weird.  It involves taking the spine out of the chicken. Using sharp scissors or shears, cut along one side of the spine all the way from top to bottom and repeat on the other side.  This can get a bit weird, as I said, I mean you're cutting through the ribs and taking a whole spine out. It's an easy 5 second process that feels like you suddenly became a surgeon.  But, I promise it's so worth it when you get that tasty crisp skin and juicy delicious chicken on the table in half the time!

    I like to do this process (pictured below) right on my cast iron skillet to minimize the mess. A cast iron skillet is a MUST have in my kitchen at this point. I use it for everything, from roasting whole chickens like this to breads and desserts. The cast iron skillet is also a healthier way to cook. It fortifies your food with iron instead of leeching chemicals into your food as other cookware can do. Most people are deficient in iron so this is such a great bonus to have. It is honestly my favorite kitchen tool and not a crazy expensive one either.

    butterflied spatchcock roasted chicken
    butterflied spatchcock roasted chicken
    butterflied spatchcock roasted chicken

    Seasoning:

    Once the chicken has been butterflied, the seasoning can begin- yay!  So an orange, an onion, and some chives. Simple and delicious. Using your fingertips pull the skin away from the breast just enough to stuff some orange peel and some chives underneath it.  The orange peel flavor gives the chicken this amazing, aromatic, zesty, subtle flavoring and the chives give it some savory punches. They work really well together in this recipe. Around the sides of the bird you can place more orange slices to had some moisture and steam from the fruit juices while cooking as well as some more chives and onions adding even more flavor.  

    Orange onion and chive roasted chicken

    Over the top of the chicken brush or pour and spread the spice injected melted butter or olive oil.  Pause to drool here… then stand back and look at this prepped roasted chicken that you've put together in 15 minutes.  

    Pop this baby in the oven at 400° for about 30-40 minutes just to get a really nice crisp going on the skin.  Turn it down to 375° for another hour or so to cook through.

    Let the chicken rest for at least 10 minutes before carving up.  This dish is so great for an amazing dinner (obviously), but also for leftovers, pulling the meat off for pulled chicken meals like tacos because um yes for tacos… etc.  The carcass can also be used to make a really really good broth or chicken stock (I'll have a recipe up for that soon).

    Blow everyone away with this delicious orange onion and chive butterflied roasted chicken at your next dinner! Enjoy 🙂

    orange onion and chive butterflied roasted chicken

    Orange Onion and Chive Butterflied (Spatchcock) Roast Chicken

    Yield: 1 chicken
    Prep Time: 15 minutes
    Cook Time: 1 hour 30 minutes
    Resting Time: 10 minutes
    Total Time: 1 hour 55 minutes

    A roasted chicken for a warm delicious and comforting meal couldn't be quicker or easier than this one right here! Weekly dinner for us- so yummy!!

    Ingredients

    • 1 Whole Roasting Chicken
    • 1 Orange
    • 1 Sweet Onion
    • Fresh Chives
    • ¼ cup Melted Butter or Olive Oil
    • 1 tablespoon Seasoned Salt
    • 1 teaspoon Black Pepper
    • 1 teaspoon Onion Powder
    • 1-2 Garlic Cloves minced

    Instructions

    1. Pre-heat the oven 400.
    2. In a large skillet or roasting pan, place chicken (dried and giblets taken out) breast side down.
    3. Taking sharp shears (cooking scissors), cut down along each side of the bird's spine to remove it.
    4. This allows you to place the bird flat, now breast side up, and spread out and open giving it a quicker roasting time and more crispy skin.
    5. Tuck a few thin slices of onion underneath the bird.
    6. Separate the top section of skin from the meat (just using fingers to pull it open) and stuff a few sections of the orange peel and handful of fresh chives under the skin.
    7. Mix all the spices and minced garlic with the melted butter or olive oil and brush/pour over the top of the bird completely coating it.
    8. Place remaining onion wedges/slices, orange slices, and chopped chives around the bird to cook with it.
    9. Bake at 400 for about 30 minutes to let the skin crisp up.
    10. Drop heat to 375 for about an hour more or until a meat or instant read thermometer reads 165°F (place thermometer into the thickest part of the thigh but not touching bone for accurate temp).
    11. Let it rest for about 10 minutes before carving it up.
    12. Enjoy!!
    © Grab the Mangos

    Coconut Broccoli Cheddar Soup

    March 6, 2019

    coconut broccoli cheddar soup

    Soups for days!

    We love this coconut broccoli cheddar soup.  Honestly, we love a lot of soups. We make them frequently in the winter especially but I also love them during thunderstorms.  I am definitely one of those people who cooks food based on the weather.

    Soups are the easiest way to make every random thing left in your fridge at the end of the week get used up.  This coconut broccoli cheddar soup is exactly where that came from actually. End of the month came and I didn't know what to make so I threw this together quick and we lovedddd it.  I made some changes here and there along the way as I perfected the recipe and I gotta say it's one of our family favorites now.

    coconut broccoli cheddar soup

    This is super easy basic soup making.  A roux- some broth and maybe cream- seasonings and whatever else.  Now we use a lot of coconut cream and coconut milk because, One: my husband and kids are sensitive to too much dairy.  Two: I grew up with a lot of coconut and Hawaiian flavors because part of my family comes from Hawaii so it's just sort of a staple.  Three: coconut milk and cream just tends to make the soup equally as delicious and creamy with a lot less of the heavy feeling attached. So all in all, I definitely recommend using coconut cream in a lot of foods even if just for the extra flavor, but know that it is also rich in potassium, magnesium, and phosphorus and helps to maintain a healthy heart and muscles. Win win right?!

    This amazing soup:

    Coconut broccoli cheddar soup starts off with a nice big chunk of butter and some veggies- a great base for any soup.  Once the onions and carrots have cooked through with the garlic add in the flour to form a roux. A roux is a mixture of fat (mostly butter) and flour and is so great for soups- especially creamy ones- to help add a rich flavor and thicken the soup up.  Forming this veggie roux makes this soup! Add in the broccoli, broth and coconut cream and mix it in thoroughly. The soup will thicken as it cooks. Let everything heat up nicely before adding the cheese in. The worst thing is when the cheese clumps up and isn't melting properly because it wasn't heated through.  Once it is nice a hot, add in the cheese slowly as well as your spices and mix it all into the soup.

    Let this simmer on low Heat for about 20-30 minutes at least.  I definitely like to cook soups for as long as I can give them before the “hangry” (angry hungry) sets in with the kids.  The more it simmers and cooks the more flavor you'll have in the soup.

    coconut broccoli cheddar soup

    Tag us on Instagram @grabthemangos and give us a rating and review right here in the comments! And don't forget to pin and save it for next time!

    Once you're ready to eat, serve into bowls and gobble this up nice and warm! Enjoy!

    coconut broccoli cheddar soup

    Coconut Broccoli and Cheddar Soup

    Yield: 4 bowls
    Prep Time: 15 minutes
    Cook Time: 30 minutes
    Total Time: 45 minutes

    Warm, delicious, creamy-but not quite as heavy, comforting soup! Easy recipe but wow such delicious results with this coconut milk spin on a classic broccoli cheddar soup.

    Ingredients

    • ½ cup Butter, 1 stick
    • ¼ cup Flour
    • ½ Sweet Onion, chopped
    • 2 Large Carrots , shredded
    • 2 cups Broccoli
    • 1 Qt Chicken Stock
    • 1 can Coconut Cream, 13.5oz
    • 2 ½ cups Shredded Cheddar Cheese
    • 1 teaspoon Thyme
    • 1 tablespoon Garlic minced
    • 1 teaspoon Nutmeg
    • 1 teaspoon Onion Salt
    • 1 teaspoon Chili Powder
    • Salt and Pepper to taste

    Instructions

    1. Melt the butter in a large soup pot over medium-low heat.
    2. Saute the onions and shredded carrots with the minced garlic for about 3 minutes or until cooked.
    3. Add in the flour to form an amazing veggie roux for your soup.
    4. Once the paste has come together add in the chicken stock and broccoli and heat through.
    5. Add in the coconut cream and mix thoroughly while letting it heat up.
    6. Add in the cheese slowly and mix until melted.
    7. Mix in all your seasonings and let simmer for about 20-30 minutes.
    8. Enjoy the best dang warm comforting yummy soup ever!
    Nutrition Information:
    Yield: 4 Serving Size: 1 people
    Amount Per Serving: Calories: 938Total Fat: 64gSaturated Fat: 43gTrans Fat: 2gUnsaturated Fat: 16gCholesterol: 133mgSodium: 1354mgCarbohydrates: 73gFiber: 4gSugar: 55gProtein: 22g

    Nutritional information is not always 100% accurate.

    © CradleKitchen

    Oatmeal Honey Bread Machine Bread

    March 4, 2019

    hand reaching for a slice of bread

    So why this Oatmeal Honey Bread Machine Bread? Well I got a bread machine from my mother in law a few years back actually kind of by accident.  I found it in her basement and it was brand new in the box just sitting there collecting dust- gasp!! I told her if she didn't have a use for it I would happily take it and use it. So now I am the proud owner of a bread machine and I LOVE this thing let me tell you.

    hand reaching for a slice of bread

    Bread Machines:

    Bread machines are the crock pots for more carbs.  You put the ingredients in press a button and wait around for the magic to come out.  I will be the first to admit I have a carb problem. I love me some carbs- pastries, donuts, breads, pastas, you name it.  The only time I have ever refused carbs was when I was pregnant with my second because I was hoping for a better time with pregnancy the second time around (first time I blew up like a balloon).  Well I wound up gaining a lot less and feeling better through the pregnancy sure but I wound up having a big ol' 9 and ½ lb baby boy- Axel. Woah right? And the first thing I ate not 1 hour after that delivery- a loaf of bread with butter and honey. Yesss. Best thing ever. And nothing beats fresh baked bread that's warm and soft and chewy with some butter slowly melting on top. I could eat the whole loaf in the first hour of being out of the oven (and I definitely have).

    overhead shot of a big loaf of bread

    Where can I get a bread machine?

    There are a lot of places to get a bread machine.  Places like Target, Wal-Mart, even Bed Bath and Beyond have bread machines.  You can even usually find quite a few at the thrift stores BUT make sure to ask an employee to check and make sure it works when plugged in first if you're looking there.  Check your mother in laws basement too because you just never know right? I would definitely recommend the Hamilton Beach bread machine if you're looking for a good price which you can find through the link, or the Cuisinart bread machine. Both of those have 12 setting options including gluten free and jam settings- that's right you can make jam in the bread maker- mind blown.  It is our favorite thing to have and I definitely wouldn't give it up that's for sure. Homemade bread is everything.

    Oatmeal Honey Bread:

    Ok, so this oatmeal honey bread is so so yummy.  It is mildly sweet which makes for amazing toast and sandwiches.  It's also chewy and fluffy with the texture of the oats just bringing it over the top for goodness.

    Add everything in the order your bread machine manufacturer recommends (mine is: wet ingredients, then dry, then yeast last, but yours could be different).  

    Set the machine on the dough cycle and let it go.  We like to bake this bread in the oven. I think it gets a much crispier crust, better shape, and better bake.  You can definitely set it to a basic or white bread cycle and leave it alone completely but I really recommend just transferring to the oven for about 30 min instead.

    Bake at 350° for 20-30 min or until the crust is golden brown and when you lightly knock on the top, the inside sounds hollow meaning it's done.

    bread with butter being eaten

    Enjoy with butter, jam, honey, cinnamon sugar… etc.  It is also amazing as a grilled sandwich with some butter and garlic powder on the outsides.  Trust me- so so good! No matter how you eat it, it's delicious. Let us know if you made it on Instagram @cradlekitchen or right here in the comments below! Enjoy 🙂

    Tag us on Instagram @grabthemangos and give us a rating and review right here in the comments! And don't forget to pin and save it for next time!

    If you love this recipe, head over to make The Best Split Pea Soup which pairs amazingly well with this bread!

    hand reaching for a slice of bread

    Oatmeal Honey Bread Machine Bread

    Yield: 1 loaf
    Prep Time: 5 minutes
    Cook Time: 20 minutes
    Machine Time: 1 hour 30 minutes
    Total Time: 1 hour 55 minutes

    The oatmeal honey bread machine bread is an easy, healthy, sweet, chewy, homemade bread recipe that won't disappoint! It's super soft, full of oats and honey, and absolutely the best bread machine bread recipe ever!

    Ingredients

    • 1 cup water
    • ⅓ cup Olive Oil
    • ¾ cup Oats, steel cut or rolled works
    • ¼ Honey
    • 2 ⅓ cups Flour
    • Pinch of Salt
    • 1 teaspoon Yeast

    Instructions

    1. Add the ingredients in the order suggested according to the manufacturer.
    2. Set to the dough cycle.
    3. Pre-heat oven to 350.
    4. Butter a bread pan.
    5. Once done on the dough cycle pour the sticky wet dough into the buttered bread pan and bake for 20-30 min or until golden brown on top and baked through.
    6. Enjoy with butter and toppings or as a sandwich bread!

    Recommended Products

    As an Amazon Associate and member of other affiliate programs, I earn from qualifying purchases.

    • Quaker Old Fashioned Oatmeal
      Quaker Old Fashioned Oatmeal
    • COSTWAY 2LB Bread Maker, 15 Programmable Multifunctional Bread Machine
      COSTWAY 2LB Bread Maker, 15 Programmable Multifunctional Bread Machine
    © Miriam Reeves
    Cuisine: American / Category: Bread


    Peanut Butter and Jelly Chocolate Cake

    March 1, 2019

    Peanut Butter and Jelly Chocolate Cake

    This peanut butter and jelly chocolate cake has all the treat sweet things that kids (most) love to eat. It has chocolate- yes! It has a sweet velvety peanut butter buttercream- yess! And it has a super easy to make strawberry jelly sauce for the filling to add a little bit of fruity tartness- yesss! Everything goes together so well: chocolate and peanut butter; chocolate and strawberries; peanut butter and strawberry jelly. All in all this will be a favorite cake to make in your house for any occasion. We ate the whole thing in a matter of 2-3 days with no shame because it is just that delicious. You won't be able to resist.

    Buttermilk Chocolate Cake:

    This is the best chocolate cake in the world I am pretty sure. You could get a box cake mix and I'm sure it would pass but this is the chocolate cake of your dreams. It is so moist (cringing writing the word but hey, it is what it is), packed with chocolate flavor, and has the perfect crumb. The buttermilk is what I think gives the cake this perfect flavor and feel combination, as buttermilk usually does for baked goods.

    peanut butter and jelly chocolate cake

    You will want to use a very large mixing bowl for this chocolate cake as it makes enough for 3 layers of cake. Start by making up the buttermilk mixture by combining your choice of milk (I have used Almond Milk and Whole Milk and both worked great) and the Apple Cider Vinegar. The ACV is key to the cake. The way the acidity in the buttermilk mixture plays with the baking soda in the cake is what gives it that moisture and fluffiness as well as good flavor. If you don't have any Amazon Prime can always get it to you quickly 😉 It also has so many uses other than cake. I am pretty sure I have 3 bottles in 3 different rooms in my house.

    Set the milk mixture aside to turn into buttermilk. In your very large bowl combine the dry ingredients making sure there are no lumps stuck anywhere. In a separate bowl or measuring cup, mix the warm water with the instant coffee until the granules are dissolved (the coffee I use is linked). This step is totally optional and the cake will taste amazing without it as well, but the point of the coffee addition is to really draw out and compliment that cocoa flavor. If you are not going to do that though, just warm water is good.

    Once you have that ready to go, begin to combine all the wet ingredients in a medium bowl with a whisk or electric mixer including the buttermilk. Finally combine it all together to make a LOT of delicious cake batter. Divide it among 3 separate cake pans- make sure they are buttered and dusted with flour. Bake them at 350 for about 30 minutes or until a toothpick inserted in the center comes out clean. When the cakes are done let them cool for a couple hours before attempting frosting or filling. This gives you time to start the peanut butter and jelly part 🙂

    Strawberry Jelly Sauce:

    This part of the recipe is short, sweet, and simple. In a medium sauce pan, combine the sugar, strawberries, and water and heat on medium or so until a low rolling boil starts. Keep stirring as you go and keep the boil going for a few minutes at least until it gets a bit thicker. The longer you cook it the thicker it will get. You can keep the strawberries whole, sliced, or you can crush them once they are soft enough. This sauce really helps to get that little bit of tartness into the layers of the sweet chocolate cake. Once it's done, let is cool completely before putting on the cake. It will thicken a bit while cooling down as well.

    Peanut Butter Buttercream:

    Is there anything more delicious sounding than peanut butter buttercream? I don't think so. It is the star of this cake. Now, I really loved using a crunchy peanut butter in this and spreading that texture over the cake. It added something different and I loved it. Feel free, though, to use a creamy version instead if that's your vibe.

    Again, super simple, sweet, and short. Beat everything in a bowl until creamy, velvety, and delicious.

    peanut butter and jelly chocolate cake

    Assembly Tips:

    • Once the cake has cooled completely, trim the tops off to make a nice even floor to place the next layer on.
    • Spread the strawberry jelly on first and then layer it up.
    • Use a piping bag or a plastic bag with a whole in the corner to pipe the peanut butter buttercream on and then spread it even.
    • If you are finding the frosting to be too thick- add a tablespoon of milk in at a time until you get the right consistency as every peanut butter is a little different.
    • If it is a little too runny, add some more powdered sugar- again a tablespoon at a time.

    Tag us on Instagram @grabthemangos and give us a rating and review right here in the comments! And don't forget to pin and save it for next time!

    Be sure to try out some of our Heath Bar Cookies next time you have a sweet craving 😉

    Peanut Butter and Jelly Chocolate Cake

    Peanut Butter and Jelly Chocolate Cake

    Prep Time: 20 minutes
    Cook Time: 30 minutes
    Cooling Time: 2 hours
    Total Time: 2 hours 50 minutes

    This homemade chocolate cake is the best! Moist and easy to make you will never go back to box again.  Add in the peanut butter buttercream frosting and the strawberry jelly filling and you have a cake made from scratch that no one will forget!

    Ingredients

    Buttermilk Chocolate Cake:

    • 3 cups Flour
    • 2 ½ cups Sugar
    • 1 ½ teaspoon Baking Powder
    • 1 tablespoon Baking Soda
    • 1 ½ cups Dark Cocoa Powder
    • 1 ½ cups Milk of Choice
    • 3 tablespoon Apple Cider Vinegar
    • 4 Eggs
    • 1 ½ cups Warm Water
    • 2 teaspoon Instant Coffee, optional
    • ½ cup Olive Oil
    • 1 teaspoon Vanilla

    Peanut Butter Buttercream:

    • 1 cup Crunchy Peanut Butter, Creamy works too!
    • 3 ½ cups Powdered Sugar
    • ½ cup Butter
    • ⅓ cup Milk

    Strawberry Jelly Sauce:

    • 1 ½ cup Strawberries
    • ½ cup Sugar
    • 2-3 tablespoon Water

    Instructions

    Buttermilk Chocolate Cake:

    1. Pre-heat oven to 350°.
    2. In a glass measuring cup mix together your milk of choice and the apple cider vinegar and set aside.
    3. In an extra large mixing bowl combine the flour, sugar, dark cocoa powder, baking soda, baking powder, and salt and mix thoroughly.
    4. Mix the eggs, warm water, olive oil, vanilla, and the milk you had set aside in a medium bowl. (If you are adding the instant coffee- mix with warm water first until dissolved).
    5. Combine all the ingredients together in the large bowl with an electric mixer until well combined- about 2-3 minutes.
    6. Divide between 3 buttered and flour dusted 9-inch cake pans and bake at 350 for 30 minutes or until a toothpick inserted in the middle comes out clean.
    7. Let them cool completely before frosting.

    Peanut Butter Buttercream Frosting:

    1. While the cakes are cooling beat all of the frosting ingredients together with an electric mixer until velvety and combined completely.
    2. When the cakes are cooled completely and the jelly sauce has been put in the layers apply the frosting all over either with a piping bag first (much easier) or with a spatula and enjoy!

    Strawberry Jelly Sauce:

    1. In a medium saucepan, add the strawberries, water, and sugar and cook on medium heat stirring constantly.
    2. Bring to a low boil and cook for a few minutes more continuing to stir as it thickens.
    3. Take it off the heat and let it cool completely before using on the cakes. (It will thicken a bit while cooling as well).
    4. When ready, use a large spoon to spread over the layers of chocolate cake.
    © CradleKitchen
    Category: Dessert

    Zesty Shrimp Tacos with Creamy Purple Slaw

    February 27, 2019

    two shrimp tacos with red cabbage coleslaw

    Oh my goshhhh, these zesty shrimp tacos with creamy purple slaw are lit.  Ok I only wrote that sentence because my husband said I wouldn’t, BUT it doesn’t change the fact that these tacos are the best shrimp tacos you will ever have and they are so so easy to make.  I have been working on this recipe for about a year honestly and every time we made them it was great but not perfect. I went to a place called the Tin Fish (sadly I think they have closed) about a year ago and they had the best shrimp tacos I have ever had in my life.  So good! So I wanted something I could make at home that was equally as good. These are it my friend. And don’t skip the creamy purple coleslaw- it makes these tacos over the top yummy- my family won’t stop asking me to make them again.

    Zesty Shrimp Tacos:

    Start by taking the shrimp, we use raw de-tailed shrimp but I think anything you prefer or have on hand would work too, and mix it in with the spices and a bit of olive oil or coconut oil.  Fry these up on medium heat and get the seasoning coated on nicely. I use my cast iron skillet for all of this type of cooking. It really helps to get a little bit of extra flavor and even some charring of the seasonings. If you don't have one at all I would highly recommend getting one. They are so amazing for almost every meal I cook including desserts. The extra flavor and the conduction of the heat makes these babies worth every penny. Basically, the more you use it- the more flavor the next meal will absorb. Super amazing!

    close up shrimp tacos with red cabbage coleslaw topping

    Cook the shrimp for about 5 minutes or until cooked through if you’re using the raw ones. Feel free to adjust how much or how little cayenne pepper you want to use.  It really just depends on your personal heat tolerance, my 3 year old can’t really tell with a dash or two for a kick and she’ll eat it up but she also has been eating spicier foods than most her whole life. Drizzle the lemon juice over the shrimp after taking them off the heat and toss it in thoroughly.  Super simple and easy for the win! Once they are done set aside and mix the coleslaw up.

    Creamy Purple Slaw:

    Taking your purple/red cabbage, cut in half, remove the core and slice into thin pieces.  I have tried just shredding the cabbage but it made it super watery and messy. Slicing it up thin was easy and quick and definitely made a better option.  Toss that into a bowl with the shredded carrot and some thinly sliced red onion and add the rest of the ingredients to mix. The red pepper flakes are up to you just like the cayenne pepper.  It just depends on how much spice you want to give this dish. Now, this slaw on top of the shrimp tacos is heaven in a tortilla. I like to add some avocado (also my kiddos favorite) and maybe some sriracha and fresh cilantro to my toppings.

    You will never want anything else on your tacos again after eating this up.  We took the coleslaw and put in on some spicy chicken tacos the next day (we eat tacos a lot sometimes) and it was so amazingly good.  This slaw will keep for about a week to a week and a half in the fridge. It’s good on its own as well but mmm mmm just writing this post makes me want some more of these zesty shrimp tacos with creamy purple slaw.  Eat up people!

    Tag us on Instagram @grabthemangos and give us a rating and review right here in the comments! And don't forget to pin and save it for next time!

    If you love these tacos, check out our Asian Chicken Tacos! YUM!

    zesty shrimp tacos with creamy purple slaw

    Zesty Shrimp Tacos with Creamy Purple Slaw

    Yield: 4 servings
    Prep Time: 5 minutes
    Cook Time: 5 minutes
    Total Time: 10 minutes

    These are the BEST shrimp tacos ever.  Pair that with this amazing creamy purple slaw and you have a party in your mouth for everyday of the week not just Tuesdays! 

    Ingredients

    Zesty Shrimp Tacos:

    • 1 tablespoon Garlic Powder
    • 1 tablespoon Seasoned Salt
    • 1 teaspoon Chili Powder
    • Dash or 2 of Cayenne Pepper
    • 1 teaspoon Paprika
    • 1 tablespoon Onion Salt
    • 2 Cups Raw Shrimp
    • Pepper to taste
    • 1 tablespoon Lemon Juice

    Creamy Purple Slaw:

    • 2 Cups Purple/Red Cabbage, about half a cabbage head
    • 1 shredded Carrot
    • ½ Red Onion
    • ½ Cup Mayonnaise
    • 1 tablespoon Dijon Mustard
    • 1 tablespoon Lemon Juice
    • Dash of Red Pepper flakes
    • 1 tablespoon Honey
    • Pepper and Salt to taste

    Instructions

    Zesty Shrimp Tacos:

    1. Place the shrimp with a little bit of olive oil or coconut oil in a pan with the spices.
    2. Cook on medium heat, tossing until they have a nice coating of seasoning evenly on all of them.
    3. Once pink and cooked through (about 5 min), take off the heat and drizzle with the lemon juice again tossing thoroughly.
    4. Set aside.

    Creamy Purple Slaw:

    1. Slice up your cabbage into nice thin shredded slices.
    2. Place in a bowl with the shredded carrot and thinly sliced red onion and toss.
    3. Add the rest of the ingredients and combine thoroughly.
    4. In a tortilla place the shrimp, then the coleslaw, and any other toppings you want to add and eat up!
    © CradleKitchen

    Easy Salmon Patties with Dill Lemon Yogurt Sauce

    February 25, 2019

    easy salmon patties with dill lemon yogurt sauce

    Hands down this easy salmon patties recipe with dill and lemon yogurt sauce on top are my family’s favorite way to eat fish at home.  Now, we absolutely love sushi also but I haven’t quite gotten the courage to make it at home myself and honestly getting enough wild caught salmon or any other good fish makes me cringe because it’s so expensive.  So, I came up with these and they are so so delicious and ridiculously easy- always a bonus! Even the kids gobble up at least 2 whole patties.

    Salmon Patties Recipe:

    Ok so let's talk fish. We love fish most of the time. We really love and are probably addicted to sushi- even my kids have been eating it since they were old enough to. But going out for sushi every week gets to be a lot so it's definitely more of a treat for us. Fish is so good for you though and I want to feed it to the fam more often but again I live in Minnesota so fish is ridiculously expensive, especially if you have multiple people to feed who all eat like hungry bears. So I get these cans of boneless skinless wild salmon cans from Trader Joes which you can also find on Amazon in a pack of 6. They are really nice to have and store because they don't go bad and they are the good kind- Wild Caught! Win!

    Making it:

    In a large mixing bowl, mix 3 cans of pink wild caught Alaskan salmon with all the spices, an egg, lemon juice, and corn meal. I have found that the corn meal just gives it that crisp texture and little bit of flaky crunch. They also seem to fry up in the pan just a bit easier with the corn meal absorbing extra moisture.

    When the fish mixture is completely and thoroughly combined, heat up your favorite oil (coconut oil or olive oil are my favorite options) in a skillet or pan on the stove at medium- high heat. As you start to press the fish into your palms to make the patties, you'll have to kind of feel it out. This mixture can be crumbly around the edges so press firmly but gently. Make all the patties before placing in the hot oil. When you are ready to start frying, again make sure to be careful of the crumbly edges. Cook for at least 3 minutes on the first side before flipping. Make sure both sides get nice and golden brown. The nice thing about these patties is how quickly they cook through. The inside should be nice and flaky.

    Set them on a paper towel to absorb any extra oil and grease while you make the yogurt sauce.

    easy salmon patties with dill lemon yogurt sauce

    Dill Lemon Yogurt Sauce:

    So so super easy but makes this meal for sure! I love sauces. We all do. I have found also that I can pretty much get my kids to eat anything if I also offer them a sauce to dip it into.

    easy salmon patties with dill lemon yogurt sauce

    Simply mix the Plain Greek Yogurt, fresh dill, and lemon juice together in a bowl and serve with the Salmon Patties. We like to heap a healthy spoonful on each patty and dig in. Let us know if you made it in the comments! 🙂

    Tag us on Instagram @grabthemangos and give us a rating and review right here in the comments! And don't forget to pin and save it for next time!

    If you LOVE this salmon patties recipe and want more lemon in your life (who doesn't honestly), check out our Lemon Meringue Cookie Gushers for dessert!

    easy salmon patties with dill lemon yogurt sauce

    Easy Salmon Patties with Dill Lemon Yogurt Sauce

    Yield: 6 servings
    Prep Time: 10 minutes
    Cook Time: 10 minutes
    Total Time: 20 minutes

    This super easy delicious crispy salmon pattie recipe is so so good! Made with a little cornmeal or bread crumbs for an extra crunch, seasonings, and canned wild caught salmon of course.  Pair with the amazing yogurt sauce and you won't be able to stop saying YUM!

    Ingredients

    Salmon Patties:

    • 3 cans Skinless Boneless Canned Salmon
    • ¼ cup Corn Meal
    • 2 teaspoon Garlic powder
    • 1 teaspoon Basil
    • Dash or 2 of Cayenne pepper
    • 2 teaspoon Onion Salt
    • 1 teaspoon Chili powder
    • 1 teaspoon Paprika
    • 1 egg
    • 2 teaspoon Fresh Chopped Dill
    • 1 teaspoon Lemon Juice
    • 1-2 tablespoon Coconut or olive oil for cooking

    Dill Lemon Yogurt Sauce:

    • ½ cup Plain Greek Yogurt
    • 2 teaspoon Fresh Chopped Dill
    • 1 teaspoon Lemon Juice
    • Salt and Pepper to taste

    Instructions

    Salmon Patties:

    1. In a large mixing bowl, combine all the ingredients using your hands to combine well.
    2. Heat coconut or olive oil (your choice) in a large skillet on medium heat.
    3. Form patties with your hands. They may be a little crumbly at first so be sure press firmly into patties and handle gently getting them into the pan.
    4. Cook until golden brown on each side and cooked through- about 3-5 min on each side.
    5. When done, place on some paper towels and serve with your yogurt sauce.

    Dill Lemon Yogurt Sauce:

    1. Stir all the ingredients together in a bowl and serve with Salmon patties.
    © CradleKitchen

    Sweet Onion Chicken Noodle Soup

    February 22, 2019

    sweet onion chicken noodle soup

    This sweet onion chicken noodle soup recipe is hands down the best chicken noodle soup that I have ever tasted.  My husband couldn’t stop gushing about how amazing it was and my kids LOVED it. Secret ingredient- definitely the red wine vinegar.  It gives it that kick of extra flavor that pushes it way beyond canned chicken noodle soup. You will seriously never go back after this.

    Making It:

    In a large soup pot or dutch oven, saute the green and sweet onions in the butter until soft, maybe a bit caramelized, and definitely aromatic.  The sweet onions should look almost see through. Add the garlic and stir making sure not to burn it (turn the heat a bit down if you need to). Stir in the diced chicken (shredded is good too but I find that it’s easier to shred chicken breasts than chicken thighs).  Cook the chicken through with the onions and garlic allowing it to really absorb the flavor. Season it up with some dried basil and add the chicken stock and red wine vinegar.

    The red wine vinegar, as I said really kicks this chicken noodle soup up a notch (or 10), and it doesn’t taste like vinegar at all so don’t worry.  It just adds that strong kick in the pants that regular chicken noodle soup needs- a good one is linked above in the recipe. The other key thing to this recipe (but really any recipe), is to make sure you get quality chicken stock. This can make or break a recipe in my opinion, not to mention good stock has so many more benefits than a super sodium dense watery cheap version.  A good chicken stock should taste good even on its own without seasonings- link above as well.

    sweet onion chicken noodle soup

    Chicken Noodle Soup Seasoning:

    Now, I like to let all my soups cook for as long as I have so at least 30 minutes- 1hr to make sure all the flavors really come together.  It makes such a huge difference letting your soups cook. So this last step really depends on how long you let it cook for. Basically, about 15 minutes before you are ready to eat, add in your dried egg noodles and bring the soup to a slight boil before placing down at simmer again and letting them cook just like you would when normally cooking them in water.  Once the noodles are al dente, add salt and pepper to taste.

    I love heapings of Pink Himalayan salt on almost everything.  It has a super good flavor, is pretty and pink (always a bonus), and it is SO much healthier than Iodized table salt.  Table salt causes inflammation, whereas pink Himalayan salt reduces it. You can find it through the link and trust me it’s worth it!  End health rant.

    Once your noodles are done, season it up with your new Himalayan pink salt and some pepper and serve it up. Enjoy this amazing upgrade to chicken noodle soup!

    Tag us on Instagram @grabthemangos and give us a rating and review right here in the comments! And don't forget to pin and save it for next time!

    If you LOVE this soup, and you will trust me, you need to head over and save our FAV Split Pea Soup too. If you're looking for dessert after this healthy meal, look no further than our 3 Ingredient Vegan Fudge Brownies. Um, yes, yum!

    sweet onion chicken noodle soup

    Sweet Onion Chicken Noodle Soup

    Yield: 5
    Prep Time: 15 minutes
    Cook Time: 30 minutes
    Total Time: 45 minutes

    This homemade easy chicken noodle soup recipe is AMAZING! It's healthy, made from scratch, great for colds or just cold weather and you will never go back to canned again.

    Ingredients

    • 3 tablespoon Butter
    • 1 Sweet Onion, diced
    • 3-4 Green Onions, chopped
    • 3 tablespoon Red Wine Vinegar
    • 1 teaspoon Garlic, minced
    • 1 teaspoon Dried Basil
    • 2-3 Chicken Thighs, diced
    • 8 Cups Chicken Stock
    • 2-3 Cups Egg Noodles
    • Salt and Pepper to taste

    Instructions

    1. In a large soup pot, melt the butter and start sauteing the onions over medium heat.
    2. When the sweet onions are almost clear and cooked through, add the spices and stir throughout.
    3. Add the diced chicken thighs and continue to stir over medium heat until cooked through.
    4. Pour in the chicken stock and red wine vinegar and cook for 30 min or longer.
    5. Bring the soup to a low boil and add in the noodles cooking until done.
    6. Season with salt and pepper to taste and serve up the best sweet onion chicken noodle soup you have ever had!

    Recommended Products

    As an Amazon Associate and member of other affiliate programs, I earn from qualifying purchases.

    • Lodge 6 Quart Enameled Cast Iron Dutch Oven. Classic Red Enamel Dutch Oven (Island Spice Red)
      Lodge 6 Quart Enameled Cast Iron Dutch Oven. Classic Red Enamel Dutch Oven (Island Spice Red)
    • Pacific Foods Organic Free Range Chicken Broth
      Pacific Foods Organic Free Range Chicken Broth
    • Barilla Pasta, Campanelle Pasta, 16 Ounce
      Barilla Pasta, Campanelle Pasta, 16 Ounce
    © Miriam Reeves
    Cuisine: American / Category: Main Meals

    Lemon Meringue Cookie Gushers

    February 18, 2019

    lemon meringue cookie gushers

    Lemon meringue cookie gushers are probably my kids (and husband's) new favorite obsession. Ever since I made these up for them, they have not stopped asking for me to make more. That's how good they are!

    Meringue Cookies

    I was inspired by my mother-in-law to make these up actually. Every Christmas or special time, she makes up these delicious "forgotten cookies" (don't worry I'll get that recipe up here soon). They are cute little green meringue cookies with Andie's mints and the whole family just loves them! She had to send boxes of them to my brother-in-law when he was deployed in Kuwait. So even though those are amazing little cookies, I thought "let's experiment!" Lemon is my absolute favorite sweet flavor (besides dark chocolate and caramel and toffee... and all the sweet things- let's be real I have a sweet tooth problem). But I just love love lemon treats! So of course I thought- Lemon Meringue Pie but in a little cookie.

    lemon meringue cookie gushers easy and fun cookie recipe based on lemon meringue pie

    The cookie part of this little sweet treat is just a normal meringue cookie. Fairly simple, but definitely some key things to remember while making them. When separating the yolks from the whites, absolutely no yolk can get into the whites or the meringue won't work. A good tool to use if you don't feel comfortable just winging the separating process, is this egg yolk separator (affiliate link) that even my 3 year old loves to use. Not to mention it is one of the cutest kitchen tools ever.

    Making the cookies:

    I usually start beating the egg whites on low to medium and work my way up to high from there slowly to make sure nothing sprays out of the bowl. Make sure to add in your cream of tartar to help stabilize the meringue especially since we will be filling them later on and you don't want them to just crumble. Get the egg whites pretty thick before adding in the sugar to make sure nothing stops the air from getting all through the whites. For the same reason, add in the sugar one tablespoon at a time and beat well to make sure it really dissolves into the cookie. Once all the sugar is added and the meringue is glossy and stiff peaks form and keep their shape, it's time to start piping cookies.

    Best way:

    Use some parchment paper to line the baking sheet to help the cookies bake evenly and to ensure no sticking. When I first attempted these cookies, I used a cheap plastic piping tip and oh my goodness what a mess! The thing exploded after being extremely difficult to use anyways. So take my advice and just get a really great, re-usable, metal piping tips with nozzles and piping bags for making these cookies or anything involving piping tips really (and a great price).

    Pipe the cookies out about 2 inches in diameter and honestly use whatever piping tip you like best but remember you'll be filling them with lemon curd so make sure there is room inside the shape. Bake in the oven for about 45-50 minutes until they have a bit of a golden color on the bottoms and edges. When the cookies are done, simply turn off the oven and leave them inside to cool gradually so they can set and stay stable.

    Making the filling:

    Making lemon curd for these lemon meringue cookie gushers is actually super easy. Who else loved gushers as a kid? I really did! This lemon curd is nice and tart with a little sweetness which is perfect in a sweet sweet meringue cookie balancing it out.

    While the cookies are baking, in a medium bowl, whisk together the saved egg yolks, sugar, lemon zest and lemon juice. You can always feel free to add some more sugar to this as you go if you want a super sweet lemon curd but the sweetness of the cookie with tart subtly sweet lemon balance is really amazing.

    Pour the mixture into a medium sauce pan on the stove on medium to low heat. Add the butter in, mixing continuously as it melts. You want to make sure you keep whisking and mixing this up as it heats slowly to prevent the yolks in the mixture from scrambling. Once you start to see some thick bubbles appear on the surface it's close to done and you can stop and take it off the heat once it has thickened to a custard/jelly type consistency.

    I love this cookie combination because all of the egg gets used up with very simple ingredients resulting in a super delicious and fancy lemon meringue cookie.

    You want to let this cool for a while so that it does melt the meringue cookie when you fill them. This is why I would make it while they are baking and let it cool for the whole time they are baking and cooling themselves.

    Filling and Eating:

    Once everything is set and cooled completely, it's time for the fun part: filling the cookies and eating them up! Fill a piping bag, or a gallon sized plastic bag with a small hole cut into one corner, with the lemon curd. Again using a good, sturdy, metal piping tip (a medium simple round tip is good), poke a small hole into the center of the bottom of the cookie. You are going to want to swirl the lemon curd around the sides of the inside of the cookie to make sure you get the whole things filled. It may take a couple tries to get your preferred balance between filling and cookie. Once you have done all the cookies serve them up and watch everyone LOVE them or you can keep them in an air tight Tupperware container until you are ready to eat them. Enjoy 🙂

    lemon meringue cookie gushers easy and fun cookie recipe based on lemon meringue pie

    Tag us on Instagram @grabthemangos and give us a rating and review right here in the comments! And don't forget to pin and save it for next time!

    If you loved these cookies, be sure to check out our other desserts like Heath Bar Cookies or Fudge Hazelnut Espresso Cookies! Get your sweet tooth on 😉

    Lemon Meringue Cookie Gushers

    Lemon Meringue Cookie Gushers

    Yield: 12
    Prep Time: 15 minutes
    Cook Time: 45 minutes
    resting time: 1 hour
    Total Time: 2 hours

    This lemon meringue cookie recipe is low carb, delightfully sweet but also that perfect lemon tart, and so simple and easy.  Using egg whites for the cookies and the yolks for the lemon curd- this recipe only has a few ingredients that you probably have on hand. 

    Ingredients

    Meringue Cookies

    • 4 Egg Whites, save the yolks separately
    • 1 cup Granulated Sugar
    • ½ teaspoon Cream of Tartar

    Lemon Curd Filling

    • 4 Egg Yolks
    • ½ cup Lemon Juice, or 2-3 lemons squeezed
    • ½ teaspoon Lemon zest
    • 3 tablespoon Butter
    • ½ cup Sugar

    Instructions

    1. Pre-heat the oven to 200.
    2. Separate the egg whites from egg yolks making sure to save both in separate bowls. Make sure no egg yolk gets into your egg whites or the cookies won't work.
    3. Place the egg whites in a large mixing bowl and add the cream of tartar.  Using the whisk attachment, beat the mixture until stiff peaks form.
    4. Continue to beat and gradually, a tablespoon at a time, add in the cup of sugar. 
    5. Beat until the mixture is glossy and the peaks hold their shape. 
    6. Scoop into a piping bag with the large piping star tip.  Use a sturdy metal one that screws on for the best results.  
    7. Pipe out cookies on a baking sheet with parchment paper on it.  Try to get them all the same size for an even bake. 
    8. Place them in the oven for 45 min, or until they are firm and golden on the bottoms. 
    9. When they are done, just turn the oven off and leave them to cool and set for about 40 minutes to an hour before taking them out. 

    Lemon Curd Filling

    1. While they are baking in the oven make your lemon curd filling. 
    2. Taking your egg yolks, whisk in the sugar, lemon juice, and lemon zest and put in a pot on the stove.  Add the butter in the pot. 
    3. Whisk continuously while cooking the mixture over medium to low heat until it thickens and bubbles start to appear.   Let it cool completely. 

    Filling the Cookies

    1. When everything is cooled completely it's time to start filling the cookies. 
    2. Scoop the lemon curd into a piping bag with a round medium sized piping tip.  Again for the best results use a sturdy metal one that screws on. 
    3. Poke a small hole into the bottom of the cookie using the metal piping tip and begin to squeeze the lemon curd into the center of the cookie.  To get enough filling in make sure to aim the tip into the sides of the cookie as well.  
    4. Once you're done, you can try to not eat them all in one sitting by storing them in dry, air tight Tupperware until you are ready to eat them all up! Enjoy! 
    © CradleKitchen
    Category: Dessert

    Heath Bar Cookies

    January 30, 2019

    stack of heath bar cookies with one bite taken out.

    Ok, these are INCREDIBLE heath bar cookies! This cookie recipe is talked about at every party or family dinner that I bring them to. Made with milk chocolate heath bar toffee bits, these are the most amazing gooey cookies!

    a cookie with heath bar bits broken open to see gooey center

    The Best Cookies:

    These started out as just a fun substitution for chocolate chips in our cookies, but once we realized how amazing the heath bar bits were in the gooey cookies, I decided to vamp up the recipe to fit the flavor even better.

    So I made sure to give these cookies a good amount of brown sugar to add that really caramelly flavor to the cookie itself. The edges get nice and crisp after cooling but the inside is nice and chewy. Perfect 🙂

    hand holding half eaten cookie showing the texture

    Making Heath Bar Cookies:

    Start out by mixing the wet ingredients in a large bowl and dry in another bowl. Then add the dry ingredients into the wet ingredients and mix until a dough forms. Trust me, you don't want to skip the separate mixing step. I tried it once and just threw everything in together and, wow, it made a difference. The butter didn't quite mix right with the flour, it took longer to combine fully, and then the cookies came out flat and not quite as good.

    Once you've mixed everything, add in the Milk Chocolate Heath Bar Bits and combine. I like to cook all my cookies on some parchment paper because it helps them to cook more evenly and guarantees no sticking (especially in a recipe with sticky toffee bits in it) without adding any extra grease. Make sure there is enough room between each ball of dough for the cookies to spread as they bake- about an inch or 2.

    Bake for about 10-12 minutes at 375 or until they look golden brown around the edges. Let them cool at least a little (I know it's hard to wait) and then gobble these heath bar cookies up with a glass of your favorite milk, tea, or coffee. (My secret treat in the morning with my coffee- so amazing)! Enjoy!

    vertical stacked heath bar cookies next to glass of milk

    Tag us on Instagram @grabthemangos and give us a rating and review right here in the comments! And don't forget to pin and save it for next time!

    heath bar cookies stacked pinterest pin

    If you LOVE these, which you will trust me, you will also go nuts for our Decadent Fudge Hazelnut Espresso Cookies! Yes, you deserve them. Go make now 🙂

    stack of heath bar cookies with one bite taken out.

    Heath Bar Cookies

    Yield: 12-18
    Prep Time: 15 minutes
    Cook Time: 12 minutes
    Total Time: 27 minutes

    Easy heath bar cookie recipe right here! THE BEST cookies with toffee bits and chocolate rolled into a brown sugar cookie for a chewy and amazing flavor! Families, holidays, kids, friends- everyone will love these!

    Ingredients

    • 2 ½ cups Flour
    • ½ teaspoon Baking Soda
    • 1 teaspoon Baking Powder
    • 1 teaspoon Salt
    • 1 cup Butter, softened
    • ½ cup Granulated Sugar
    • 1 cup Brown Sugar
    • 1 teaspoon Vanilla
    • 2 Eggs
    • 1 8oz bag Heath Bar Toffee Bits

    Instructions

    1. Pre-heat oven to 375.
    2. In a large mixing bowl, combine the butter, sugar, brown sugar, vanilla, and eggs.  Mix well until creamy.
    3. In a separate bowl combine the flour, baking soda, baking powder,and salt.
    4. Slowly add the dry ingredient mixture into the wet ingredients in the large bowl.  
    5. Once fully combined, add in the heath bar bits and fold into the dough. 
    6. Scoop rounded tablespoons onto parchment paper on a baking sheet with at least 1.5 inches between each cookie. 
    7. Bake for 10-12 minutes until golden brown around the edges. 
    8. Let cool slightly and enjoy!

    Recommended Products

    As an Amazon Associate and member of other affiliate programs, I earn from qualifying purchases.

    •  3 Non-Stick Cookie Sheet Set
       3 Non-Stick Cookie Sheet Set
    • Hershey's Heath Bits 'O' Brickle Baking Pieces - 8 oz - 2 pk
      Hershey's Heath Bits 'O' Brickle Baking Pieces - 8 oz - 2 pk
    Nutrition Information:
    Yield: 18 Serving Size: 1 cookies
    Amount Per Serving: Calories: 295Total Fat: 15gSaturated Fat: 9gTrans Fat: 0gUnsaturated Fat: 5gCholesterol: 55mgSodium: 325mgCarbohydrates: 37gFiber: 1gSugar: 24gProtein: 3g

    Nutritional information is not always 100% accurate.

    © Miriam Reeves
    Cuisine: American / Category: Dessert


    One Pot Gouda Mac and Cheese

    January 29, 2019

    One Pot Gouda Mac and Cheese

    Who doesn't like a good bowl of creamy, gooey, cheesey Mac and Cheese every so often? I know my 3 year old would eat it everyday for lunch if I let her. So this is the gourmet version that we like to make whenever we want real, good, savory one pot Gouda mac and cheese.

    Mac and cheese in a bowl with green onions on top

    The nice thing about this recipe is that you can make the whole thing in one pot- less dishes and less space. I have a really small kitchen to be honest, and our goal is to move onto a school bus "skoolie" in the next couple years so it may only get smaller for me. So I definitely am a fan of "one pot" recipes. Less mess and dishes if I can help it.

    Making Mac and Cheese:

    Start out with the butter and flour making a simple roux which will help thicken the sauce. I like to let the butter get to that just browning stage before adding in the flour to really get some of that good butter flavor going first.

    Once you have made your roux, start adding the liquids. We used almond milk for a couple reasons. One, it adds a nutty undertone that goes really well with cheese flavors. Two, we get the bulk- 6 boxes of almond milk from Costco (also on Amazon in the link above) so we use it a lot in baking and cooking to save on our regular milk. If you prefer a different type of milk though feel free to use what you have. Add the chicken broth as well and start stirring and bringing to a boil. Once it's boiling add the macaroni and cook on a low boil just like if you were cooking it normally until done. The mixture will thicken quite a bit while the pasta cooks.

    Once the macaroni is done, begin adding the cheeses. We just get the small 7oz wedge of Gouda at Target. It's in any deli section usually. The sharp cheddar adds that sharp flavor boost and the cream cheese adds even more creaminess to the mixture. Once the cheese is melted in, add the spices and salt and pepper to taste and cook on low heat for a couple minutes just to let the spices combine well into the cheese sauce.

    Serve it up hot, get comfy, and enjoy the best one pot Gouda mac and cheese ever!

    above photo mac and cheese in a bowl with green onion on top

    Tag us on Instagram @grabthemangos and give us a rating and review right here in the comments! And don't forget to pin and save it for next time!

    If you love this recipe be sure to check out our Stir Fried Noodles recipe too 🙂

    One Pot Gouda Mac and Cheese

    One Pot Gouda Mac and Cheese

    Prep Time: 10 minutes
    Cook Time: 30 minutes
    Total Time: 40 minutes

    Easy, creamy, cheesey, and loads of flavor! This homemade mac and cheese recipe is all made in one pot on the stovetop with gouda, cheddar, and cream cheese for the best comfort food imaginable! 

    Ingredients

    • 2 tablespoon Butter
    • 3 tablespoon Flour
    • 2 cups Almond Milk
    • 3 cups Chicken Broth
    • 1 box Elbow Macaroni
    • 7 oz Gouda , diced
    • 1 cup Sharp Cheddar , shredded
    • ½ 8 oz block Cream Cheese
    • 1 teaspoon Garlic
    • ½ teaspoon Nutmeg
    • 1 teaspoon Paprika
    • Salt and Pepper , to taste

    Instructions

    1. In a large pot or dutch oven, melt the butter on medium-low heat.  
    2. Once melted completely and just beginning to brown, add the flour and combine with a whisk. 
    3. Add the milk of choice (almond milk adds a little bit of a nuttier flavor) and the chicken broth and combine well using the whisk. 
    4. Bring to a boil and add the macaroni. Reduce to a low boil and stirring every couple minutes. 
    5. Once macaroni is fully cooked and the mixture has thickened, add the cheese slowly mixing it in with a spoon to melt and combine fully.  
    6. Add the spices in and cook on low for 5-10min stirring constantly.  
    7. Serve hot and Enjoy!! 
    © CradleKitchen
    pin for one pot gouda mac and cheese

    Maple Chili BBQ Sauce

    January 21, 2019

    Maple Chili BBQ Sauce

    Mmmm Mmm! Who doesn't need a good BBQ sauce in their life, especially a Maple Chili BBQ sauce? YUM! We are always trying the different BBQ sauces at each store we go to. Some of our favorites are actually at a little antique store in Anoka, MN called The Big White House. If you've been there, wonder over to the kitchen side and take a look at their incredible goodies.

    That's what made me want to come up with our very own BBQ sauce. We like a little bit of a kick to ours but I also love all things maple and sweet (I have the worst sweet tooth and my husband and kids are no help at all- they just encourage it) so this recipe is a favorite for us now! The best part- it is so dang simple. I made this while holding my giant 4 month old son (seriously- 9.5 lbs when he was born = woah!) and dancing to The Cure with my 3 year old daughter (I'm a total 80's emo child at heart). That's how easy this recipe is!

    Bring all the ingredients together to boil in a pot. I would go with a medium pot just to give your sauce more room to boil without spilling over. Keep whisking the sauce to make sure nothing is sticking to the bottom of the pot, and set at a rolling boil- so probably just above medium heat. I stir this up probably every minute to every other minute just to keep it moving.

    Once you see that the sugars in it are starting to caramelize and the sauce is starting to thicken to the consistency you prefer, you can turn off the heat. Keep whisking until the bubbles all go away and let it cool off. Whisk it together one last time before pouring into a glass jar. I think it tastes even better once it's been chilling for a couple hours but feel free to use it right away! We LOVE this maple chili BBQ sauce on pulled chicken or pork and especially on burgers. Try it out and enjoy!

    Maple Chili BBQ Sauce

    Maple Chili BBQ Sauce

    Prep Time: 5 minutes
    Cook Time: 10 minutes
    Total Time: 15 minutes

    This homemade BBQ sauce is so simple and easy to make! In only 15 min you'll have a sweet sauce that packs a punch.  Drool worthy for all your BBQ dishes!

    Ingredients

    • ½ cup Apple Cider Vinegar
    • ½ cup Ketchup
    • ¼ cup Dijon Mustard
    • 3 tablespoon Brown Sugar
    • 3 tablespoon Pure Maple Syrup
    • 1 teaspoon Chili Powder
    • 1 teaspoon Garlic
    • 1 tablespoon Worcestershire Sauce

    Instructions

    1. Place all ingredients into a medium sized pot on the stove. 
    2. Combine with a whisk and bring to a boil continuing to stir.
    3. Keep on a rolling boil (stirring consistently with whisk) until sauce thickens and reduces by at least ⅓.  
    4. Turn off heat and let it cool before storing in a glass jar (mason jars work well).  Keep refrigerated and enjoy! 
    Nutrition Information:
    Yield: 1 Serving Size: 1 Servings
    Amount Per Serving: Calories: 491Total Fat: 3gSaturated Fat: 0gTrans Fat: 0gUnsaturated Fat: 2gCholesterol: 0mgSodium: 2976mgCarbohydrates: 116gFiber: 4gSugar: 97gProtein: 4g

    Nutritional information is not always 100% accurate.

    © CradleKitchen
    Cuisine: American / Category: Main Meals

    Stir Fried Noodles

    January 18, 2019

    bowl of fried noodles with chop sticks

    Stir fried noodles is one of our favorite quick and easy - "wow where did the time go today- what the heck is for dinner" - meals to whip up. This fried noodle recipe is so great because these are all ingredients we normally have on hand and it's a quick throw together with delicious stir fried noodle flavor- what's not to love?

    Quick and Easy Asian Meal

    So my family's absolute favorite is stir fried noodles. I ask them all the time- "fried rice or fried noodles" and it's always the same answer- "if you're asking, then fried noodles." It's not because they don't like the fried rice, especially with some yum yum sauce, but because they just LOVE fried noodles. Who wouldn't choose pasta honestly? If you don't love pasta and noodles, you're just lying. Sometimes I just have to make fried rice and fried noodles because we can't decide and we like a lot of leftovers anyways. Don't judge.

    hand holding chop sticks picking up fried noodles

    Making Stir Fried Noodles:

    Start out by cooking up the noodles, like normal, in a pot with boiling water for about 5-8 minutes. We use all different kinds of noodles for this recipe and it always tastes good. Our favorite are our homemade fresh noodles but in a pinch we use regular store bought egg noodles and even some simple fettuccine noodles.

    While the noodles are boiling, fry up the sesame seed oil with your favorite stir fry veggies and/or protein. We usually toss in whatever is on hand making this super versatile. Think of: onions, peppers, carrots, water chestnuts (my absolute favorite), green beans, sugar snap peas, broccoli) and chicken. We also love some shrimp or scallops if we have them on hand at the time. Once that has been cooked through and looking delicious even by itself, toss the noodles in with the oil and veggies. Add the soy sauce, Hoisin sauce, and Worcestershire sauce to the pan and toss all together. Stir up for about 5 min at least to really immerse the noodles in the sauce and absorbing flavor. Serve these stir fried noodles hot and enjoy all this easy goodness!

    chop sticks with stir fried noodles

    Notes:

    Let's talk soy sauce. Not all Soy Sauces are created equal. A really good dark soy sauce will bring your flavor from good to amazing with a nice Dark soy sauce. It has so much more rich flavor.

    A wok. You need one. I think everyone needs a good wok if you plan on making fried rice, fried noodles, and so many other tasty dishes. For sure get one. Trust me!

    Try out those homemade fresh noodles for this recipe 😉

    hand lifting up stir fried noodles
    bowl of fried noodles with chop sticks

    Stir Fried Noodles

    Yield: 4
    Prep Time: 15 minutes
    Cook Time: 15 minutes
    Total Time: 30 minutes

    Easy Asian stir fried noodles recipe that is so versatile and customizable! Make it with spaghetti, fettuccine, classic egg noodles, whatever you've got. 

    Ingredients

    • Egg Noodles or our Easy Rolling Pin Noodles
    • 1 tablespoon Sesame Oil
    • ⅓ cup Dark Soy Sauce
    • ¼ cup Hoisin Sauce
    • 2 tablespoon Worcestershire Sauce

    Instructions

    1. Boil noodles according to the instructions on the box or until al dente.
    2. While noodles cook, begin to saute your favorite stir fry veggies (carrots, peppers, onions, water chestnuts, peas, green beans...) and/or meat or fish (chicken, beef, pork, shrimp, scallops...) in the sesame seed oil. 
    3. Once they are cooked through well, add the noodles and the sauces. 
    4. Stir well and keep cooking on medium to low heat to let the noodles absorb and get coated in the sauce. 
    5. Serve hot and gobble this tasty dish up! 
    Nutrition Information:
    Yield: 4
    Amount Per Serving: Calories: 187Total Fat: 5gSaturated Fat: 1gTrans Fat: 0gUnsaturated Fat: 4gCholesterol: 12mgSodium: 1500mgCarbohydrates: 29gFiber: 2gSugar: 6gProtein: 6g

    Nutritional information is not always 100% accurate.

    © Miriam Reeves
    Cuisine: Chinese / Category: Main Dish
    • « Go to Previous Page
    • Page 1
    • Page 2
    • Page 3
    • Page 4
    • Page 5
    • Go to Next Page »

    Primary Sidebar

    gluten free recipes

    Vegan Quinoa Bowl in a white bowl

    Vegan Quina Bowls

    Reuben dip in a cast iron skillet with a wood woven charger under the pan

    Ultimate Reuben Dip - With Deli Corned Beef

    glass of the best dairy free eggnog with almond milk and sprinkled nutmeg and a cinnamon stick

    The Best Dairy Free Eggnog with Almond Milk

    bowls of creamy dairy free roasted butternut squash soup

    Roasted Butternut Squash Soup - dairy free

    I'm Renee and welcome! Grab the Mangos focuses on affordable, simple, and easy-to-make recipes. Let's make delicious food together with easy steps and simple ingredients so you have one less stress in your life.

    More about me →

    NEW RECIPES

    • Christmas Tree Cupcakes on a white wood surface.
      Christmas Tree Cupcakes
    • Wood bowl of Christmas Trail Mix.
      Christmas Trail Mix: The Ultimate Holiday Snack Mix
    • Apple cider donut Bundt cake on a wood cake stand.
      Apple Cider Bundt Cake (Gluten Free Option Included)
    • pumpkin spice syrup in a jar with a lid and tag and a jar without a lid.
      Homemade Pumpkin Spice Syrup Recipe: A Perfect Fall Treat

    TREADING RECIPES

    • stack of heath bar cookies with one bite taken out.
      Heath Bar Cookies
    • holding a wood bowl of gnocchi.
      Best Gnocchi Recipe
    • mahi mahi in a cast iron skillet with mango chunks and cilantro
      Hawaiian Style Mahi Mahi Recipe
    • rolled out pizza dough
      Super Easy Pizza Dough

    Footer

    ↑ back to top

    About

    • About
    • Privacy Policy
    • Disclaimer

    Newsletter

    • Sign Up! for emails and updates

    Contact

    • Contact

    As an Amazon Associate, I earn from qualifying purchases.

    Copyright © 2020 Brunch Pro on the Brunch Pro Theme