• Skip to primary navigation
  • Skip to main content
  • Skip to primary sidebar
  • Skip to footer
  • Recipes
  • Shop
  • About
  • Contact Me

Grab the Mangos

  • Recipes
    • Main Dish
      • Beef
      • Chicken
      • Seafood
      • Vegetarian
    • Breakfast
    • Side Dishes
    • Dessert
      • Cakes
      • Cookies
      • Brownies + Bars
    • Salads
    • Drinks
    • Snacks
    • Bread
    • Sauces
  • Healthy Living
  • About
  • Shop
    • Appliances
    • Baking
    • Beautiful Kitchen
    • BIPOC Owned Favorites
    • Dishware
    • Eco Healthy Kitchen
    • Food Photography
    • Foods You’ll Love
    • Kitchen Tools + Gadgets
    • Organizing
    • Pots and Pans
  • Contact Me
menu icon
go to homepage
  • Recipes
  • Shop
  • About
  • Contact Me
    • Facebook
    • Instagram
    • Pinterest
  • subscribe
    search icon
    Homepage link
    • Recipes
    • Shop
    • About
    • Contact Me
    • Facebook
    • Instagram
    • Pinterest
  • ×

    Recipes

    Healthier Apple Pie French Toast

    October 12, 2020

    stack of french toast covered in apple pie filling on white plates

    This cool Autumn weather makes you want some warm apple recipes loaded with cinnamon before all that pumpkin spice arrives to spam your life. We love this amazing apple pie french toast in the morning. Who doesn't like french toast really? If you don't like french toast you either need to try a better recipe or you need professional help. I'm here with that first option- this delicious recipe. Our healthier apple pie french toast recipe is a winner. I have tried lots of homemade french toast that are dry, bland, and just basically soggy toast with syrup. We can do better people. Three words- Use. Your. Spices. Cinnamon, nutmeg, and cloves or allspice make or break a good french toast recipe. Let's make this!

    stack of french toast covered in apple pie filling on white plates

    What is the Secret to good Apple PIe French toast?

    There a quite a few things that make good french toast the best.

    • Let the bread go stale. Seriously, leave the bread you are going to use sit out over night and get dry and stale. This really helps with the next tip:
    • Soak the stale bread in the egg mixture for as long as you can, even over night is good. The stale bread will gobble that mixture up and make a really tender french toast. Un-stale bread will just fall apart and become soggy.
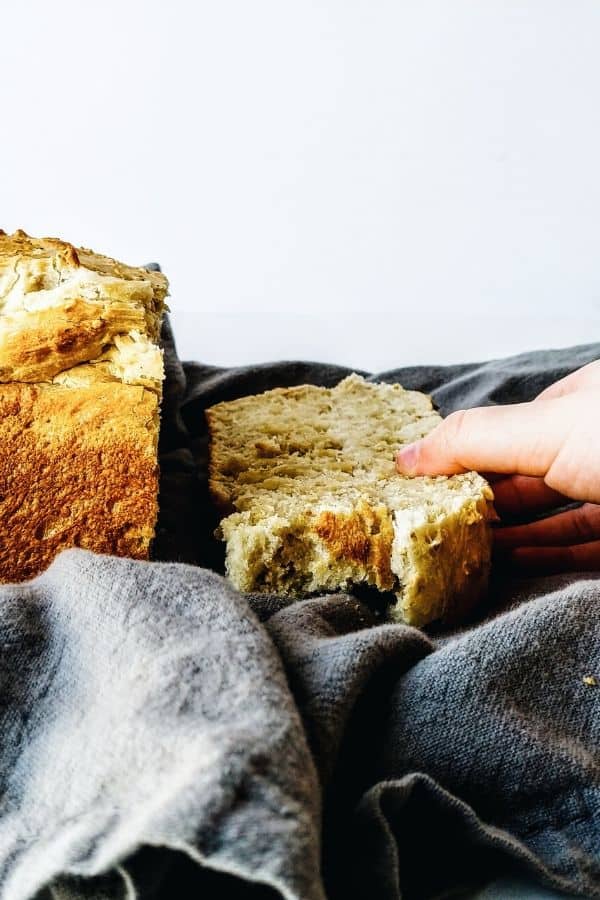
    • Use a thick bread like challah or a thick sliced french bread. This again helps with soaking it and getting all that tender texture and flavor.
    • Put your spices right into that egg mixture and don't skimp out on them. Load these babies up!
    apples in the background of a french toast stack

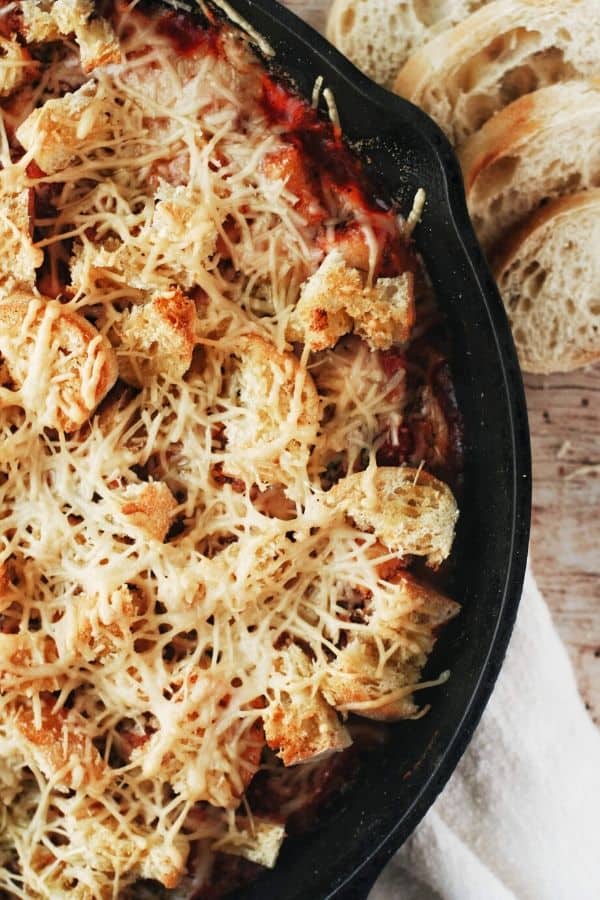
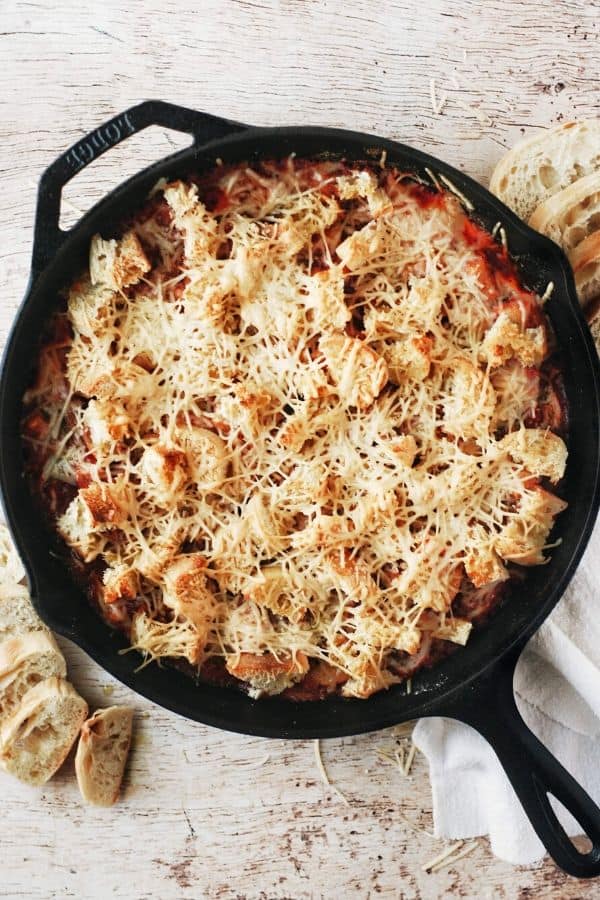
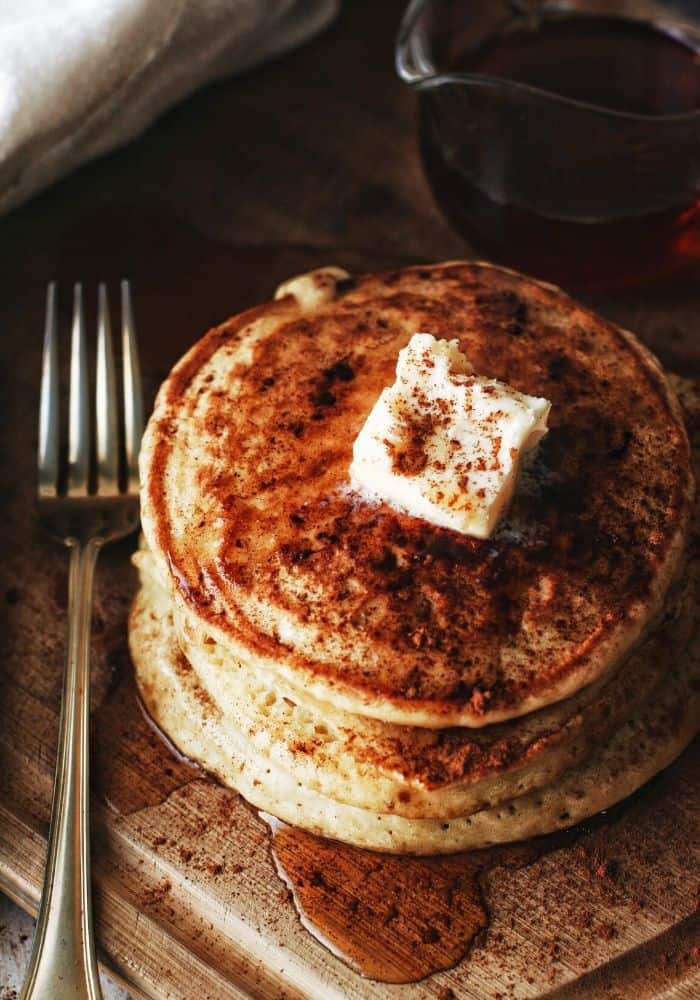
    We bake our french toast in this recipe so the only butter we used is for slathering it on top with maple syrup if you want it. Baking it is super easy and quicker which is really nice in the morning especially if you have people that wake up "hangry."

    Why does my French Toast come out Soggy?

    Generally, if you are doing all of those tips above right and you are still getting soggy french toast, you are using too much dairy or sugar in your recipe.

    In our recipe, you can use either regular milk, almond, or oat milk for your "dairy." We don't put sugar in the egg mixture in our recipe simply because we cover it with the apple pie sauce and that sweetens things up perfectly.

    a fork standing up in the stack of apple pie french toast

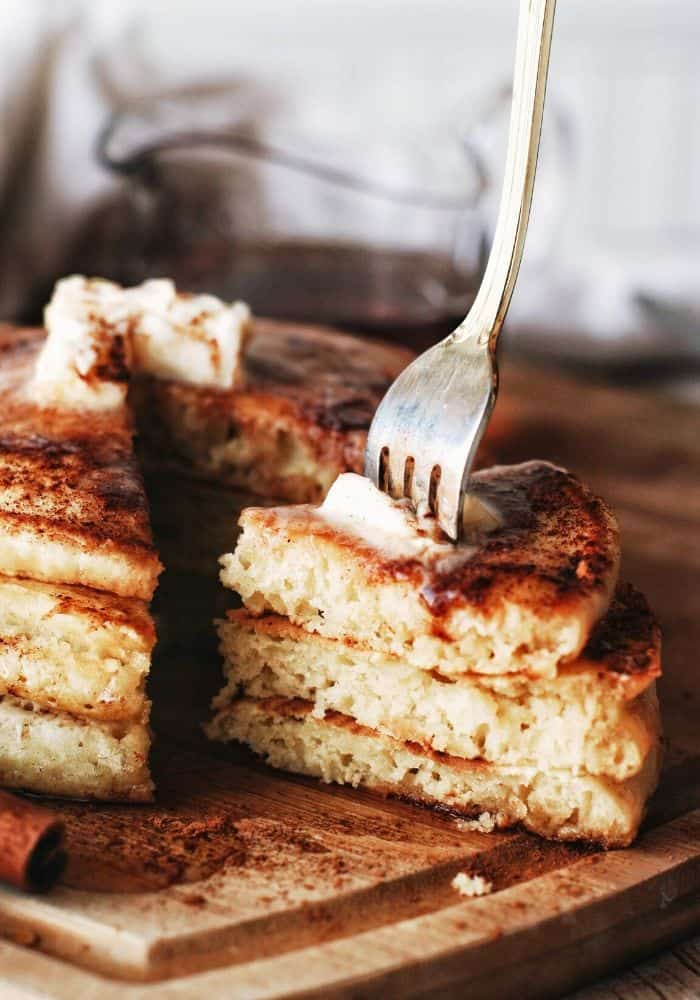
    A perfect slice of french toast has crispier edges and a soft tender center. Too much dairy in the egg mixture makes the egg not able to create that cooked firm coating on the bread.

    How to make Apple Pie French Toast

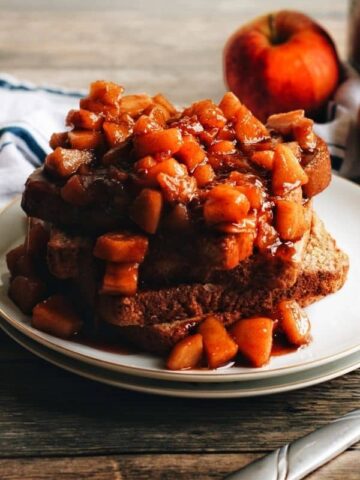
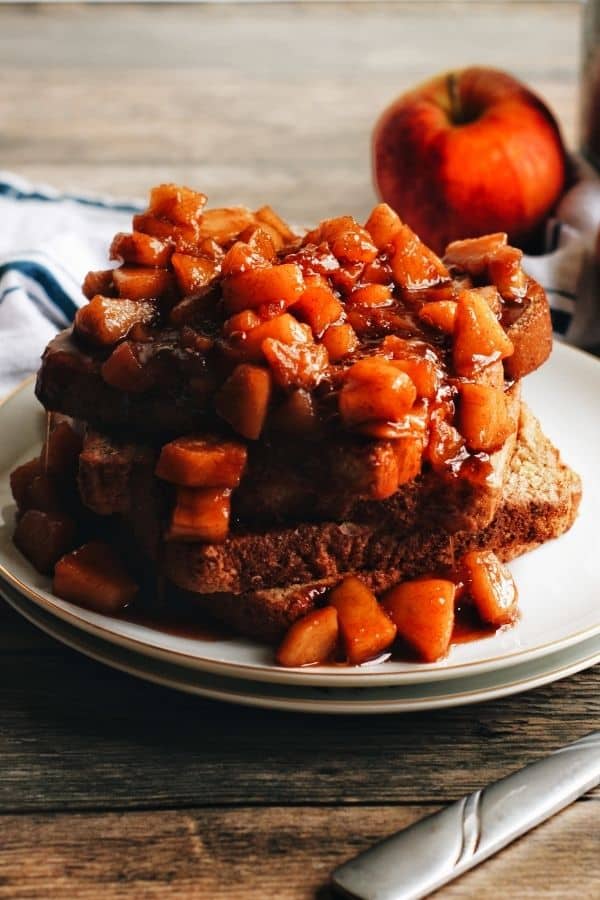
    The apple pie sauce is what makes this french toast recipe perfect for fall and so so delicious! Make with fresh apple chunks, cinnamon, nutmeg, and maple syrup. There's nothing better.

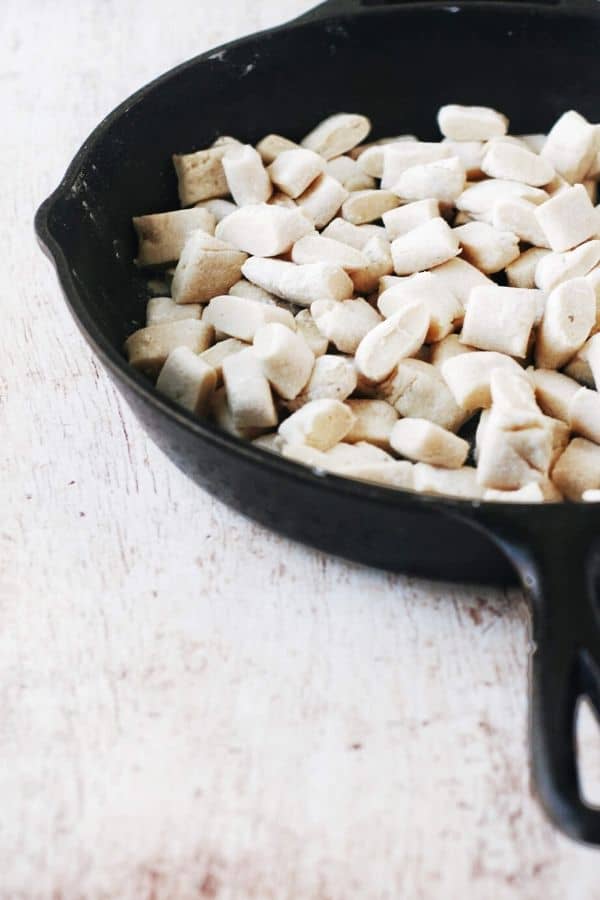
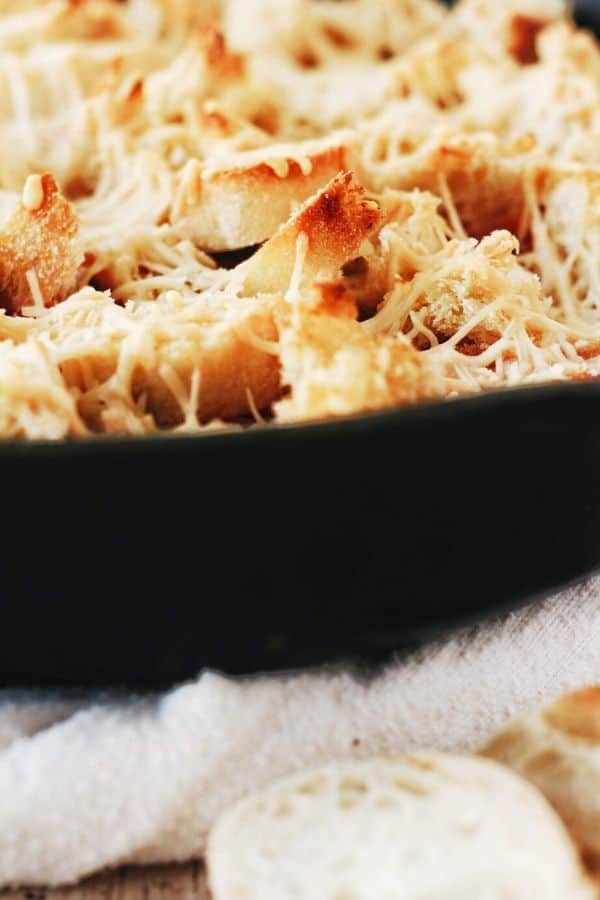
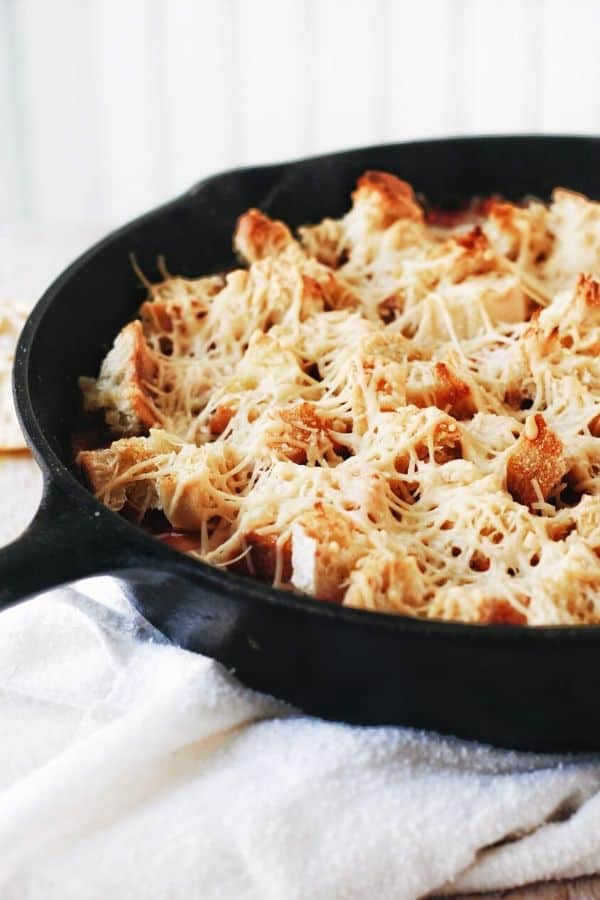
    Take your stale bread and soak in your cinnamon egg mixture while you preheat your oven (unless you went the extra step of soaking it all night- in which case just preheat your oven). When you are ready to bake, put the soaked bread pieces on parchment paper and pop them in the oven.

    close up of a stack of french toast and apple pie sauce with a bite taken out of it

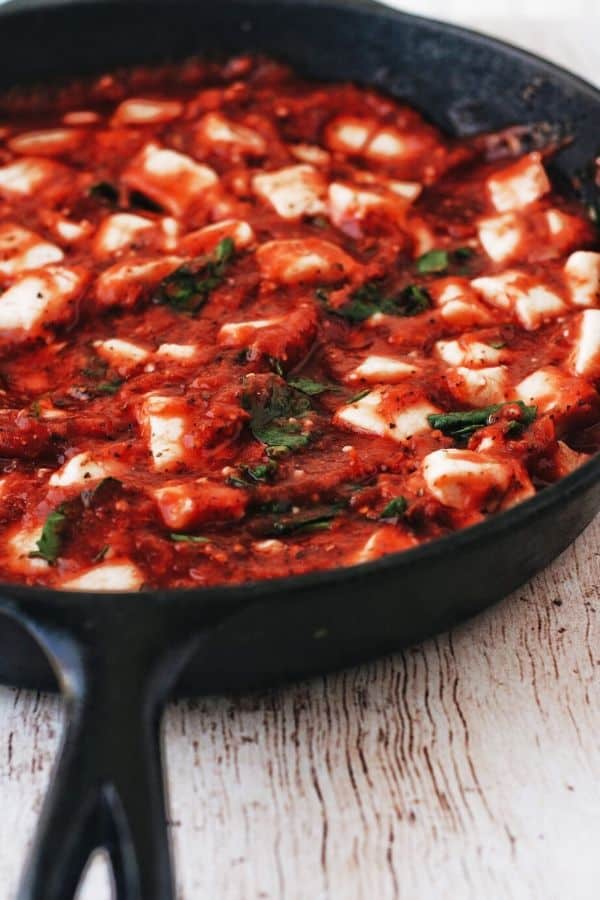
    While they bake you can make your apple pie sauce. This apple pie sauce is made really simply. Just slightly sticky and perfectly (not overly) sweet and spiced.

    With water, apple chunks, cinnamon, nutmeg, cloves, and maple syrup boiling in a pot together, the apple's natural fruit juices help to make that sticky sweet sauce for your french toast. Super easy to make!

    Hope you enjoy this apple pie french toast as much as we do!

    white plate full of french toast with apple pie sauce being poured onto it

    This post may contain affiliate links. If you click and buy, I may make a commission at no cost to you. See my policy for more information.

    Tag us on Instagram @grabthemangos and give us a rating and review right here in the comments! And don't forget to pin and save it for next time!

    This super yummy and easy to make baked apple pie french toast is healthier and perfect for cool fall mronings! With cinnamon and nutmeg, you whole kitchen will smell like autumn rolled through it. pinterest pin

    More Sweet recipes for you to love

    • Skillet Apple Crumble
    • Easy Cinnamon Baked Apples
    • Apple Zucchini Bread
    • Fluffy Cinnamon Pancakes
    • Pumpkin Cinnamon Rolls (gluten and dairy free)

    Shop The Post

    stack of french toast covered in apple pie filling on white plates

    Healthier Apple Pie French Toast

    Yield: 4 servings
    Prep Time: 20 minutes
    Cook Time: 15 minutes
    Total Time: 35 minutes

    This super yummy and easy to make baked apple pie french toast is healthier and perfect for cool fall mornings! With cinnamon and nutmeg, you whole kitchen will smell like autumn rolled through it.

    Ingredients

    Apple Pie Sauce

    • 4 Apples
    • ½ cup Water
    • 1 teaspoon Cinnamon
    • ¼ teaspoon Nutmeg
    • ¼ teaspoon Cloves
    • ¼ cup Maple Syrup

    French Toast

    • 4-6 Thick Bread Slices
    • 3 Eggs
    • ¼ cup Milk 
    • 1 teaspoon Cinnamon
    • 1 teaspoon Honey

    Instructions

    1. Pre-heat oven to 375.
    2. Beat the eggs, milk, cinnamon, and honey together in a bowl.
    3. Place stale slices of bread in the egg mixture to soak for about 5 minutes or longer. (if bread is not stale, don't soak for more than a minute or 2)
    4. Once soaked sufficiently, place bread onto parchment paper on a baking sheet and bake in the oven for 15 minutes.
    5. While it bakes, make your sauce.
    6. Peel your apples and cut them into bite sized pieces (removing the core).
    7. Place them in a pot to boil on high with the water.
    8. Boil for about 5-7 minutes until it begins to get a bit thicker and sticky.
    9. Add your apple pie sauce spices (cinnamon nutmeg and cloves) and mix into the sauce well.
    10. Heat for 5 more minutes, then add your maple syrup and stir for about 3 minutes to bring it all together.
    11. Let it cool and then serve over the baked french toast.
    12. Enjoy!
    Nutrition Information:
    Yield: 5 servings Serving Size: 1
    Amount Per Serving: Calories: 274Total Fat: 5gSaturated Fat: 1gTrans Fat: 0gUnsaturated Fat: 3gCholesterol: 113mgSodium: 236mgCarbohydrates: 52gFiber: 5gSugar: 28gProtein: 8g

    Nutritional information is not always 100% accurate.

    © Miriam
    Cuisine: American / Category: Breakfast

    How to Make Healthy Food Taste Good

    September 30, 2020

    table covered in yummy colorful foods

    The motto of this entire blog: how to make healthy food taste good while keeping it simple and easy to make. This entire post is how we have learned to make healthy foods taste good, and I mean really REALLY good. Good enough for my toddler to love means absolutely delicious because, well, toddlers can be opinionated can't they. So what's that process? How do you go about making healthier foods and ingredients taste good? How do you take a regular recipe and switch things up to make it more healthy and enjoyable? Well let's walk through that process a bit here with all of our best tips and tricks in our healthy-ish kitchen.

    table covered in yummy colorful foods

    What Makes a Meal Healthy?

    So here's where I want to clarify what we and Grab the Mangos mean by "healthy food." Obviously because I'm writing this post up, I don't like my food to taste like leaves and dry bland fish. I want flavor, mega flavor. I want spices, heat, and even sweetness. Enjoying life includes BOTH enjoying your food and feeling good because of it.

    That's why we like to break our recipes down into 3 categories:

    Healthy-ish

    Healthier

    Super Healthy

    What do these mean? Let's start with Healthy-ish.

    When we make a brand new recipe from scratch, we always reach for healthy ingredients. Then we add the flavor which may or may not be "healthy." In the case where a recipe just needs some extra love with something that generally isn't considered to be healthy, I like to call it healthy-ish. Healthy-ish means the recipe has less of the bad stuff, more of the good stuff, a lot of flavor, and is as well balanced as I can get it.

    slice taken out of almond flour carrot cake

    An example of a healthy-ish recipe would be our Almond Flour Carrot Cake (above). This cake is gluten free, has FAR less sugar than a normal carrot cake, and has an easy substitute for the cream cheese frosting if you want to go the extra mile. So while this cake isn't necessarily what I would call a healthy recipe, it is "healthy-ish."

    So what's healthier? This one is more simple. This is what I call it when you take a good old original recipe and simply substitute things, change amounts, and alter the recipe to make it healthier. An example of this being our

    Super healthy, again, is more self explanatory. It's any recipe that you would consider a super health filled, energizing, nutritious recipe.

    How to make Healthy Food taste Good

    knife chopping up fresh herbs

    There are so many easy and simple ways to make healthy food taste good. Here are some of our favorite ways:

    • Use Spices, Seasonings, and/or Extracts. Got a vegetable or healthy food that you don't like the natural taste of? No problem. We add spices and seasonings, fresh herbs, or even extracts to a lot of our food. Our favorite for veggies is the classic garlic and sea salt. I'm pretty sure this will make any asparagus, green bean, or Brussels sprout taste great on your plate. Next time you go to the store be sure to browse the spices. Get the ones that seem interesting to you and then don't be afraid to use them generously in your dish. Part of learning what you like is trying out new things.
    • Use a Healthy Fat. We only buy extra virgin olive oil and butter as our cooking and baking fats. This is primarily because we like the taste of these the best but it's also because real Extra Virgin Olive Oil has so many good health benefits. Drizzle it over your veggies to roast or pan cook them, use it in baking as a substitute for canola or vegetable oil, you can do all of it with a good olive oil. We also use butter, although not as often, for some cooking but mostly for baking or just buttering toast.
    • Start with GOOD Ingredients. So many people think of healthy food as "sugar free brownies" or "protein bars and shakes." Stop just eating "healthy" products marketed to you and focus on just getting actual fresh and delicious ingredients.
    • Stop thinking that healthy food must taste bad. One of the things that keeps people from wanting to start eating healthy is that it must not be as tasty right? WRONG! Fresh, seasoned, delicious food with loads of flavor tastes amazing and is healthy! Eating healthy should just be about eating wholesome, real, fresh, products that you've cooked and made into something delicious. Things like Sea Salt, lemon juice, and a fresh herb can make the best roast chicken you've ever had. Change your mindset- it's not all bland leafy greens.
    • Use a sauce. One of our FAVORITE ways to spice things up and eat a quick and easy healthy meal is to have a sauce to simply pour over it. We love making things like a cilantro lime sauce, avocado sauce, etc. Sauces help maximize the flavor and honestly make cooking a breeze. A lot of our favorite meals are simple sheet pan dinners with seasonings and then a sauce over pita bread.
    • Think of the flavor you're actually craving and make it happen. So many people think healthy food must be a plain plate of baked chicken and veggies. NOO! What are you craving? Salty, Sweet, Sour, Spicy? Use these 4 flavor points like a compass. The best way to make sure you aren't craving more an hour after your meal is to put the flavors that you are craving in your food. Play off these flavors- Spicy and Sweet- Mangos and Chiles. Salty and Sour- Salt and Vinegar. Eat the flavors you are craving and be happy!
    cutting board with herbs and fresh veggies

    There are so many ways to make your healthy foods taste amazing. These are my favorites, so I hope they help you too. Just remember, practice makes perfect and that applies even in cooking. Keep experimenting with flavors you like. Keep finding new ingredients to try.

    Here are some of our favorite recipes for you to start out with:

    • Slow Cooker Healthy Beef Chili Recipe
    • Scrumptious Spinach Pesto Pasta
    • Roasting Mini Sweet Peppers
    • Almond Flour Double Chocolate Muffins

    Shop Our Favorites:

    Don't forget to share!

    The best ways to make healthy food taste good! With spices, herbs, and so much more. Eat well and be happy!

    Easy Spinach Basil Pesto Pasta

    September 18, 2020

    This Spinach Basil Pesto Pasta is so creamy and delicious made with fresh flavors of spinach, basil, pine nuts, garlic, fresh tomato, olive oil, and a dry-aged cheese like Parmesan, Parmigiano-Reggiano, or Pecorino. 

    why we added spinach to pesto

    The traditional version of a good pesto sauce for your pasta is made with Basil. Some fresh basil, olive oil, toasted nuts, and spices make a great pesto- we actually have that recipe here on the blog (Basil Pesto). But I love the depth the spinach gives to this pesto it really adds another layer of flavor. And you only need a little basil so it's also a lot more affordable making it this way.

    Ingredients in Spinach basil pesto

    • Spinach
    • Basil
    • Parsley
    • Lemon Juice
    • Parmesan
    • Toasted Nuts (almond or pine nuts)
    • Salt, Pepper
    • Garlic

    The fresh sharp bite of a little lemon juice with the salty amazing Parmesan is what really brings this recipe to the top of the list of easy great recipes. Pop all of your ingredients in a food processor and let the magic happen!

    Health Benefits of Spinach

    There are so many health benefits to eating spinach and this recipe is perfect for getting it onto the plate while still tasting great because it leaves the spinach raw.

    Some of the best health benefits to eating up some spinach recipes like this one are:

    • Heart Healthy- spinach contains high levels of omega-3 fatty acids and folates.
    • Strengthens your bones- spinach is a rich source of Vitamin K which helps promote stabilization and strength in the bones.
    • Good for Eye sight and Immune system- spinach contains beta carotene, zeaxanthin, lutein and chlorophyll, all great for improving eye sight and your immune system.
    • Helps skin- spinach has a lot of vitamin A which helps to repel viruses and bacteria especially on the skin and mucous membranes.
    • Energizing- spinach contains magnesium which helps you to generate energy.

    Needless to say, spinach is called a super food for a reason! This recipe just makes it even tastier.

    Hope you enjoy it as much as we do!

    This post may contain affiliate links. If you click and buy, I may make a commission at no cost to you. See my policy for more information.

    Tag us on Instagram @grabthemangos and give us a rating and review right here in the comments! And don't forget to pin and save it for next time!

    More Sweet recipes for you to love

    • Basil Pesto (dairy free)
    • Vegan Red Pepper Pasta
    • Garlic Bread Baked Gnocchi
    • Zucchini Noodles with Lemon Butter

    Shop the Post

    Easy Spinach Basil Pesto

    Easy Spinach Basil Pesto

    Yield: 4 servings
    Prep Time: 10 minutes
    Total Time: 10 minutes

    This delicious spinach basil pesto pasta is so easy to make! Just pop the ingredients in the blender and top your pasta with this scrumptious sauce. Spinach, lemon, and parmesan, yum!

    Ingredients

    • 2 cups Spinach
    • ½ cup Basil (.5 oz container)
    • ¼ cup Parsley
    • 2-3 Garlic Cloves (peeled)
    • ¼ cup whole Pine Nuts/Almonds
    • ½ Lemon Juiced
    • ½ cup Parmesan
    • ¼ cup Olive Oil (use more or less for desired consistency
    • 1 12oz container of cherry tomatoes
    • Salt to taste
    • 1 lb your favorite pasta, cooked

    Instructions

    PASTA

    1. Cook pasta in a large pot with some salted water, according to the package. Drain and set aside. 

    SAUCE

    1. In a food processor, add olive oil, spinach, basil, parsley, pine nuts, garlic, cheese, and lemon juice with salt.
    2. Pulse several times to begin to blend. Scrape sides of the blender and pulse a few more times. You may need to scrape the sides again and pulse a few more times until all ingredients are well blended.
    3. Heat a tablespoon of olive oil in a pan over medium heat. Add tomatoes and Saute, shaking pan frequently, until tomatoes soften and skins just begin to wrinkle, about 2 minutes.
    4. When tomatoes are done cooking add cooked pasta and pesto and toss together.

      Notes

      Our favorite pasta with this pesto is penne or bow tie

      Nutrition Information:
      Yield: 4 Serving Size: 1
      Amount Per Serving: Calories: 556Total Fat: 38gSaturated Fat: 5gTrans Fat: 0gUnsaturated Fat: 31gCholesterol: 0mgSodium: 219mgCarbohydrates: 45gFiber: 7gSugar: 2gProtein: 14g

      Nutritional information is not always 100% accurate.

      © Miriam
      Cuisine: American / Category: Main Dish

      Easy Baked Cinnamon Apples

      September 11, 2020

      roasted apples and cinnamon

      That autumn (fall) weather is here if you live in Minnesota. It's rainy, overcast, and chilly outside. Perfect for hot drinks and warms spices. Treats like these easy baked cinnamon apples are the best for this lazy afternoons. So easy to make and so YUMMY. Like bites of apple pie without the work. This recipe couldn't be any easier. No peeling, no coring, no pastry. Let it bake and smell the spices as they fill your house with that spiced autumn scent.

      roasted apples and cinnamon

      Healthy Baked Cinnamon Apples

      These easy baked cinnamon apples are also healthy. No oil or butter. Just dry roasted with a sprinkling of brown sugar and cinnamon. The sugar and spice bakes into a sticky sweet coating on the apples that doesn't overwhelm and gives it that apple pie flavor without everything else.

      If you are looking for an AMAZING fall recipe, this dry roasted apple one is it!

      We like to leave our apple whole and cut it only a little so that it turns into a pull apart apple. This gives it a really yummy soft and juicy, but still a slight crunch in the middle, texture. It bakes in the oven just long enough for the brown sugar and cinnamon to caramelize into the apple and make it a sweet healthy fall treat.

      roasted apples falling apart with cinnamon sugar

      Healthy baked apples are one of the best parts of autumn weather and great recipe to keep on hand for a lazy evening after apple picking.

      Simple + Easy Baked CInnamon Apples

      This recipe is only 3 ingredients. That's how simple and easy it is. All you need are:

      • Apples (we love the Honeycrisp or Jazz apples)
      • Cinnamon
      • Brown Sugar

      That's it!

      apple slices roasted and covered in cinnamon

      To make these apples "pull apart" like we do, simply cut like you would to slice it into normal apple slices, but stop before you get to the bottom. Don't worry or stress if this doesn't work for you. You can cut them into thick slices and it will work just as well. Pull a parts are just fun!

      Bake the apples for about 30 minutes dry and plain. Then take them out and sprinkle cinnamon sugar into the slices you've created. Help open them slightly by placing a butter knife or fork into the slice and twisting slightly to open it up and sprinkle the sugar inside.

      roasted sliced apples on parchment paper

      If you just sliced the apples like normal, just sprinkle the cinnamon sugar on top like normal and bake for another 30 minutes.

      Either way you prep it, this recipe is easy peasy and SO delicious and aromatic. Your house being filled with warm spiced smells is half the reason to make this. I could smell it in my back yard even.

      hand reaching for apple slices

      Hope you enjoy this recipe as much as we do!

      Tag us on Instagram @grabthemangos and give us a rating and review right here in the comments! And don't forget to pin and save it for next time!

      This delicious, healthy, easy, perfectly Autumn/Fall weather recipe for baked cinnamon apples is the best! Only 3 ingredients, sweet, and aromatic. pinterest pin

      This post may contain affiliate links. If you click and buy, I may make a commission at no cost to you. See my policy for more information.

      More Sweet recipes for you to love

      • Apple Zucchini Bread
      • Gluten Free Apple Pie Coffee Cake
      • Skillet Apple Crumble
      • Pumpkin Cinnamon Rolls

      Shop the Post

      roasted apples and cinnamon

      Easy Baked Cinnamon Apples

      Yield: 5 apples
      Prep Time: 5 minutes
      Cook Time: 1 hour
      Total Time: 1 hour 5 minutes

      This delicious, healthy, easy, perfectly Autumn/Fall weather recipe for baked cinnamon apples is the best! Only 3 ingredients, sweet, and aromatic.

      Ingredients

      • 5 Sweet Apples (jazz, honeycrisp, or your favorite)
      • 3 tablespoon Brown Sugar
      • 1 teaspoon Cinnamon

      Instructions

      1. Preheat the oven to 375.
      2. Take each apple and cut as though you are normally slicing it but stop about half way down or so to create a pull a part apple. (or you can simply slice in half and bake with the skin on the bottom)
      3. Bake for 30 minutes on a baking pan lined with parchment paper.
      4. Take the apple out and sprinkle your cinnamon sugar on top of the apples and in between the slices. (use a fork to slip it in between the slices and twist slightly to open, then sprinkle some cinnamon sugar in).
      5. Bake for another 30 minutes.
      6. Take them out to cool and when you are ready dig in and enjoy!
      Nutrition Information:
      Yield: 5 Serving Size: 1
      Amount Per Serving: Calories: 121Total Fat: 0gSaturated Fat: 0gTrans Fat: 0gUnsaturated Fat: 0gCholesterol: 0mgSodium: 4mgCarbohydrates: 32gFiber: 5gSugar: 25gProtein: 1g

      Nutritional information is not always 100% accurate.

      © Miriam
      Cuisine: American / Category: Dessert

      Roasting Mini Sweet Peppers

      September 4, 2020

      overhead shot of roasted mini peppers with spices

      Whether it's a snack or a side dish, roasting mini sweet peppers is one of our favorite healthy and savory delicious foods to make. Honestly, roasting veggies is just too easy. Making them delicious is also too easy. We used salt, garlic, and pepper for this particular easy peasy recipe. The flavor of the peppers does the rest. Let it shine through with that sweet roasted flavor.

      overhead shot of roasted mini peppers with spices

      How do you eat mini sweet peppers?

      You can eat mini sweet peppers just like you would eat something like baby carrots. Just dunk them in things like hummus, ranch dressing, or blue cheese dressing and gobble them up.

      We like to roast them in the oven sometimes for extra flavor and to switch things up. Roasted peppers like this are especially great as a colorful and healthy side dish option.

      Roasted peppers on parchment paper

      Roasting mini sweet peppers and other mild veggies like this, helps to concentrate and highlight the yummy flavor. With a bit of Olive Oil and seasonings, this recipe really only take a few minutes to throw together before just letting it bake in the oven.

      How to make Roasted Mini Sweet Peppers

      Like I said above, roasting mini sweet peppers is super easy. You can either keep your peppers whole or I prefer to cut them in half length wise.

      close up of a roasted mini pepper

      You can toss them in a bowl with Olive Oil or you can spray some olive oil spray across them thoroughly on the baking sheet. Definitely make sure you use parchment paper underneath them while baking so that all the juices that caramelize don't wind up sticking to the pan.

      After coating your mini sweet peppers in the oil and seasonings you can roast them up.

      There a few options for eating them:

      • Top with some whipped goat cheese.
      • Feta Cheese crumble
      • Ranch or Blue Cheese dip
      • Or just right out of the oven
      a bunch of roasted peppers laid out

      Hope you enjoy these roasted sweet peppers as much as we do!

      Tag us on Instagram @grabthemangos and give us a rating and review right here in the comments! And don't forget to pin and save it for next time!

      These delicious roasted sweet mini peppers are perfect for an easy and quick snack or side dish. Roasted and seasoned and only a few minutes of prep work needed! pinterest pin

      More Sweet recipes for you to love

      • Roasted Parmesan Zucchini
      • Parmesan and White Wine Roasted Asparagus
      • Roasted Butternut Squash Soup
      • Bacon and Roasted Veggie Pasta Salad

      SHop the Post

      overhead shot of roasted mini peppers with spices

      Roasting Mini Sweet Peppers

      Yield: 4 servings
      Prep Time: 10 minutes
      Cook Time: 20 minutes
      Total Time: 30 minutes

      These delicious roasted sweet mini peppers are perfect for an easy and quick snack or side dish. Roasted and seasoned and only a few minutes of prep work needed!

      Ingredients

      • 1 lb Mini Sweet Peppers
      • 2 tablespoon Olive Oil
      • 2 teaspoon Garlic Powder
      • 2 teaspoon Paprika
      • 1 teaspoon Salt (can add more after roasting for taste)
      • 1 teaspoon Black Pepper

      Instructions

      1. Pre-heat the oven to 400.
      2. Cut the peppers in half length wise.
      3. Toss them in a bowl with the olive oil and spices.
      4. Spread them out evenly on a baking sheet lined with parchment paper and bake for 20 minutes.
      5. Enjoy!
      Nutrition Information:
      Yield: 4 Serving Size: 1
      Amount Per Serving: Calories: 105Total Fat: 7gSaturated Fat: 1gTrans Fat: 0gUnsaturated Fat: 6gCholesterol: 0mgSodium: 588mgCarbohydrates: 9gFiber: 3gSugar: 5gProtein: 2g

      Nutritional information is not always 100% accurate.

      © Miriam
      Cuisine: American / Category: Side Dishes

      BBQ Pulled Chicken Sandwiches with Mango Slaw

      August 31, 2020

      close up of a bbq pulled chicken sandwich on a sesame bun

      The summer is not over yet and neither are our summer recipes! These BBQ pulled chicken sandwiches have our creamy crunchy and healthy mango slaw on top. It is the perfect summer sandwich with a little hint of sweet crunch on top. Totally easy to customize with additional toppings and whatever your favorite kind of BBQ sauce is. Ready for easy weeknight dinners or a nice relaxing meal on the weekends. Easy and delicious, this one is calling your name for these last few weeks of summer weather!

      close up of a sesame seed bun with pulled chicken and coleslaw

      Is Pulled chicken the same as shredded?

      There is only a little difference between the two making them generally the same thing.

      Here's the difference: Pulled meats are generally cooked slowly until EXTRA tender. This allows you to literally pull it apart easily because it basically falls apart on its own.

      Here's why they are basically the same thing: pulled is just a more tender fall apart version of shredded. Shredded is quicker and will create a more "chopped bits" type of bite vs. a pulled meat is going to be more of that classic tender juicy fall apart bits.

      They are both super delicious and don't make a huge difference in your meal. It really just depends on what you have time for.

      This recipe for BBQ pulled chicken sandwiches is super easy to make just on the stove top. By cooking whole pieces of chicken tenders or sliced chicken breasts with a drizzle of olive oil in a pan with the lid on, you get that really tender cooked through chicken that is easy to shred/pull apart.

      overhead shot of a cutting board with coleslaw and pulled chicken sandwich stuff on it

      How do you shred chicken?

      Shredding chicken is super easy but can also be kind of a pain. You can either use two forks and pull the chicken apart bit by bit, or you can use your electric blender. Yep, that's right! You can use the same electric mixer you normally use for making cookies to shred your chicken quicker and easier.

      Tips for using your electric mixer for pulled chicken:

      • Use a tall bowl to minimize the chicken bits flying out while you shred.
      • Poke your beaters through a paper plate and then attach them to the beater, creating a shield so that chicken doesn't fly out of the bowl.
      • Make sure your chicken is really cooked through and tender.
      • Use your beater to go on top of the bigger pieces of chicken and work your way downward to tear it up.
      making bbq chicken sandwiches

      This post may contain affiliate links. If you click and buy, I may make a commission at no cost to you. See my policy for more information.

      BBQ Pulled Chicken Sandwiches

      All you need to make some really tasty and easy pulled chicken is chicken of course, and your favorite BBQ sauce. Our favorites are:

      • Our own Maple Chili BBQ Sauce which packs a punch
      • Kansas Style BBQ Sauce with a Kick
      • Tangy Mustard BBQ Sauce
      • Vidalia Onion BBQ Sauce

      Simply douse your pulled chicken in the BBQ sauce you like best and pile onto your sandwich! Add our creamy, crunchy, and healthier mango slaw on top for the complete and AHH-MAZING sandwich.

      Hope you enjoy this one as much as we do!

      2 hands holding up a sandwich ready to eat

      More Sweet recipes for you to love

      • Crunchy Mango Slaw
      • Crock Pot Pulled Pork
      • Maple Chili BBQ Sauce
      • Grilling the Perfect Chicken Drumsticks

      Tag us on Instagram @grabthemangos and give us a rating and review right here in the comments! And don't forget to pin and save it for next time!

      An amazing and delicious bbq pulled chicken sandwich with mango slaw is the perfect summer meal. Easy and quick for weeknights and yummy and relaxing for weekends! pinterest pin

      Shop the Post

      close up of a bbq pulled chicken sandwich on a sesame bun

      BBQ Pulled Chicken Sandwiches with Mango Slaw

      Yield: 5 people
      Prep Time: 20 minutes
      Cook Time: 10 minutes
      Total Time: 30 minutes

      An amazing BBQ pulled chicken sandwich that is perfect for eating well but also a little healthier. Use your favorite BBQ sauce and top with our favorite mango slaw. SO yummy!

      Ingredients

      • For the Mango Slaw:
      • 2 cups shredded Green Cabbage
      • 2 shredded Carrots
      • ½ Red Onion
      • 1 Whole Mango (~1 cup diced Mango)
      • ½ cup Plain Greek Yogurt
      • 2 tablespoon White Vinegar
      • 2 tablespoon Honey
      • ¼ cup finely chopped Cilantro
      • Pinch of Cayenne Pepper
      • Salt and Pepper to taste
      • -
      • For the BBQ Pulled Chicken:
      • 4-5 Chicken Tenders OR 2-3 Chicken Breasts
      • 2 tablespoon Olive Oil
      • 1 cup Favorite BBQ Sauce
      • +
      • Sesame Buns

      Instructions

      1. For the Mango Slaw:
      2. Shred you cabbage by slicing it nice and thin (best way to do this written up above).
      3. Shred your carrots, dice red onion small, chop up cilantro, and dice the mango.
      4. Add everything to a big bowl and toss together with any additional ingredients you may want (see original recipe for ideas)
      5. Add in your Greek yogurt, vinegar, honey, and spices and mix well.
      6. You can eat it right away or for best results, refrigerate for a 2-3 hours before serving. 
      7. -
      8. For BBQ Pulled Chicken:
      9. Heat the olive oil in a skillet over medium heat and add chicken whole (not cut).
      10. Place a cap on the skillet and let the chicken cook for about 3-4 minutes for tenders and 5-7 minutes for breasts. Then flip and do the same on the other side.
      11. Once cooked all the way through (may take slightly longer or shorter, check by cutting open), turn the heat off and place into a bowl to shred with electric beaters (see tips written in article above, or onto a cutting board to pull apart with forks.
      12. Once completely shredded, mix in your BBQ sauce (you may want more or less according to your taste preference) and feel free to heat in the skillet over low heat.
      13. Once you are ready to eat, scoop BBQ chicken onto a sesame bun with coleslaw on top and gobble up. Enjoy!
      © Miriam Reeves
      Cuisine: American / Category: Chicken

      dairy-free Pineapple Smoothie

      August 27, 2020

      3 cups being filled with a creamy yellow pineapple smoothie surrounded by chunks of pineapple

      Smoothies are some of the easiest ways to have a nice frozen treat and a healthy dose of goodness at the same time. This creamy pineapple smoothie is seriously a dream. Super simple, filled with frozen pineapple, yogurt, and creamy coconut milk. Add a dash of tumeric if you want and you've got a refreshing smoothie with some health benefits. This smoothie is the rich and thick kind of smoothie- almost the texture of a frosty. We eat it up like ice cream in the summer!

      3 cups being filled with a creamy yellow pineapple smoothie surrounded by chunks of pineapple

      What makes a smoothie creamy?

      This pineapple smoothie is extra creamy. Ingredients like:

      • frozen fruit
      • dairy free yogurt
      • coconut milk
      • avocado
      • frozen banana
      • milk ice cubes
      close up of creamy pineapple smoothies overflowing

      These type of ingredients, usually a few of them, in a smoothie will help make it creamy instead of watered down. We used those first 3 ingredients in this smoothie for that pure pineapple tropical flavor, but there is plenty of room for you to add avocados, frozen banana, or veggies if you want that. The flavor will change a bit from this original recipe, but they are mild changes most of the time with benefits you may want.

      The second thing that is important to remember when you want that thick and creamy smoothie is what your blender can do. Some blenders, you may need to work through the thicker bunch of ingredients by starting and stopping and using a spoon to mix it all up for the blender to get it all. A food processor or a more high powered blender will work a little easier in getting the job done but we used our crappy cheap blender for this and with a little working it in, it worked out well.

      hand reaching for a creamy pineapple smoothie

      creamy pineapple smoothie without banana or juice

      Like I said above, you definitely can add some frozen banana if you want some extra flavor. We did not because, well if I'm honest we didn't have any was the biggest reason. But I also just think banana is in everyone's smoothie. So again, feel free to add it- it will taste amazing, but you don't need to.

      Adding juice to this smoothie is something you should only do if your blender is having too much trouble with how thick it is. If that's the case definitely add some juice- a quarter cup at a time should do the trick without thinning it out too much. Obviously pineapple juice would be my suggestion for the best juice to add, but any tropical juice or even orange juice works well with pineapples. Definitely try to work it through the blender before adding any juice if you want that thick and creamy smoothie.

      close up of chunks of pineapple with smoothies

      How to Store this smoothie for later?

      We make big batches of this and store it in a big jar for later. It stores really well in the fridge. If it does sort of melt and become watery, just add a little more frozen pineapple and blend again. Lasts up to a week in the fridge.

      Here's to some bright, tasty, creamy smoothies. Hope you enjoy it as much as we do!

      This post may contain affiliate links. If you click and buy, I may make a commission at no cost to you. See my policy for more information.

      Tag us on Instagram @grabthemangos and give us a rating and review right here in the comments! And don't forget to pin and save it for next time!

      This creamy pineapple smoothie is so easy to make and SO YUMMY! A tropical vacation in a cup with hints of coconut and vanilla. Healthy and delicious. pinterest pin

      More Sweet recipes for you to love

      • Blueberry Coffee Smoothie
      • Mango Aloe Green Smoothie
      • Mango Jalapeno Salsa
      • How to Grill the Best Chicken Drumsticks
      • Mango Cabbage Slaw

      Shop The Post:

      3 cups being filled with a creamy yellow pineapple smoothie surrounded by chunks of pineapple

      Dreamy Creamy Pineapple Smoothie

      Yield: 3-4 cups
      Prep Time: 7 minutes
      Total Time: 7 minutes

      This creamy pineapple smoothie is so easy to make and SO YUMMY! A tropical vacation in a cup with hints of coconut and vanilla. Healthy and delicious.

      Ingredients

      • 4 cups Frozen Pineapple
      • ¼ cup dairy Free Plain Greek Yogurt
      • 1 can Coconut Milk (13.66 oz)
      • 1 teaspoon Vanilla
      • 1 pinch of Salt
      • 1 tablespoon Maple Syrup (optional)

      Instructions

      1. In your blender add all of the ingredients and pulse the blender, mixing the ingredients every few minutes between pulses to get all of them incorporated.
      2. Blend until smooth.
      3. Pour into cups or a bowl and eat just like that or add some granola or shaved coconut on top. Enjoy!

      Notes

      Don't mix with a spoon or utensil while the blender is on. Stop, then mix, then start again.

      Nutrition Information:
      Yield: 4 Serving Size: 1
      Amount Per Serving: Calories: 430Total Fat: 21gSaturated Fat: 19gTrans Fat: 0gUnsaturated Fat: 1gCholesterol: 1mgSodium: 57mgCarbohydrates: 61gFiber: 3gSugar: 55gProtein: 4g

      Nutritional information is not always 100% accurate.

      © Grab the Mangos
      Cuisine: American / Category: Smoothies

      Kentucky Derby Party Food Recipes: appetizers, drinks & desserts

      August 22, 2020

      round up for the kentucky derby recipes

      A round up of the best Kentucky Derby party food recipes from appetizers to drinks and desserts. Try an easy mint julep cocktail or decadent mint julep cupcakes!

      ...

      Read More

      No Bake Cheesecake Jars with Bourbon Candy Bacon

      August 17, 2020

      jars of no bake cheesecake with candied bacon on top

      The Kentucky Derby is coming up! Normally it's in the spring, but because it's 2020 and things are just weird all over the place- well, this year it's September 5th. Any chance to have some delicious food and think about fun things this year sounds good to me. So we made these no bake cheesecake jars with an amazing, salty, sweet, bourbon candy bacon on top. Sound drool worthy? It is! If you love cheesecake, bacon, bourbon, all good things, and of course horses, then you are in the right place. Let's make some yummy desserts.

      jars of no bake cheesecake with candied bacon on top

      No Bake Cheesecake Jars

      We love a classic cheesecake but sometimes you just want something easier right? This recipe for no bake cheesecake jars is so easy. No baking, no eggs, just a handful of ingredients whipped together and chilled. Easy peasy.

      Ingredients needed:

      • Plain Greek Yogurt
      • Cream Cheese
      • Maple Syrup
      • Vanilla
      • Lemon

      That's seriously all you need to make delicious cheesecake jars whenever you want. The best part is that this recipe uses slightly healthy ingredients, like maple syrup instead of refined sugar. We're not saying it's "healthy" per say. Just a bit lighter and easier so you can pile on that bourbon candied bacon.

      hand grabbing some cheesecake in a jar with candy bacon

      All you need to do to make your cheesecake jars is whip the ingredients together for about 5 minutes. Really get it nice and smooth and beat that fluffy air into it. This recipe is not overly sweet to allow the creamy texture to shine along with the strong candied bacon flavor.

      Bourbon Candy Bacon Recipe

      Some bourbon candy bacon is always the ticket to take a dessert over the top. The 3 key things to remember making this recipe are:

      • Cut the bacon small and cook until crispy first, then drain the grease.
      • Cook the sugar in the bacon on low heat for 10-15 minutes to make sure the granules of sugar are really dissolved. Otherwise you will get a crumbly, sand like mixture at the end.
      • Make sure to add the little bit of bourbon, butter, and cream/milk off the heat at the end. This helps the texture as well as keep the bourbon from simply all burning off in the heat.

      PS- we got these cute little dessert jars from this yogurt brand. Oui is such a good yogurt and comes in these adorable little jars which we then repurposed. They are at most regular grocery stores.

      sticker from a yogurt jar

      Let the candied bacon bourbon mix cool down quite a bit before serving on the chilled cheesecake jars to make sure the cheesecake mix doesn't just melt underneath it.

      This recipe makes about 3-4 little dessert jars but you can definitely double the recipe if needed.

      Hope you enjoy this recipe as much as we do!

      This post may contain affiliate links. If you click and buy, I may make a commission at no cost to you. See my policy for more information.

      cheesecake jars in front of bourbon

      Tag us on Instagram @grabthemangos and give us a rating and review right here in the comments! And don't forget to pin and save it for next time!

      This super easy, drool worthy, no bake cheesecake recipe is placed in jars and topped with a sweet and salty bourbon candied bacon. Perfect for an over the top but easy to make dessert! pinterest pin

      More Sweet recipes for you to love

      • Blueberry Coffee Smoothie
      • Heath Bar Cookies
      • Brown Sugar Wet Rub
      • Grilling Chicken Drumsticks
      • 5 Minute Chocolate Mug Cake

      SHop the Post

      jars of no bake cheesecake with candied bacon on top

      No Bake Cheesecake Jars with Bourbon Candy Bacon

      Yield: 3-4 dessert jars
      Prep Time: 1 hour
      Cook Time: 10 minutes
      Total Time: 1 hour 10 minutes

      This super easy, drool worthy, no bake cheesecake recipe is placed in jars and topped with a sweet and salty bourbon candied bacon. Perfect for an over the top but easy to make dessert!

      Ingredients

      • 8 oz Cream Cheese
      • ½ cup Plain Greek Yogurt
      • 2 tablespoon Maple Syrup
      • 1 teaspoon Vanilla
      • 1 teaspoon Lemon Juice
      • 4 large pieces of Thick Cut Bacon
      • ½ cup Granulated Sugar
      • 1 tablespoon Butter
      • 2 tablespoon Cream or Milk
      • ¼ cup Bourbon

      Instructions

      1. In a medium mixing bowl, whip together your cream cheese, yogurt, vanilla, lemon juice, and maple syrup.
      2. Whip with beaters for at least 10 minutes to get air into the mixture.
      3. Place in jars and chill in the fridge for about 45 minutes.
      4. While the cheesecake jars chill, make your candied bacon mix.
      5. Using scissors, cut thick pieces of bacon into small pieces.
      6. Place in a pan and cook until crisp over medium- high heat.
      7. Drain the grease carefully **
      8. In the pan with the crispy bacon bites, add your sugar. Cook the sugar over low- medium heat for about 10 minutes until it turns a dark iced tea color. Be careful to keep an eye on it so it doesn't burn.
      9. Take the mix off the heat completely and add the butter, cream or milk, and bourbon and mix together carefully.
      10. Let it cool and when you are ready to eat, serve the bacon bourbon mixture over the cheesecake jars.
      11. Enjoy!

      Notes

      ** Be very careful draining the grease. Make sure there are no flames, turn off the stove completely and wear oven mitts. Drain grease into a bowl or a jar, not down a drain.

      Nutrition Information:
      Yield: 4 Serving Size: 1
      Amount Per Serving: Calories: 463Total Fat: 27gSaturated Fat: 16gTrans Fat: 0gUnsaturated Fat: 9gCholesterol: 83mgSodium: 297mgCarbohydrates: 39gFiber: 0gSugar: 34gProtein: 10g

      Nutritional information is not always 100% accurate.

      © Miriam
      Cuisine: American / Category: Dessert

      Best Blueberry Coffee Breakfast Smoothie

      August 11, 2020

      2 cups of blueberry coffee smoothie with fresh blueberries and coffee grounds

      Blueberry and coffee. There is no better breakfast/brunch combo. Dunkin’ donuts has a blueberry iced coffee that I get every single time I go. This is that, reimagined into a smoothie because why not? Healthier, mind bogglingly delicious, and so easy to make. Coffee smoothies are my favorite, and coffee flavored everything is the way to live life. Add some blueberries with some maple syrup and creamy milk (whatever milk you like best) and blend to sweet coffee perfection.

      2 cups of blueberry coffee smoothie with fresh blueberries and coffee grounds

      Coffee Breakfast Smoothie Recipes

      I love making a quick and easy smoothie in the morning but I also love my morning coffee. This combines the two into wonderfulness. This coffee smoothie recipe does not use bananas or instant coffee. Instead the basic ingredients for this amazing blueberry coffee breakfast smoothie are:

      • coffee ice cubes
      • milk of choice
      • maple syrup
      • fresh blueberries
      hand pouring blueberry coffee smoothie into cup

      These are my basic ingredients for making a great coffee smoothie. You can definitely add other things if you want to beef up your smoothie. Things you can add:

      • rolled oats
      • chia seeds
      • protein powder

      Making a Blueberry Coffee Smoothie

      I think the best way to make a good coffee smoothie is by making coffee ice cubes. We have silicone ice cube trays that make this super easy. Any old ice cube tray will work.

      close up pic of coffee grounds and blueberries

      Simply make a pot of coffee and pour into the ice cube tray to let it freeze over night. We made enough for about 15 coffee ice cubes. Make sure if the coffee is hot still, that you use the silicone tray or else, let the coffee cool first.

      In the morning, all you need to do is pop those frozen cubes of coffee into the blender with your blueberries, milk, and maple syrup (plus whatever else you want to add) and blend up into a creamy dreamy coffee breakfast smoothie.

      2 breakfast smoothies surrounded by blueberries

      This recipe blends pretty easily because the coffee cubes are a bit softer than regular water ice cubes. It also tastes amazing with some coconut whipped cream on top (our favorite recipe for this is linked).

      Hope you enjoy this morning delicious-ness as much as we do!

      This post may contain affiliate links. If you click and buy, I may make a commission at no cost to you. See my policy for more information.

      Tag us on Instagram @grabthemangos and give us a rating and review right here in the comments! And don't forget to pin and save it for next time!

      This amazing blueberry coffee breakfast smoothie is so easy and simple to make. FIlled with fresh blueberries, frozen coffee, and healthy maple. Made creamy with your choice of milk. SO good! pinterest pin

      More Sweet recipes for you to love

      • Mango Aloe Green Smoothie
      • Thai Iced Tea
      • Strawberry Infused Iced Tea
      • Blueberry Sweet Potato Muffins
      • Whipped Coffee with Maple Syrup

      Shop the Post

      2 cups of blueberry coffee smoothie with fresh blueberries and coffee grounds

      Best Blueberry Coffee Breakfast Smoothie

      Yield: 2-3 servings
      Prep Time: 6 hours
      Make Time: 10 minutes
      Total Time: 6 hours 10 minutes

      This amazing blueberry coffee breakfast smoothie is so easy and simple to make. FIlled with fresh blueberries, frozen coffee, and healthy maple. Made creamy with your choice of milk. SO good!

      Ingredients

      • 15 cubes Frozen Black Coffee
      • 1 cup Milk of choice
      • 2 cups Blueberries
      • 1 cup Maple Syrup

      Instructions

      1. Make a fresh pot of coffee and let it cool. Pour into ice cube trays and let it freeze over night or until fully frozen (around 6 hours).
      2. Place the frozen coffee cubes, milk, blueberries, and maple syrup in a blender and blend until smooth.
      3. May need to pulse or stop and stir to get everything blended properly.
      4. Enjoy just like that or with some delicious coconut whipped cream on top.
      Nutrition Information:
      Yield: 3 Serving Size: 1
      Amount Per Serving: Calories: 390Total Fat: 2gSaturated Fat: 1gTrans Fat: 0gUnsaturated Fat: 1gCholesterol: 7mgSodium: 80mgCarbohydrates: 91gFiber: 2gSugar: 75gProtein: 5g

      Nutritional information is not always 100% accurate.

      © Miriam
      Cuisine: American / Category: Smoothies

      Grilling the Perfect Chicken Drumsticks

      July 14, 2020

      white bowl full of grilled drumsticks and some celery

      Grilling chicken drumsticks can be tricky if you don't know what you're doing or are new to grilling. Well this guide is for you. We have been working on perfecting our grilled chicken drums for a while. We love grilling in the summer months and this is how we get that slightly charred, fully cooked, tender, fall off the bone chicken.

      white bowl full of grilled drumsticks and some celery

      Using a Charcoal Grill

      We use a charcoal grill for the flavor mostly (it's also just what we happen to have). And we love it.

      Using a charcoal grill may seem like more work but once you know how to set it up, it's extremely easy to use and the flavor is 100% better. No propane flavored chicken.

      The best way to heat up your grill with charcoal is with a chimney starter.

      1. Remove the grates in your grill.
      2. Place the chimney starter in the grill and put paper into the bottom and light it.
      3. The charcoal then sits on top of the lit paper.
      4. Close your grill hood and allow the flame to work it's way through the charcoal.
      5. You want to wait at least 20 minutes for this to work through until you can see a white smoldering color- SUPER hot.
      6. Carefully (using oven mitts) dump the charcoal into the grill and move the hot charcoal (using metal tongs/spatula) into an even layer on one side of the grill.
      7. Place the grates back on and give it about 5-10 minutes for the grates to heat up.
      8. Check your thermometer and remember that your grates are always about 100 degrees hotter than the temperature reads.
      9. Use your vents to moderate and cool the temperature as needed. (just takes some practice).
      hand reaching for a grilled chicken drumstick

      How to cook Chicken drumsticks on the grill?

      Grilling chicken drumsticks is super easy. Assuming you've done the steps above for how to get your grill going, let's grill!

      First things first, season your drumsticks. Either use a nice dry rub or put them on plain and add BBQ sauce or teriyaki at the end.

      You want your grill to be about 400 F. Place the drumsticks on the grate over the hot charcoal. The smaller ones can be placed over indirect heat.

      close up of grilled chicken drumsticks

      How long do you cook drumsticks on the grill?

      The key to grilling is always to keep an eye on your food and on the thermometer. The exact time is slightly different every time.

      Start by rotating the chicken drumsticks every 5 minutes. Move the chicken that chars too quickly off of the direct heat so that it can still cook through without drying out or burning up.

      Like I said you can add the BBQ or Teriyaki sauce to your drumsticks for the last 10 minutes when you know the meat is almost done. This gives the chicken the perfect sticky grilled sauce flavor.

      Make sure the internal temperature is 180 F which when all is said and done should take about 40 minutes total at 400F. Once you're there, you're ready to eat!

      chicken drumstick with a bite out of it

      Try out our Maple Wet Rub or our homemade Maple Chili BBQ sauce if you are looking for a new rub recipe for your drumsticks.

      Hope you enjoy your grilled chicken drumsticks as much as we did!

      This post may contain affiliate links. If you click and buy, I may make a commission at no cost to you. See my policy for more information.

      More Sweet recipes for you to love

      • Maple Brown Sugar Wet Rub
      • Maple Chili BBQ Sauce
      • Healthy Mango Slaw
      • Roasted Parmesan Zucchini

      Tag us on Instagram @grabthemangos and give us a rating and review right here in the comments! And don't forget to pin and save it for next time!

      Grilling the perfect chicken drumsticks is super easy with this guide. Get that perfectly charred, smokey, and fall off the bone chicken with whatever seasonings or sauces you like best! pinterest pin

      Shop the Post

      white bowl full of grilled drumsticks and some celery

      Grilling the Perfect Chicken Drumsticks

      Yield: 8-10 drumsticks
      Prep Time: 30 minutes
      Cook Time: 40 minutes
      Total Time: 1 hour 10 minutes

      Grilling the perfect chicken drumsticks is super easy with this guide. Get that perfectly charred, smokey, and fall off the bone chicken with whatever seasonings or sauces you like best!

      Ingredients

      • Chicken Drumsticks
      • Seasoning or Sauce

      Instructions

      1. Using a charcoal chimney starter, get your charcoal smoking and heating.
      2. Spread the hot charcoal on one side of the grill and place the grate on to heat up to 400 F.**
      3. Place the chicken drumsticks on direct heat (smaller ones can go on indirect heat) and rotate every 5 minutes.
      4. Move the ones that may char too quickly over to the indirect heat so they can cook through without drying out.
      5. Cooking through will take about 40 minutes.
      6. Make sure the internal temperature is 180 F to ensure it's cooked through.
      7. If you are seasoning with a dry rub, you can do that first. Otherwise, in the last 10 minutes of grilling, you can spread BBQ or Teriyaki over your drums on the grill.

      Notes

      ** the grate will always be about 100 degrees hotter than the thermometer on the grill says.

      Nutrition Information:
      Yield: 4 Serving Size: 1
      Amount Per Serving: Calories: 59Total Fat: 3gSaturated Fat: 1gTrans Fat: 0gUnsaturated Fat: 2gCholesterol: 30mgSodium: 261mgCarbohydrates: 2gFiber: 1gSugar: 2gProtein: 6g

      Nutritional information is not always 100% accurate.

      © Miriam
      Cuisine: American / Category: Main Dish

      Healthy Mango Cabbage Slaw

      July 10, 2020

      hero shot of healthy mango cabbage slaw in a white bowl

      A delicious and healthy coleslaw is a necessity in the summer. Top pulled chicken, pulled pork, BBQ, etc. with this amazing creamy dreamy healthy mango cabbage slaw. It is drool worthy and so easy to make. You get the sweetness from the mangos, a tangy bite from the vinegar and Greek yogurt, and you can add some heat with jalapenos if you like it that way (but certainly don't need to). Either way you make it, whatever you put it on, this mango slaw recipe is so so good and a must for the summer.

      hero shot of healthy mango cabbage slaw in a white bowl

      Homemade Mango Cabbage Slaw

      Making homemade coleslaw is so much easier than I used to think. You can buy pre-shredded cabbage if you really don't want to cut your own cabbage (which is really easy actually). And I'll go through how to cut your mangos nice and thin for this slaw.

      How Do you slice cabbage thinly?

      First things first, let's prep the ingredients. Like I said you can always just buy a bag of pre-sliced cabbage slaw mix. But it is extremely easy to do it yourself and one cabbage head usually makes a lot more coleslaw than just one bag will.

      side shot of mango cabbage slaw in stacked white bowls with slices of mango
      1. Cut the cabbage in half.
      2. Place one half down on the cutting board, flat side down.
      3. Begin slicing nice thin slices from the top of the head of cabbage, moving in towards the butt as you go.
      4. Once you've sliced about 2 cups worth, chop up the sliced cabbage a bit more to make sure there are no big pieces.

      Super easy right?

      How do you shred a mango for mango cabbage slaw?

      Alright so you do not want to try to shred a mango with a shredder.

      1. Simply cut your mango open around the seed.
      2. Slice each side into smaller slices and cut the skin off.
      3. Finally, slice the mango pieces into smaller match stick looking slices or you can just cube the mango into bite sized pieces.
      hand picking up a scoop of mango coleslaw

      Healthy Slaw Recipe

      What else should you add to your mango cabbage slaw? Well we love to add shredded or thinly sliced carrots, red onions, and if we are feeling a little spicy, we add a jalapeno.

      This mango slaw is nice and healthy because we've replaced the mayo with Greek yogurt. That plus a little honey, vinegar, cilantro, and spices makes that tangy and creamy slaw flavor that is so addictive.

      All you have to do is slice up and shred your ingredients, mix them all together in a bowl with the sauce, and then refrigerate. Remember, refrigerating your coleslaw will really help the flavor to come together even more.

      overhead shot of mango slaw in a bowl with a serving fork and mango slices

      Feel free to add any of these veggies to your mango slaw:

      • Red Bell Pepper
      • Shredded Brussels Sprouts
      • Green Onions
      • Jalapeno

      Top your BBQ pulled chicken, pulled pork, and fish tacos with this mango cabbage slaw. Make it as a side for any grilling or BBQ's and bring to potlucks.

      Hope you enjoy it as much as we do!

      This post may contain affiliate links. If you click and buy, I may make a commission at no cost to you. See my policy for more information.

      More Sweet recipes for you to love

      • Peach Salsa
      • Crock Pot Pulled Pork
      • Mango Aloe Smoothie
      • Shrimp Tacos

      Tag us on Instagram @grabthemangos and give us a rating and review right here in the comments! And don't forget to pin and save it for next time!

      This delicious mango slaw is full of cabbage and tangy creamy flavor. No mayo, healthy Greek yogurt, and fresh herbs. Such a good recipe for topping fish tacos, BBQ, or pulled pork or chicken. pinterest pin

      Shop The Post

      hero shot of healthy mango cabbage slaw in a white bowl

      Healthy Mango Cabbage Slaw

      Yield: 5 servings
      Prep Time: 15 minutes
      Total Time: 15 minutes

      This delicious mango slaw is full of cabbage and tangy creamy flavor. No mayo, healthy Greek yogurt, and fresh herbs. Such a good recipe for topping fish tacos, BBQ, or pulled pork or chicken.

      Ingredients

      • 2 cups shredded Green Cabbage
      • 2 shredded Carrots
      • ½ Red Onion
      • 1 Whole Mango (~1 cup diced Mango)
      • ½ cup Plain Greek Yogurt
      • 2 tablespoon White Vinegar
      • 2 tablespoon Honey
      • ¼ cup finely chopped Cilantro
      • Pinch of Cayenne Pepper
      • Salt and Pepper to taste

      Instructions

      1. Shred you cabbage by slicing it nice and thin (best way to do this written up above).
      2. Shred your carrots, dice red onion small, chop up cilantro, and dice the mango.
      3. Add everything to a big bowl and toss together with any additional ingredients you may want (see notes)*
      4. Add in your Greek yogurt, vinegar, honey, and spices and mix well.
      5. You can eat it right away or for best results, refrigerate for a 2-3 hours before serving. Enjoy!

      Notes

      Additional Optional Ingredients:

      Green Onion

      Red Bell Pepper

      Purple Cabbage

      Shredded Brussels Sprouts

      Jalapeno

      Nutrition Information:
      Yield: 5 Serving Size: 1
      Amount Per Serving: Calories: 108Total Fat: 0gSaturated Fat: 0gTrans Fat: 0gUnsaturated Fat: 0gCholesterol: 1mgSodium: 89mgCarbohydrates: 24gFiber: 3gSugar: 20gProtein: 4g

      Nutritional information is not always 100% accurate.

      © Miriam
      Cuisine: American / Category: Side Dishes

      Easy Parmesan Roasted Zucchini

      July 9, 2020

      spread out parmesan roasted zucchini

      This parmesan roasted zucchini recipe is so easy to make and so yummy! The edges get slightly crispy and the flavor of parmesan with some fresh cracked pepper makes this more of a treat than just another veggie recipe. It's always a good idea in my book to give a healthy veggie a little boost with something like roasted parmesan right? My kids love it and if you have kids, I'm sure they will love it too. Not only that, but it is SUCH an easy side for any dinner. Make dinner time easier right? I'm always on board for that.

      spread out parmesan roasted zucchini

      Oven Baked Zucchini Recipe

      The easiest way to cook a vegetable and keep flavor, health benefits, and make it easy and uncomplicated is always- 100%- to roast it on a pan with a drizzle of Olive Oil in the oven. Just add some flavor with seasonings and something like parmesan and you're good to go.

      This recipe only has 3 ingredients (besides the obvious zucchini):

      • Powdered Parmesan
      • Olive Oil
      • Black Pepper

      Roasting a veggie in the oven like this is not only flavorful, but one of the healthier ways to cook veggies.

      hand holding a roasted zucchini chip

      Dry cooking like roasting helps vegetables to retain more vitamins than boiling does. It may even retain more antioxidants than steaming your veggies.

      Even though cooking your vegetables always kills a small amount of the nutrients, it actually can also make the nutrients easier for your body to absorb. So there is a nice trade off there.

      How to make parmesan roasted zucchini

      Making a parmesan roasted zucchini could not be easier.

      1. Slice up the zucchini.
      2. Toss in a bowl with olive oil, parmesan, and black pepper.
      3. Spread on a pan and bake in the oven.

      Seriously, it's that easy to have delicious and healthy food.

      spread out parmesan roasted zucchini

      Hope you love it as much as we do!

      Tag us on Instagram @grabthemangos and give us a rating and review right here in the comments! And don't forget to pin and save it for next time!

      This oven roasted zucchini recipe is so easy to make and so delicious. Keep eating healthy but don't sacrifice flavor! (can also be made with yellow squash) pinterest pin

      More Sweet recipes for you to love

      • Buffalo Roasted Cauliflower
      • Butternut Squash Soup
      • Roasted Red Pepper Sauce
      • The Best Oven Baked French Fries

      Shop The Post

      spread out parmesan roasted zucchini

      Easy Parmesan Roasted Zucchini

      Yield: 3 Zucchini
      Prep Time: 10 minutes
      Cook Time: 20 minutes
      Total Time: 30 minutes

      This oven roasted zucchini recipe is so easy to make and so delicious. Keep eating healthy but don't sacrifice flavor! (can also be made with yellow squash)

      Ingredients

      • 3 sliced Zucchini
      • 2 tablespoon Olive Oil
      • ¼ Grated Parmesan
      • Pepper to taste

      Instructions

      1. Pre-heat your oven to 400.
      2. Slice up your zucchini into bite sized chips discarding the ends.
      3. Toss the zucchini with olive oil, then add parmesan and pepper and toss until evenly coated.
      4. Spread out on a pan lined with parchment paper.
      5. Roast for 20 minutes until it has slightly golden edges, let cool when done, and enjoy!

      Notes

      Can use yellow squash too! Equally as yummy.

      Nutrition Information:
      Yield: 4 Serving Size: 1
      Amount Per Serving: Calories: 87Total Fat: 7gSaturated Fat: 1gTrans Fat: 0gUnsaturated Fat: 6gCholesterol: 0mgSodium: 11mgCarbohydrates: 5gFiber: 2gSugar: 3gProtein: 2g

      Nutritional information is not always 100% accurate.

      © Miriam
      Cuisine: American / Category: Side Dishes

      Creating an Eco Kitchen- Top 10 Reusable Kitchen Products

      June 29, 2020

      Creating an Eco Kitchen that is sustainable and better for you and the environment has never been easier. From reusable produce bags to gorgeous bowl covers, take the plastic out of the kitchen. Healthy and amazing products just for you to try.

      Trying to cut down on single use plastics, trash, and waste in general? Cool! Us too. These are our absolute favorite products that got us started with creating a more Eco kitchen. Most of our waste comes from our kitchen whether it's using zip-lock baggies for everything, food going to waste, or even just single use paper towels and napkins. So to cut down on a lot of that waste, which also saved us a ton of money, we decided we needed to make more of conscious effort to be more Eco friendly and budget smart.

      This post may contain affiliate links. If you click and buy, I may make a commission at no cost to you. See my policy for more information.

      Remember, creating an Eco kitchen doesn't have to be an "all or nothing" type of adventure. Slowly changing one product you are used to into a more sustainable product like the ones pictured below, is going to get you there beautifully. Even just changing your dish soap is such a big step forward for some. You've got this!

      Top 10 Eco Kitchen Products

      This list contains affiliate links, meaning I will make commission if you decide to buy at no cost to you! We only recommend products we actually love. This just helps the blog to continue publishing free content every week. Thanks and enjoy.
      1

      Dish and Bowl Covers- set of 4

      Photo Credit: SpazaStore

      These dish and bowl covers are handmade on Etsy's Spaza Store and are not only gorgeous, but so much easier to use than plastic wrap. These covers fit over multiple sizes and keep your food fresh without the plastic waste.

      2

      Reusable Paper Towels

      Photo Credit: EcoLoveUS

      These reusable paper towels are so cute and fun and will save you so much money each month. No more buying giant packs of paper towels. Just reuse these! They come in different styles as well.

      3

      Reusable Silicone Bags- set of 4

      Instead of storing your food and left overs in single use plastic bags, use some silicone reusable bags. These bags come in large and small, are dishwasher safe, leak proof, BPA free, and perfect for anything!

      4

      Beeswax Food Wraps

      Photo Credit: YouEnjoyMyGoods

      Beeswax food wraps are amazing for storing foods without plastic. No cling wrap or plastic wrap needed again if you can just reuse these neat and sustainable wraps. Very affordable and will help your budget so much in the future as well.

      5

      Reusable Metal Straws

      Keep these with you every time you go out for coffee and ask for no straw! These are so fun to have at home as well. Kids love them and they are so much more durable than plastic ones anyways.

      6

      Reusable Produce Bags- 6 Pack, Variety, Mesh + Bulk

      Photo Credit: EarthSunflower

      This variety pack is the best we've found. Bulk, as well as medium and smaller sized reusable produce bags. 6 total, which is such a great amount to get started with making you grocery trips for sustainable and eco friendly.

      7

      Dishwashing Soap Bar

      Photo Credit: SeasideNaturals

      This may be one of our ultimate favorite eco friendly products for a kitchen. This soap bar smells amazing, has no plastic, and is all natural. No bottle to throw into a land fill, lasts longer, and is a great price for how long it lasts. Comes in 2 different scents.

      8

      Food Huggers- 4 Pack 

      Photo Credit: Freshthinkingco

      These food huggers are so cool. No more small plastic baggies every time you cut a veggie or a fruit. No more containers that take up all the room in the fridge either. These food huggers are the best for storing and saving cut foods.

      9

      Reusable Coffee Filters

      Photo Credit: Remiusables

      Coffee filters are a must if you are drink coffee regularly with a coffee machine or pour over. BUT because of these wonderful things, you don't have to lace your coffee with chemicals and dyes anymore. And no waste either.

      10

      Reusable Eco Friendly Sponge

      Photo Credit: Freewheelinmarket

      This adorable sponge is reusable and unlike those gross packs of crappy sponges at the store, these are much more durable without all the chemicals. Totally recyclable and works well cleaning dishes or wiping things down. Comes in bumble bee, daisy, and lady bug.

      There is no better time to start than now in creating a more sustainable and green way of living. Better air quality, better water quality, better life. Save your money and the things you love around you by switching it up today!

      Almond Flour Double Chocolate Muffins

      June 25, 2020

      a double chocolate muffin with chocolate chips and sea salt in front of a stack of chocolate muffins

      These little almond flour chocolate muffins are filled with rich cocoa and chocolate chips to make them a chocolate lovers dream! No refined sugar, just maple syrup to sweeten it up. Who doesn't need more chocolate these days? I know I do. Especially if it's healthier and easy to make. These are good enough to eat for breakfast, snacks, or even a midnight treat. Add a pinch of sea salt to the tops and you have a decadent but still healthy chocolate muffin.

      a double chocolate muffin with chocolate chips and sea salt in front of a stack of chocolate muffins

      Gluten Free CHocolate Muffins

      Like I said, who doesn't need more chocolate in their life? We love making things with almond flour mostly for the flavor and texture which we love, but also because it creates a nice balance in our diet as well as our bank account.

      I like to have a variety of flours to use for different recipes simply so that I don't go through all of one kind at once. We like to bake and cook a lot around here and sometimes almond flour is a great substitute for regular flour in baking which saves the regular flour for other things. Enter these double chocolate muffins with chocolate chips.

      a broken up almond flour chocolate muffins

      We love desserts. We love unhealthy foods. We also love healthy foods. Basically we love food that tastes good and most of the time makes you feel good. There is a balance and I think it's different for everyone. I personally love turning treats and desserts into a slightly healthier version with really easy ingredients. Easy ingredients, meaning fairly easy to find in a regular grocery store.

      Almond Flour + COconut Flour

      These two flours almost always go together in my gluten free baking recipes. They really help balance each other out with the moisture level in baked goods.

      Almond flour chocolate muffins also have that coconut flour in them. The trick is balancing the cocoa powder as well which obviously I think we did here.

      hand sprinkling sea salt onto a chocolate muffin

      Almond flour adds a lot of nutty flavor and extra moisture. Coconut flour adds texture and soaks up the extra moisture. Cocoa powder is obviously there for the chocolate, which I am also here for.

      Making Almond Flour Chocolate Muffins

      The best part about these double chocolate muffins is how easy they are to make!

      In a medium sized mixing bowl, combine your dry ingredients:

      • almond flour
      • coconut flour
      • cocoa powder
      • baking soda
      • baking powder
      • salt

      Once these are mixed up, add your eggs and maple syrup to the bowl.

      Lastly add your milk + vinegar combination and stir in the chocolate chips. Using a ¼ cup, fill your cupcake tin. You can either spray it to make it non-stick or use cupcake liners.

      Bake at 350 for 20 minutes.

      hand grabbing an almond flour chocolate muffin

      Add an optional sprinkle of sea salt to the top and enjoy!

      This post may contain affiliate links. If you click and buy, I may make a commission at no cost to you. See my policy for more information.

      More Sweet recipes for you to love

      • Blueberry Sweet Potato Muffins
      • Almond Flour Cookies
      • Almond Flour Bread
      • Gluten Free Cornbread Muffins

      Tag us on Instagram @grabthemangos and give us a rating and review right here in the comments! And don't forget to pin and save it for next time!

      These super easy to make, healthy double chocolate muffins are made with almond flour and extra chocolate chips. So yummy! Perfect for snacking or breakfast. pinterest pin.

      Shop The Post

      a double chocolate muffin with chocolate chips and sea salt in front of a stack of chocolate muffins

      Almond Flour Double Chocolate Muffins

      Yield: 12
      Prep Time: 15 minutes
      Cook Time: 20 minutes
      Total Time: 35 minutes

      These super easy to make, healthy double chocolate muffins are made with almond flour and extra chocolate chips. So yummy! Perfect for snacking or breakfast.

      Ingredients

      • 1 cup Almond Flour
      • ¼ cup Coconut Flour
      • 1 teaspoon Baking Soda
      • 1 teaspoon Baking Powder
      • Pinch of Salt
      • ¼ cup Cocoa Powder
      • ½ cup Milk of choice + 1 tablespoon Vinegar
      • 2 Eggs
      • ½ cup Maple Syrup
      • 1 cup Chocolate Chips

      Instructions

      1. Pre-heat your oven to 350.
      2. In a glass measuring cup, combine the milk and apple cider vinegar together and set aside.
      3. In a medium mixing bowl, combine the dry ingredients- almond flour, coconut flour, salt, cocoa powder, baking powder ,and baking soda.
      4. Add the eggs and maple syrup.
      5. Finally mix in the milk and vinegar mixture (aka buttermilk) and stir in the chocolate chips until everything is well combined.
      6. Use a ¼ cup scooper to pour into cupcake tins. You can use liners or spray to make sure it won't stick.
      7. Bake for 20 minutes. Make sure it's cooked through by poking a tooth pick through the middle muffin and making sure it comes out clean.
      8. Let them cool for at least 30 minutes- 1 hour so that they come out cleanly.
      9. Enjoy with an extra sprinkle of sea salt!
      Nutrition Information:
      Yield: 12 Serving Size: 1
      Amount Per Serving: Calories: 196Total Fat: 11gSaturated Fat: 4gTrans Fat: 0gUnsaturated Fat: 6gCholesterol: 32mgSodium: 179mgCarbohydrates: 24gFiber: 3gSugar: 17gProtein: 5g

      Nutritional information is not always 100% accurate.

      © Miriam
      Cuisine: American / Category: Dessert

      How to Make Corn Tortillas

      June 18, 2020

      hand holding a folded homemade tortilla

      Making corn tortillas from scratch doesn't have to include a fancy tortilla press (although they are fun to have) or even crazy amounts or time to make them. These corn tortillas are so easy to make, only three ingredients, and fresh out of the pan- they are heaven! Learn how to make tortillas the easy way with this recipe.

      hand holding a folded homemade tortilla

      Corn Tortilla Recipe

      Making corn tortillas is probably one of the easiest things to do. With Masa flour, water, and salt, you can whip these up whenever you want an authentic Mexican or Native American meal.

      Personally I love using Masa Harina to go with tacos, fajitas, empanadas, tamales, gorditas, or even baked into tostidos. That smoky corn flavor is just unbeatable.

      The bonus to these tortillas is that they are also naturally gluten free, dairy free, and vegan. Win win for everyone!

      water pouring into a bowl with masa flour

      What is Masa Harina?

      Masa Harina means "dough flour." It's a flour that is made from corn soaked in lime water which gives it amazing and unique flavor. Masa is naturally gluten free and much easier for the body to digest.

      The beauty of this flour is that it's basically an instant flour. Just add water and you are good to go for most recipes including this one.

      a ball of dough and masa flour

      Where can I find Masa?

      Masa Harina can be found in almost any store in the Ethnic aisle. We get ours from Aldi's and it is so much cheaper than regular flour. Just another reason to love all the amazing recipes you can make with this delicious Masa Harina.

      How to Make Tortillas

      In a bowl, mix your Masa flour and water with a pinch of salt until a soft dough forms. Divide your dough into about 4 sections (8 if you double this recipe.. etc. etc. math math math).

      I you are using a tortilla press, awesome. If you're not, cool me neither. I totally want one one day but currently this is my method:

      • Shape the dough into a slightly flattened ball.
      • Place it on a sheet of parchment paper to prevent sticking.
      • Use a cutting board or any other flat large thing you have, and lay it on top, pressing it flat.
      • Then you can easily place a second sheet of parchment paper over it and roll it out to the nice thin tortilla shape that you want.
      • cutting dough into pieces
      • pressing the dough balls into flat pieces
      • rolling the dough flatter

      In a pan with a little bit of Olive Oil over medium to low heat, fry up each side of the tortilla. This should only take about 2 minutes on each side to get a good golden color.

      Definitely turn the heat on your burner down if you notice smoking or that the tortilla is burning. Place them on a paper towel and serve up right away or store for later.

      fried golden tortillas

      You can keep your tortillas in a sealed container in the fridge for about 1 week. (we love them fresh and warm though)

      Hope you enjoy these fresh corn tortillas as much as we do!

      This post may contain affiliate links. If you click and buy, I may make a commission at no cost to you. See my policy for more information.

      More Sweet recipes for you to love

      • Almond Flour Bread
      • Honey Oat Bread
      • Asian Chicken Tacos
      • Cornbread Muffins

      Tag us on Instagram @grabthemangos and give us a rating and review right here in the comments! And don't forget to pin and save it for next time!

      This recipe shows you how to make corn tortillas from scratch without a press. Using Masa Harina these are the real and delicious warm corn tortillas you need! Super easy and quick too.

Pinterest pin for homemade corn tortillas

      Shop this Post

      hand holding a folded homemade tortilla

      How to Make Corn Tortillas

      Yield: 4 tortillas
      Prep Time: 15 minutes
      Cook Time: 5 minutes
      Total Time: 20 minutes

      This recipe shows you how to make corn tortillas from scratch without a press. Using Masa Harina these are the real and delicious warm corn tortillas you need! Super easy and quick too.

      Ingredients

      • 1 cup Masa Flour
      • ⅔ cup + 1 tablespoon Water
      • Pinch of Salt

      Instructions

      1. In a medium mixing bowl, mix together all of the ingredients until a soft dough forms.
      2. Divide the dough into 4 pieces and form into flat-ish balls.
      3. Using either a tortilla press or a large cutting board, press the tortilla flat.
      4. Roll out a bit more into a nice round thin tortilla shape and place into a frying pan with a little olive oil to cook on medium to low heat.
      5. Cook each side for about 2 minutes or so until slightly golden.
      6. Serve warm with taco fillings or anything else you like! Enjoy
      Nutrition Information:
      Yield: 4 Serving Size: 1
      Amount Per Serving: Calories: 103Total Fat: 1gSaturated Fat: 0gTrans Fat: 0gUnsaturated Fat: 1gCholesterol: 0mgSodium: 35mgCarbohydrates: 22gFiber: 2gSugar: 0gProtein: 2g

      Nutritional information is not always 100% accurate.

      © Miriam
      Cuisine: Mexican / Category: Bread

      Dalgona Coffee Frozen Yogurt Recipe

      May 25, 2020

      getting a scoop of chocolate chip coffee frozen yogurt

      We decided to do something different with our fun little whipped coffee recipe and turned it into a frozen yogurt recipe. Can we just say- it's amazing! If you are a coffee lover then you will LOVE this frozen treat this summer. The whipped fluffy texture of the dalgona coffee makes this a perfect, easy, no churn frozen yogurt. Add in some chocolate chips, some crunchy pecans, or even an extra drizzle of maple syrup to the bowl and you have the perfect coffee flavors summer time dessert. Since it's coffee... can we have it for breakfast? We vote yes. I mean, it's coffee and yogurt- breakfast, snack, dessert- it's all of it.

      getting a scoop of chocolate chip coffee frozen yogurt

      How to make A Frozen Yogurt Recipe

      This post may contain affiliate links. If you click and buy, I may make a commission at no cost to you. See my policy for more information.

      Ingredients needed:

      • Instant Coffee (our favorite kind is linked)
      • Boiling Water
      • Maple Syrup
      • Greek Vanilla Yogurt (other flavors work too- raspberry, blueberry, whatever you think would taste great with coffee)

      Can you just freeze yogurt to make frozen yogurt?

      Not quite. It will turn into something more like an ice cube if you simply just freeze it. It's very similar to regular ice cream in how it's made. Most of the time it's churned until the right consistency is achieved.

      This recipe however, is a no churn froyo. Why? Because of all that air you whipped into your dalgona coffee. We found it really worked well to fold the whipped coffee into a creamy vanilla yogurt and freeze for about 2-3 hours.

      All that air in the whipped coffee helps to lighten the yogurt up and make it more of a soft "nice cream" type texture when you take it out of the freezer.

      a spoonful of coffee frozen yogurt with chocolate chips

      Just make sure to not over freeze. If you do this, it will get just a bit to ice-cube like and you will have to let it sit out on the counter for a bit to de-thaw until it's soft again.

      Is frozen yogurt better for you than ice cream?

      This depends on a lot of factors. Namely what kind of froyo you eat and what kind of ice cream you eat.

      Frozen yogurt technically has fewer calories and is lower in saturated fats. BUT a low fat ice cream is about the same. They both tend to have to same amount of sugar though.

      Honestly, eat whichever one you like the taste of better! Especially this drool worthy one.

      bread pan full of coffee froyo and chocolate chips

      What should I freeze it in?

      Once you have gently made and folded together your frozen yogurt recipe, you can freeze it. We used a bread loaf pan to freeze it and it worked super well. You can also use freezer boxes, or even cake pans.

      Try to avoid glass as the glass may crack and break with the temperature changes.

      You don't need any kind of parchment paper or non-stick spray.

      a container full of frozen yogurt and chocolate chips being scooped

      How to store for later

      If you need to put some away for later, make sure to cover in plastic wrap and place back in the fridge. It will get pretty frozen after too long in the freezer but still just soft enough to scoop. The best thing to do is just let it sit on the counter for ~30 minutes (longer if you really want it to soften up) to get it back to that frozen yogurt texture. Enjoy for up to a week after making it.

      Hope you enjoy this recipe!

      This post may contain affiliate links. If you click and buy, I may make a commission at no cost to you. See my policy for more information.

      Tag us on Instagram @grabthemangos and give us a rating and review right here in the comments! And don't forget to pin and save it for next time!

      More Sweet recipes for you to love

      • Strawberry Oat Milk Popsicles
      • Whipped Coffee with Maple Syrup
      • Espresso Fudge Cookies
      • Thai Iced Tea Latte

      Shop the Post

      getting a scoop of chocolate chip coffee frozen yogurt

      Dalgona Coffee Frozen Yogurt Recipe

      Yield: 5 people
      Prep Time: 10 minutes
      Freeze Time: 2 hours
      Total Time: 2 hours 10 minutes

      This frozen yogurt recipe has no ice cream maker or machine needed and is full of coffee flavor. Healthy, easy, and a little bit tart from the yummy yogurt. Have homemade Greek frozen yogurt with whipped coffee any time!

      Ingredients

      • 2 tablespoon Instant Coffee
      • 2 tablespoon Maple Syrup
      • 2 tablespoon Boiling Water
      • 1 cup Vanilla Greek Yogurt (or your favorite flavor)

      Instructions

      1. Make your whipped coffee first, combining the boiling water- instant coffee- and maple syrup. Whip it up with an electric mixer until it's fluffy like whipped cream. (3-5 minutes)
      2. Place your Greek yogurt into a bowl and fold in your whipped coffee slowly and gently with a spatula to make sure as little air as possible escapes.
      3. You can add chopped pecans, chocolate chips, crushed pretzles... etc.
      4. Pour into a loaf pan or freezer container, cover with plastic wrap, and freeze for 2-3 hours (depending on how soft you like it)
      5. Scoop into bowls when it's done and top with whatever toppings you like and enjoy!

      Notes

      If the froyo comes out a bit too frozen for your taste, let it sit on the counter for 30 minutes to soften for a bit.

      You can keep this in the freezer for up to a week covered in plastic wrap and again leave out for a bit to soften when you want to eat it.

      Greek yogurt is much creamier and thicker than regular yogurt so it will make a difference if you choose to use something else.

      Nutrition Information:
      Yield: 5 Serving Size: 1
      Amount Per Serving: Calories: 56Total Fat: 0gSaturated Fat: 0gTrans Fat: 0gUnsaturated Fat: 0gCholesterol: 1mgSodium: 17mgCarbohydrates: 10gFiber: 0gSugar: 9gProtein: 4g

      Nutritional information is not always 100% accurate.

      © Miriam
      Cuisine: American / Category: Dessert

      Favorite Top 10 Recipes

      May 22, 2020

      the top 10 best recipes on cradle kitchen graphic.

      Grab the Mangos is a 1 ½ years old! How did the time fly so fast? Over this past year, we've gotten to see what your favorite top 10 recipes are on the blog. These are the recipes that get the most likes, shares, comments, pins, and views consistently. We've got the most messages with pictures of how you made these recipes and we just love seeing it so much. So here are the best favorite recipes on Cradle Kitchen right now.

      the top 10 best recipes on cradle kitchen graphic.

      This post may contain affiliate links. If you click and buy, I may make a commission at no cost to you. See my policy for more information.

      Favorite Top 10 Recipes

      These are the most liked, shared, viewed, and made recipes on Cradle Kitchen right now. Recipes you all love the most, rounded up right here! Try them out if you haven't already.

      Best Gnocchi Recipe

      This easy homemade potato gnocchi recipe will be a family favorite for you! It's so simple to make right at home in your own kitchen and is so fluffy and delicious. 

      Easy Rolling Pin Noodles

      Easy homemade pasta without a machine is our favorite recipe! It is so easy and makes noodles, shapes, ravioli is a favorite of ours! Top with your favorite sauces and you are good to go!

      Stir Fried Noodles

      Easy Asian stir fried noodles recipe that is so versatile and customizable! Make it with spaghetti, fettuccine, classic egg noodles, whatever you've got. 

      Super Easy Pizza Dough

      This super easy quick and crispy pizza dough recipe is amazing! Can be made fluffy or thin crust but definitely is the best recipe. Homemade and no mixer needed 🙂

      Heath Bar Cookies

      Easy heath bar cookie recipe right here! THE BEST cookies with toffee bits and chocolate rolled into a brown sugar cookie for a chewy and amazing flavor! Families, holidays, kids, friends- everyone will love these!

      Hawaiian Style Mahi Mahi Recipe

      This pan seared mahi mahi is so easy to make and so good! Made with a delicious Hawaiian sauce plus mango chunks to brighten it up. This is the best!

      Easy Buttermilk Naan

      This easy Indian Naan Bread recipe made with buttermilk and yeast will rock your world! Made with no yogurt but loads of flavor, use it for pizzas, wraps, complete quick easy dinners and meals, dip in hummus.  So many ideas to use naan bread for! 

      Baked Spring Rolls with Chicken and Spinach

      These baked spring rolls are gluten free made with rice paper and all the good things including chicken and spinach! Made in the oven and delicious.

      Decadent Fudge Hazelnut Espresso Cookies

      Warm, thick, brownie like, fudgy cookies with a hazelnut espresso flavor to take it to the next level! You'll want to make these every week!!

      Oatmeal Honey Bread Machine Bread

      The oatmeal honey bread machine bread is an easy, healthy, sweet, chewy, homemade bread recipe that won't disappoint! It's super soft, full of oats and honey, and absolutely the best bread machine bread recipe ever!

      Shop the post:

      Tag us on Instagram @grabthemangos and give us a rating and review right here in the comments! And don't forget to pin and save it for next time!

      Let us know how you liked these recipes and tell us what you want to see next on the blog!

      Pantry Peanut Butter Stir Fry Noodles

      May 14, 2020

      overhead shot of stir fried noodles

      Mmmm, is there anything better than an easy AND quick peanut butter stir fry with noodles? If you know that there is actually nothing better then you are in the right place. If you don't know what I am talking about, then please for your own sake keep reading and make this ASAP! A good Asian inspired recipe with veggies and noodles and peanut in the mix is always a go to for any tired weeknight. The best part? You can use fettuccine, spaghetti, egg noodles, ramen noodles, or rice noodles. Whatever you have in your pantry- hence "pantry peanut butter stir fry noodles."

      overhead shot of stir fried noodles

      Peanut Stir Fry Sauce

      Peanut butter is stir fry sauce is one of life's simple pleasures. If you are allergic to nuts feel free to substitute some Tahini instead for that similar (not exactly the same) nutty flavor that is still delicious.

      Our basic peanut stir fry sauce consists of:

      • Soy Sauce (tamari if you are gluten free)
      • Garlic Powder
      • Rice Vinegar (or white vinegar- whatever is on hand)
      • Honey (maple syrup works just fine if you are vegan)
      • Lemon juice
      • Peanut Butter (creamy or crunchy- again whatever you like best and have on hand)
      ingredients for asian stir fry and noodles

      All of these AMAZING delicious ingredients come together in a simple, customizable stir fry to make an oober yummy meal that is even better than take out.

      You can use crunchy or creamy peanut butter depending on what you like better. Both work great.

      Asian stir fry noodles

      Like I said above, you can use whatever type of long noodle you like best. The only ones that may be weird are things like penne or rotini or any other short noodles like that. Let's be clear- it would still taste amazing, but wouldn't feel right texture wise. Get your slurp on with these noodles.

      scooping up fried noodles and veggies

      Noodles that are great for Asian recipes:

      • Spaghetti
      • Fettuccine
      • Egg Noodles
      • Ramen Noodles
      • Rice Noodles

      Always just follow the directions for cooking that particular type of noodle and then add to the stir fry. Super simple.

      Stir Fry Veggies

      Any veggies that you have on hand in the fridge or the freezer will work in this recipe. We love using a large variety of veggies in our stir fry. The best part about this is the versatility, which is why we have this meal a lot when it's almost time to go grocery shopping again.

      close up of kale and noodles

      Best vegetables to put in stir fry:

      • Broccoli
      • Cauliflower
      • Zucchini
      • Onions and Peppers
      • Water Chestnuts
      • Green Beans
      • Asparagus
      • English Peas
      • Snap Peas
      • Chopped Kale
      • Green Onions
      • Brussels Sprouts
      • Mushrooms
      squeezing lemon into stir fry noodles

      You can always add things like chicken, shrimp, tofu... etc. That's the beauty of this super versatile pantry meal!

      Hope you enjoy it as much as we do!

      Tag us on Instagram @grabthemangos and give us a rating and review right here in the comments! And don't forget to pin and save it for next time!

      These amazing peanut butter stir fry noodles are so easy to make and use ingredients you have on hand. The sauce is delicious and you can add chicken, veggies, or whatever else you like!

      More Sweet recipes for you to love

      • Honey Mustard Chicken
      • Hawaiian Style Mahi Mahi
      • Thai Iced Tea
      • Crunchy Thai Chicken Salad
      overhead shot of stir fried noodles

      Pantry Peanut Butter Stir Fry Noodles

      Yield: 5 people
      Prep Time: 10 minutes
      Cook Time: 15 minutes
      Total Time: 25 minutes

      These amazing peanut butter stir fry noodles are so easy to make and use ingredients you have on hand. The sauce is delicious and you can add chicken, veggies, or whatever else you like!

      Ingredients

      • 10-12 oz Long Spaghetti Noodles
      • 1 tablespoon Sesame Oil
      • ⅓ cup Soy Sauce
      • 1 teaspoon Garlic Powder
      • 1 teaspoon Rice Vinegar
      • 1 teaspoon Honey
      • ½ of a Lemon
      • 1 tablespoon Peanut Butter
      • 3 cups of your favorite veggies
      • Chicken, Pork, Shrimp, Tofu etc if you want any

      Instructions

      1. Cook your pasta according to the directions on the box/bag and rinse in cold water when done.
      2. Prep your veggies (and protein if you are adding it) cutting them into bite sized pieces.
      3. Cook the veggies in the sesame oil on medium heat for about 5-7 minutes. (make sure your meat is cooked through if you add it)
      4. Whisk together your soy sauce, garlic powder, vinegar, honey, and peanut butter in a separate container.
      5. Pour the sauce in with the veggies and cook over medium- low heat for another 2-3 minutes.
      6. Add in your noodles, toss all together and let it cook in the sauces for about 3 or 4 minutes.
      7. Turn the heat off, squeeze half a lemon over the stir fry and serve. Enjoy!

      Notes

      Add some red chili flakes if you like it more spicy.

      Nutrition Information:
      Yield: 5 Serving Size: 1
      Amount Per Serving: Calories: 1204Total Fat: 14gSaturated Fat: 3gTrans Fat: 0gUnsaturated Fat: 9gCholesterol: 33mgSodium: 1031mgCarbohydrates: 216gFiber: 12gSugar: 11gProtein: 50g

      Nutritional information is not always 100% accurate.

      © Miriam
      Cuisine: Chinese / Category: Main Dish

      Easy Almond Flour Bread Recipe- No Yeast

      May 12, 2020

      overhead shot of almond flour bread

      Everyone and their mother, sister, brother... etc. is making bread at home these days. Well if you're looking for a super easy, no knead, no yeast almond flour bread recipe - look no further. This recipe is so good with some butter and honey or jam. That fresh, subtly sweet, extra soft and chewy bread flavor right out of the oven is perfect in this recipe. No work other than mixing it all together and baking it. This almond flour bread is amazing for a quick rise bread that is gluten free and perfect for spreading and dipping. It's just a bonus that it doesn't need any regular flour, because who can find any anyways these days. Even if you are not gluten free, you'll love this easy and scrumptious bread.

      overhead shot of almond flour bread

      How does almond flour affect baking?

      Almond flour bread recipes can be tricky. The almond flour adds a subtle sweetness as well as extra moisture and richness. This can be great for soft things like rolls, but for things like bread where you want a good crust and more chewy texture, you need to add a few things.

      • Extra eggs- holds things together better when you are dealing with almond flour and coconut flour in baking
      • Coconut flour- helps to absorb excess moisture so things don't get soggy.
      • Rising agents.
      cut open almond flour bread

      Yeast or No Yeast

      If you do want to use yeast in a recipe with almond flour, you will normally need to use more than the regular amount and give it extra time to rise.

      This almond flour bread recipe doesn't use yeast. Instead we went the easier route with some buttermilk (can be made dairy free) and baking soda together, as well as baking powder. Each one gives a rise and helps this bread taste chewy and fluffy instead of brick-like.

      While this bread probably isn't what you would call sandwich bread because of it's shape- it's amazing for a quick and easy fresh out of the oven bread. Spread some butter and taste the goodness.

      • hand pouring bread dough into skillet
      • bread ready to bake in the oven

      Best Almond Flour bread Recipe

      This almond flour bread can be made in minutes and baked in a dutch oven, skillet, or bread pan. Super versatile and delicious.

      All you need are things you may already have in your pantry/fridge:

      • Almond Flour
      • Coconut Flour
      • Eggs
      • Milk of Choice (almond, whole milk, oat milk... etc)
      • Apple Cider Vinegar
      • Baking Powder
      • Baking Soda
      • Maple Syrup
      • Salt
      fluffy chewy almond flour bread

      Nothing super crazy in this recipe so here are the key things to remember:

      1. Mix the dry ingredients and the buttermilk mixture separately first. That buttermilk mixture will activate the baking soda right when it hits it. So you want to do that quickly and get it in the oven where you want most of the rise to happen.
      2. Bake on parchment paper to make sure it doesn't stick.
      3. Finally, make sure you let it rest for at least 10-15 minutes after baking so that it doesn't crumble. Almond flour can make things a little more fragile straight out of the oven- letting it rest stabilizes it for the best results.

      How long will Almond Flour Bread keep?

      Almond flour actually extends the shelf life of most baked goods. The fat in it retains moisture and keeps the bread from going stale a bit longer.

      buttering almond flour bread

      This bread should be kept in an air tight bag on the counter for about a week (after a week just keep an eye on it).

      Hop you enjoy this super easy almond flour bread recipe as much as we do!

      Tag us on Instagram @grabthemangos and give us a rating and review right here in the comments! And don't forget to pin and save it for next time!

      This almond flour bread recipe has no yeast and is so easy to make. Subtly sweet and delicious with some butter fresh out of the oven. Keto friendly, gluten free, healthy, and simple.

      More Sweet recipes for you to love

      • Honey Oat Bread Machine Bread
      • Buttermilk Naan
      • Almond Flour Carrot Cake
      • Apple Zucchini Bread
      • Healthy Banana Bread
      overhead shot of almond flour bread

      Easy Almond Flour Bread Recipe- No Yeast

      Yield: 1 loaf
      Prep Time: 10 minutes
      Cook Time: 40 minutes
      Total Time: 50 minutes

      This almond flour bread recipe has no yeast and is so easy to make. Subtly sweet and delicious with some butter fresh out of the oven. Keto friendly, gluten free, healthy, and simple.

      Ingredients

      • 1 ½ cup Almond Flour
      • ¼ cup Coconut Flour
      • 3 Eggs
      • 1 teaspoon Baking Soda
      • ½ teaspoon Baking Powder
      • 1 tablespoon Apple Cider Vinegar
      • 3 tablespoon Milk
      • 2 tablespoon Maple Syrup
      • Pinch of Salt

      Instructions

      1. Preheat the oven to 350.
      2. In a bowl mix together the almond flour, coconut flour, baking soda, and baking powder.
      3. Mix your milk and apple cider vinegar in separate container and set aside.
      4. Add your eggs into your almond flour mixture and then add your milk and vinegar mixture. Mix until a dough/batter forms.
      5. Pour the dough into a skillet or bread pan lined with parchment paper. Make sure to shape the dough into a nice even shape or even it out if it's in a bread pan.
      6. Bake at 350 for 35-40 minutes until golden brown on top.
      7. Let it settle and cool for 10-15 minutes before cutting. Enjoy!
      © Miriam
      Cuisine: American / Category: Bread

      Amazing + Easy Thai Iced Tea Latte

      May 6, 2020

      thai iced tea latte with cinnamon stick over it

      Moving into the summer recipes over here on CK and I am more ready for it than ever before. We need these sweet, refreshing, relax in the sun type recipes right now. This Thai iced tea latte recipe is one of our absolute favorites all year round. In the winter we love it hot and in the summer we love it iced. Either way it's amazing and a staple. A simple black tea with aromatic spices, some sweetener, and your milk of choice. It's amazing how good just a few ingredients are this tasty and relaxing.

      thai iced tea latte

      What is Thai Tea Made Of?

      This post may contain affiliate links. If you click and buy, I may make a commission at no cost to you. See my policy for more information.

      Thai tea is traditionally made of strong black tea and spices like cardamom, cinnamon, star anise, etc... mixed with milk over ice.

      Our thai iced tea recipe has cardamom as it's star ingredient. If you don't have cardamom, you can usually find it with the other spices in your grocery store or you can order it online. We love the flavor of cardamom in a lot of things like our Cardamom Chickpea Blondies which are drool worthy heaven.

      spices ready for thai tea

      The black tea can be whatever brand you like best. We normally let ours steep a bit longer than the directions say to give it a stronger brew. About 6 minutes will give you a nice strong black tea.

      The other spices we use are cinnamon and allspice. These are seen a lot in Christmas baking so they are pretty readily available. You can use ground cinnamon or 2-3 cinnamon sticks. The cinnamon sticks will give more flavor the longer they sit in the tea.

      Almond extract and Vanilla extract are also amazing flavor additives in this drink.

      hand pouring milk into the black tea

      Finally, the milk. We use either whole milk or oat milk. I would definitely recommend a creamier milk like one of those. It just works better in this type of drink.

      How do you make Thai tea from scratch?

      We like to use a 64oz (8 cup) mason jar to make our tea in, but any large heat proof pitcher works.

      Fill your pitcher up with about 7 cups boiling water. Add 4 black tea bags and let it steep for 6 minutes to get a nice strong tea.

      • hand stirring cinnamon sticks into tea
      • heand reaching about to drink thai iced tea

      Once the 6 minutes are over, remove the tea bags and add your spices, flavors, and sugar. Stir and steep another 10 minutes or so. Finally, add your 1 cup of milk and refrigerate overnight or until it's chilled (about 4 hours at least).

      This will last in the fridge for about 2 weeks if you can even get it to last that long. It also goes really well with spicy dinners.

      Pour over ice and enjoy!

      Tag us on Instagram @grabthemangos and give us a rating and review right here in the comments! And don't forget to pin and save it for next time!

      This super easy, homemade, Thai iced tea recipe is made with tea bags, spices, and your milk of choice and is so delicious! Perfect for summer and the best drink recipe. pinterest pin

      More Sweet recipes for you to love

      • Cardamom Chickpea Blondies
      • Green Iced Tea
      • Creamy Dairy Free Eggnog
      • Hot Cocoa Mix
      • Whipped Coffee with Maple
      thai iced tea latte with cinnamon stick over it

      Amazing + Easy Thai Iced Tea Latte

      Yield: 7
      Prep Time: 20 minutes
      Chill Time: 4 hours
      Total Time: 4 hours 20 minutes

      This super easy, homemade, Thai iced tea recipe is made with tea bags, spices, and your milk of choice and is so delicious! Perfect for summer and the best drink recipe.

      Ingredients

      • 7 cups Boiling Water
      • 4 Black Tea Bags
      • ½ cup Sugar
      • 1 teaspoon Cardamom
      • ½ teaspoon Ground Cinnamon (or 2-3 cinnamon sticks)
      • 1 teaspoon Vanilla
      • 1 teaspoon Almond Extract
      • ½ teaspoon Allspice
      • 1 cup Milk of choice

      Instructions

      1. Boil 7 cups of water.
      2. Add your 4 black tea bags and let it steep for 6 minutes.
      3. Remove the bags and add you sugar and spices.
      4. Let that steep for 10 more minutes.
      5. Add the milk of choice (whole milk or oat milk are best).
      6. Refrigerate overnight or for at least 4 hours until cooled.
      7. Pour over ice and enjoy!

      Recommended Products

      As an Amazon Associate and member of other affiliate programs, I earn from qualifying purchases.

      • London English Breakfast Black Tea Bags
      • Ball 64 ounce Jar
        Ball 64 ounce Jar
      • Organic Ground Cardamom
        Organic Ground Cardamom
      Nutrition Information:
      Yield: 7 Serving Size: 1
      Amount Per Serving: Calories: 79Total Fat: 1gSaturated Fat: 0gTrans Fat: 0gUnsaturated Fat: 0gCholesterol: 3mgSodium: 28mgCarbohydrates: 17gFiber: 0gSugar: 14gProtein: 1g

      Nutritional information is not always 100% accurate.

      © Miriam
      Cuisine: Thai / Category: Drinks

      Peanut Butter Banana Oatmeal Cookies

      May 2, 2020

      stack of 4 banana oatmeal cookies

      If you are like me and need tasty things to bake while we all wait at home, then you need this delicious, super simple and quick, peanut butter banana oatmeal cookies recipe. My four year old could make this on her own it's so easy (obviously I would put it in the oven). Banana and peanut butter are a combo made in heaven, add in some oats and you have a cookie. These cookies are healthy enough to have for breakfast too... which is exactly when we ate most of them.

      stack of 4 banana oatmeal cookies

      Healthy banana oatmeal cookies

      What makes a healthy cookie also a tasty cookie? Sweetness and flavor combo.

      If the flavor combo is the right one, you won't need as much (or any) sugar. The flavors themselves should take over.

      That's why when you are making a healthier sweet treat- pick stronger flavors. Vanilla doesn't usually cut it by itself. You need so much more to fill the actual cookie.

      banana oatmeal cookies with peanut butter

      Chocolate is always a solid choice. Peanut butter is amazing. Bananas are perfect for healthy baking especially. Why? Because of their consistency, versatility, and naturally sweet flavor. Perfect!

      Health Benefits of Bananas

      Bananas have loads of healthy attributes. They contain vitamin C, nutrients that help moderate blood sugar levels, and powerful antioxidants. Bananas also have manganese which is really good for your skin. They help you feel more full too which is what makes these cookies such good breakfast cookies.

      No Flour Cookie recipes, No Problem

      What about the flour? When you don't a cookie with flour (or you literally can't find any at the store these days), try oats. Oats are really good at binding it all together and adding some structure.

      rolled oats next to cookies

      They are also nice and healthy. Like I said, you can definitely eat these cookies for breakfast.

      Banana Oatmeal Cookies with Peanut Butter

      These delicious cookies have no flour, no sugar, and no eggs. So- vegan and healthy peanut butter cookies? Coming up!

      These banana oatmeal cookies have only 4 ingredients:

      • Bananas
      • Peanut Butter
      • Oats
      • Baking Powder
      a banana oatmeal cookie with a bite taken out of it

      They are super soft and delicious. Just mash the bananas, mix in the peanut butter and oats, and add the baking powder. The baking powder gives it a nice little rise.

      Bake these at 350 for 10 minutes and you are good to go. Gobble them up with your morning coffee and thank me later.

      Hope you enjoy these as much as we do!

      Tag us on Instagram @grabthemangos and give us a rating and review right here in the comments! And don't forget to pin and save it for next time!

      These healthy, easy to make, 4 ingredient, banana oatmeal cookies with peanut butter are amazing! Soft, chewy, healthy, vegan, and gluten free and flourless. So good!

      More Sweet recipes for you to love

      • Healthy Banana Pancakes
      • Whipped Coffee with Maple Syrup
      • Amazing Almond Flour Carrot Cake
      • Healthier Chocolate Chip Banana Bread
      • Peanut Butter Banana Granola
      stack of 4 banana oatmeal cookies

      Peanut Butter Banana Oatmeal Cookies

      Yield: 12
      Prep Time: 7 minutes
      Cook Time: 10 minutes
      Total Time: 17 minutes

      These healthy, easy to make, 4 ingredient, banana oatmeal cookies with peanut butter are amazing! Soft, chewy, healthy, vegan, and gluten free and flourless. So good!

      Ingredients

      • 3 Ripe Bananas
      • ½ cup Peanut Butter
      • 1 cup Rolled Oats
      • ½ teaspoon Baking Powder

      Instructions

      1. Pre- heat your oven to 350.
      2. In a bowl, mash your bananas up well.
      3. Add the rest of your ingredients and mix well.
      4. Scoop onto a cookie sheet lined with parchment paper at least an inch apart.
      5. Bake for 10 minutes.
      6. Let cool before removing and enjoy!

      Recommended Products

      As an Amazon Associate and member of other affiliate programs, I earn from qualifying purchases.

      • Medium Cookie Scoop
        Medium Cookie Scoop
      •  10 Piece Measuring Cups and Spoons Set 
         10 Piece Measuring Cups and Spoons Set 
      • Nonstick Bakeware 12-Cup Muffin Tin With Grips 
        Nonstick Bakeware 12-Cup Muffin Tin With Grips 
      • Non-Stick Parchment Paper
        Non-Stick Parchment Paper
      Nutrition Information:
      Yield: 12 Serving Size: 1
      Amount Per Serving: Calories: 115Total Fat: 6gSaturated Fat: 1gTrans Fat: 0gUnsaturated Fat: 4gCholesterol: 0mgSodium: 72mgCarbohydrates: 14gFiber: 2gSugar: 4gProtein: 4g

      Nutritional information is not always 100% accurate.

      © Miriam
      Cuisine: American / Category: Cookies

      Whipped Coffee Recipe with maple syrup

      April 28, 2020

      close up of maple syrup whipped coffee over milk in a glass

      Ok, so we jumped on this trend real fast because, well, it's coffee and coffee is life. After experimenting quite a bit with different coffees and flavor combos we came up with our favorite whipped coffee recipe using maple syrup instead of granulated sugar. Made from a hazelnut or maple flavored instant coffee (Nescafe is our favorite to use in this recipe or in other baking with coffee recipes). We love ours over cold milk (oat milk is best for dairy free drinkers) and slightly mixed in with the whipped coffee. Basically, if you love coffee, you have got to try this recipe!

      close up of maple syrup whipped coffee over milk in a glass

      What is whipped coffee?

      This whipped coffee recipe has become a viral sensation over night it seems and honestly, I can get on board. Coffee is in my veins at this point.

      Whipped coffee (Dalgona coffee) is a creamy coffee made from instant coffee, sugar, and water. It, almost magically, whips up into a creamy coffee substance that you can put onto cold or hot milk. My preference is definitely cold milk but that's because I love iced coffee.

      spoon dropping whipped coffee into milk

      The term "Dalgona" comes from the South Korean honeycomb toffee confection which has that same rich butterscotch color as the whipped coffee.

      Trust me, this coffee will make you feel like you are in a cafe drinking a fancy coffee again.

      Whipped Coffee without Sugar

      Normally this Dalgona coffee is made with granulated sugar. BUT we decided to make it with maple syrup and it worked perfectly!

      The original recipe is equal parts instant coffee, boiling water, and sugar. We added a little more maple syrup than just equal parts because it tasted better and whipped really nicely.

      Our recipe calls for one extra tablespoon of maple syrup. The constancy is amazing, the flavor is on point, and it tastes great with cold or hot milk. We love our whole milk but oat milk or even, if you like it sweeter, some vanilla almond milk tastes super good.

      hand grabbing for a whipped coffee

      This post may contain affiliate links. If you click and buy, I may make a commission at no cost to you. See my policy for more information.

      Can you use regular grounds?

      No, you can not use regular coffee grounds for this recipe. The chemical reaction that happens between the three ingredients is mainly because of the instant coffee properties. Using a direct substitute of regular coffee grounds doesn't work.

      Using a good instant coffee can make a big difference, though. A super cheap and bad quality instant coffee will taste more bitter than it should. Our favorite is the Nescafe hazelnut flavored instant coffee which they sell at most Targets or Walmarts.

      cinnamon sticks with maple syrup next to whipped coffee

      how long does it take to whip?

      This is actually a super quick recipe. The actual whipping process only takes about 2-3 minutes.

      Starting on a low speed, gradually work your way up to one of the higher speeds as you see it start to thicken. This is actually made the exact same way that I make whipped cream, just different ingredients.

      whipped coffee recipe

      Once you can see that it is thick and whipped cream like, you can stop the beaters and scoop onto your milk of choice. It should make 2 nice cups.

      Hope you enjoy this one as much as we did!

      Tag us on Instagram @grabthemangos and give us a rating and review right here in the comments! And don't forget to pin and save it for next time!

      More Sweet recipes for you to love

      • Almond Milk Eggnog
      • Hot Chocolate Mix
      • Green Iced Tea with Strawberry
      • Espresso and Fudge Cookies
      close up of maple syrup whipped coffee over milk in a glass

      Whipped Coffee with Maple Syrup

      Yield: 2
      Prep Time: 7 minutes
      Total Time: 7 minutes

      This amazing whipped coffee recipe also known as Dalgona coffee is so good! No wonder it's a hit all over the place. Made with instant coffee, boiled water, and maple syrup in this recipe.

      Ingredients

      • 2 tablespoon Instant Coffee (good quality makes difference- we like hazelnut flavored instant coffee the best)
      • 2 tablespoon Boiled Water
      • 3 tablespoon Maple Syrup
      • Milk of choice

      Instructions

      1. Bring water to a boil.
      2. In a medium/large bowl place you instant coffee, water, and maple syrup.
      3. Using an electric beater, beat on low speed (trying not to splatter) until it starts to get foamy.
      4. Gradually increase speed as it thickens past foamy and into creamy.
      5. Once it has a whipped cream texture, stop the beaters and scoop onto glasses of cold or hot milk of choice and enjoy!

      Recommended Products

      As an Amazon Associate and member of other affiliate programs, I earn from qualifying purchases.

      • KitchenAid 5-Speed Ultra Power Hand Mixer, White
        KitchenAid 5-Speed Ultra Power Hand Mixer, White
      • Pyrex Glass Mixing Bowl Set (3-Piece Set, Nesting, Microwave and Dishwasher Safe)
        Pyrex Glass Mixing Bowl Set (3-Piece Set, Nesting, Microwave and Dishwasher Safe)
      • Mueller Premium 1500W Electric Kettle with SpeedBoil 
        Mueller Premium 1500W Electric Kettle with SpeedBoil 
      • Nescafe Taster's Choice Instant Coffee Hazelnut
        Nescafe Taster's Choice Instant Coffee Hazelnut
      Nutrition Information:
      Yield: 2 Serving Size: 1
      Amount Per Serving: Calories: 141Total Fat: 2gSaturated Fat: 1gTrans Fat: 0gUnsaturated Fat: 1gCholesterol: 10mgSodium: 68mgCarbohydrates: 26gFiber: 0gSugar: 18gProtein: 4g

      Nutritional information is not always 100% accurate.

      © Miriam
      Cuisine: Korean / Category: Drinks

      Garlic Bread Baked Gnocchi

      April 23, 2020

      above photo of Garlic Bread baked Gnocchi in a cast iron skillet

      This is one of our favorite comfort foods- garlic bread baked gnocchi. Even the name just screams "comfort food goodness." I actually promised this recipe at the end of my post for the best homemade gnocchi and then life happened and I totally didn't post it. I was much more scattered with my posting schedule a year ago. BUT here it is and it is dreamy good. Super easy to make and even though I wouldn't deem this baked gnocchi recipe as "healthy" in the traditional sense, in this time of life it's exactly the recipe we need sometimes. Giving yourself comfort in trying times is my kind of healthy.

      close up of a skillet filled with garlic bread and parmesan on baked gnocchi

      Best baked gnocchi recipe

      This is the best way to make a really hearty comforting gnocchi bake (in our house at least). Our go to, easy dinner is always pasta and this one has ALL those good things.

      We've got shredded Parmesan cheese, bits of baguette, garlic, tomato and herbs, and of course fresh gnocchi (store bought works great as well).

      So let's get down to it.

      raw gnocchi in a cast iron skillet

      Can you cook gnocchi without boiling?

      Simple answer, yes you can. In this recipe, though, I have found that either pan frying it or boiling as usual before baking in the sauce works better and ensures you don't get raw gnocchi. YUCK. No one wants dough blobs in their meal.

      The reason you do want to boil or pan fry first is the garlic bread bites on the top. You only cook this for about 15 minutes to get the flavors coming together and that bread crispy and golden on top. This isn't quite long enough to make sure that all the gnocchi is baked through, but any longer and your bread will burn.

      close up of the garlic bread on the gnocchi bake

      The other reason, pan frying your gnocchi adds so much flavor and texture. It's a win every time.

      So how do you pan fry gnocchi? The key to doing this right is simply doing it in batches. You do not want to over crowd the pan. The gnocchi needs room to breathe so that it doesn't start mushing and melting into one another.

      I usually make this easy by frying it up in the skillet that I will also bake it in. Fry up just enough for the pan to be filled but breathable. If you want more than that, then you can fry in batches, setting aside each cooked batch in a bowl until you're ready to add them back in to bake with the sauce.

      top view of a skillet baked gnocchi

      Can you overcook gnocchi?

      If you decide to boil instead of pan fry your gnocchi, make sure you just boil until they float to the top (only about 2-3 minutes). Over cooking them will make them turn to mush.

      If you are doing the trusty and flavorful pan frying method, heat about a tablespoon or 2 of olive oil in a pan over medium heat. Add the gnocchi in (not over crowding the pan), and cook for about 10 minutes, turning a few times to get each side golden and seared.

      Garlic Bread Baked Gnocchi

      Once you have either boiled or pan fried it your gnocchi, you can begin to throw together your recipe.

      • hand pouring sauce over gnocchi
      • pan filled with gnocchi and sauce
      • hands ripping up baguette bread

      In a skillet or baking pan (we always use our cast iron skillet), place your cooked gnocchi. Mix together crushed tomatoes, spices, and fresh basil and pour in with the gnocchi. Give it a gentle toss to incorporate it all together.

      Break up bits of baguette (french bread, sour dough- tastes amazing) and place on top of your gnocchi and sauce. The bread should be bite sized.

      pan with toasted garlic bread and parmesan

      Drizzle some olive oil lightly over the top (1-2 tablespoons) and sprinkle with your garlic powder. Finish it off with shredded Parmesan (powdered works fine too).

      Pop this in the oven and bake at 375 for 15 minutes or until the top is golden and melted. Serve right away.

      of gnocchi and garlic bread baked

      Hope you enjoy!

      Tag us on Instagram @grabthemangos and give us a rating and review right here in the comments! And don't forget to pin and save it for next time!

      This super easy baked gnocchi is delicious! Topped with garlic bread bites, this recipe is ultimate comfort food for dinner. Pinterest Pin

      More Sweet recipes for you to love

      • Best Gnocchi Recipe (use this to make your own gnocchi for this recipe)
      • Healthy Beef Chili
      • Sweet Onion Chicken Noodle Soup
      • Parmesan + White Wine Asparagus
      • Quick Ramen Noodle Soup
      close up of a skillet filled with garlic bread and parmesan on baked gnocchi

      Garlic Bread Baked Gnocchi

      Yield: 6 people
      Prep Time: 10 minutes
      Cook Time: 15 minutes
      (fresh made gnocchi time): 15 minutes
      Total Time: 40 minutes

      This super easy baked gnocchi is delicious! Topped with garlic bread bites, this recipe is ultimate comfort food for dinner.

      Ingredients

      • Fresh made Gnocchi (our recipe is linked above) - or 1 bag of store bought gnocchi
      • 1 28oz can Crushed Tomatoes
      • ¼ cup Chopped Fresh Basil
      • 2 Garlic Cloves (minced)
      • Salt + Pepper to taste
      • ~2 cups bite sized Baguette Bread
      • 2 tablespoon Olive Oil (plus more for drizzling over the bread)
      • 1 tablespoon Garlic Powder
      • 1 cup Shredded Parmesan Cheese

      Instructions

      1. Make your gnocchi using our best gnocchi recipe OR use store bought gnocchi.
      2. Pre-heat your oven to 375.
      3. Heat 2 tablespoon of olive oil in a pan over medium heat.
      4. Add in some of the gnocchi to pan fry, make sure not to overcrowd the pan and turning several times to get all the sides golden.
      5. Do this in batches until all done (more tips on pan frying gnocchi above).
      6. Once you are done, place the gnocchi in a pan and mix together your crushed tomatoes, garlic, basil, and salt and pepper, then pour over the gnocchi.
      7. Toss in together gently.
      8. Rip up baguette pieces in to bite sized chunks and spread over the top of the gnocchi.
      9. Drizzle a little more olive oil over the top (1-2 Tbsp) and then sprinkle with the garlic powder evenly.
      10. Top it with the shredded parmesan cheese.
      11. Bake at 375 for 15 minutes or until the top is golden. Enjoy!
      Nutrition Information:
      Yield: 6 Serving Size: 1
      Amount Per Serving: Calories: 250Total Fat: 9gSaturated Fat: 3gTrans Fat: 0gUnsaturated Fat: 6gCholesterol: 22mgSodium: 619mgCarbohydrates: 33gFiber: 4gSugar: 7gProtein: 11g

      Nutritional information is not always 100% accurate.

      © Miriam
      Cuisine: Italian / Category: Main Dish

      Healthy eating for kids: 7 real-life tips that actually work!

      April 15, 2020

      a toddler holding an apple smiling.

      Getting kids to eat healthy can feel like a full-time job. Whether it’s refusing to touch anything green or a dinner table negotiation that rivals international diplomacy, the struggle is real.

      But good news: healthy habits don’t have to be forced—they can be fun, approachable, and even enjoyable for your whole family. These 7 simple tips are designed to encourage better eating habits with less stress and more smiles.

      a family preparing food and dancing in the kichen.

      7- Tips to help you get your kids to eat better

      1. Lead by Example (Yes, They’re Watching)

      Kids are way more likely to try new foods if they see you eating them. Sit down together and enjoy the same meal—they’re soaking up more than you think.

      Quick Tip: Try saying “Mmm, this roasted broccoli is so good!” instead of “You should eat your broccoli.”

      A family sitting at a table making food.

      2. Get Them Involved in the Kitchen

      Let them help wash veggies, stir pancake batter, or pick out snacks at the grocery store. Ownership builds interest, and interest builds healthy habits.

      family making a salad together adding veggies to a bowl.

      Kid-friendly tasks:

      • Peeling fruits and veggies
      • Stirring ingredients
      • Assembling their own plate
      Helathy food on one side and unhealthy food on the other side.

      3. Make Healthy Swaps, Not Big Changes

      Small swaps can go a long way. Think Greek yogurt instead of sour cream, whole grain pasta instead of regular, or fruit instead of candy. And sneak veggies in where ever you can!

      Easy swaps to try:

      Instead of French Fries — Try Baked Sweet Potato Fries

      • Crispy, slightly sweet, and full of fiber and vitamins, sweet potato fries are a fun way to boost nutrition without giving up the dipping!

      Instead of Ice Cream — Try Frozen Banana “Nice Cream”

      • Blend frozen bananas with a splash of milk and a spoonful of cocoa powder or berries for a creamy, dreamy treat with no added sugar.

      Instead of Juice Boxes — Try Infused Water or Coconut Water

      • Water doesn’t have to be boring! Add slices of fruit like strawberries, lemons, or cucumbers to keep things flavorful and hydrating.

      Instead of White Pasta — Try Whole Wheat or Chickpea Pasta

      • These high-fiber, high-protein alternatives taste just as great and keep little tummies full longer.

      Instead of Packaged Cookies — Try Homemade Oatmeal Bites

      • Mix oats, nut butter, honey, and mini chocolate chips for a sweet treat that doubles as an energy boost.

      Why These Swaps Work
      The key to getting kids on board with healthier food is to keep things familiar but better. These swaps aren’t about restriction—they’re about upgrades. Keep the flavors fun, the textures familiar, and the portions realistic. Over time, even the pickiest eaters can start embracing healthier habits with less resistance and more excitement.

      a toddler holding an apple smiling.

      4. Create a “Yes List” of Healthy Favorites

      Sit down with your kids and list out healthy foods they already like. Post it on the fridge and build meals from those favorites—it makes dinner planning easier, too!


      5. Don’t Label Foods “Good” or “Bad”

      Instead of moralizing food, teach balance. It’s okay to enjoy cookies—just maybe not 12 at once. Help them understand that food is fuel and fun.

      fun kids foos on plates as a fox, owl, and fish on a blue surface.

      6. Use the Power of Presentation

      Sometimes it’s all in the packaging. Cut fruit into fun shapes, use bento boxes, or turn smoothies into popsicles. A little creativity can go a long way.

      Bonus idea: Make a “snack board” with fruits, crackers, cheese, and dips for an after-school win.

      A mom handing her daugther a piece of cucumber.

      7. Keep It Chill

      No pressure, no bribes, no forcing bites. Keep offering new foods, and let them explore at their own pace. The more relaxed the environment, the more open they’ll be.

      If you're navigating mealtime with little ones, here are a few gentle, realistic strategies to make healthy eating feel less like a battle and more like a win for everyone:

      Start Small With Picky Eaters

      Instead of overhauling their entire plate, offer just one new food alongside something they already like. Keep portions tiny and pressure low. Even if they don’t take a bite, just exploring new textures and colors is progress.

      Make Veggies More Fun

      Roasting veggies brings out their natural sweetness and makes them more kid-friendly. You can also pair them with dips or blend them into familiar foods—like tossing chopped spinach into pasta or adding pureed carrots into sauces.

      two kids making cookies together.

      Yes, You Can Still Serve Dessert!

      Dessert doesn’t need to be off-limits. The trick? Don’t use it as a reward. Present it as a normal part of the meal rotation so it doesn’t become “forbidden fruit.” It’s all about balance, not bribery.

      It’s a Journey, Not a Race

      Progress doesn’t happen overnight—and that’s okay. Celebrate the small wins, be patient with the tough days, and know that creating a healthy foundation is worth every bite.

      Some healthy recipes that taste good...

      • 4 Ingredient strawberry smoothie - (dairy free)
      • Banana Oatmeal Pancakes
      • Sweet Potato Blueberry Muffins
      • Healthy Fudge Brownies

      Actually Amazing Almond Flour Carrot Cake

      April 7, 2020

      a piece cut from the cake

      You may think creating an almond flour cake just results in a trash little cake that is dry, grainy, and flat. Well this recipe is here to prove you wrong my friend! This almond flour carrot cake is so perfect and moist and you'd never be able to tell that it wasn't a traditional (slightly healthier) carrot cake with cream cheese frosting of course. The key to a good almond flour cake is perfecting your rising agent. So let's make a cake!

      a piece cut from the cake

      Almond Flour Cake Recipes

      Almond flour can result in some really dense and sunken cakes because it holds more moisture than regular flour and therefore is heavier. It weighs the cake down versus allowing it to fluff up.

      Here's how to solve this:

      • Use a bit of coconut flour to absorb some of the moisture.
      • Use TWO rising methods instead of just one.
      • Eggs are going to help keep the cake from getting crumbly.
      • Don't add oils which will weigh it down with even more moisture locked in than you need; you're cake will be super dense.
      • Don't waste time- you need to mix this up and immediately get it into the oven quickly. The rise starts to happen as soon as all the ingredients come together in the batter. You want most of that rise to happen in the heat in the oven.
      fluffy almond flour carrot cake with cream cheese frosting and cinnamon

      The two rising methods that we use in this almond flour cake recipe also give it a boost of flavor- Baking soda + a homemade buttermilk, and Baking powder.

      Baking soda on it's own doesn't do much rising in your baking. It needs an acid to start the reaction which forms those nice little bubbles. (like those homemade volcanoes from school) This recipe uses baking soda and super easy Apple Cider Vinegar buttermilk. The vinegar is the really important part and the milk just gives more flavor. You can use almond milk or even oat milk instead of whole milk to make this recipe dairy free. If you don't have ACV (apple cider vinegar) you can use a regular white vinegar instead or even substitute lemon juice. We used ACV for the sort of apple spiced flavor (but also we had it on hand).

      • cake being frosted
      • hand frosting a carrot cake
      • hand sprinkling cinnamon over a cake

      Baking powder was invented over a hundred years ago to give home bakers an easier way to make fluffy risen cakes without using yeast. Pretty self explanatory there.

      How does almond flour affect baking?

      So we've already talked about the moisture that almond flour adds to cakes and the rising agents needed to go with that. Almond flour cake also has an added element of sweetness from the almond flour that regular flour does not have.

      overhead shot of carrot cake with cream cheese frosting

      This is why we have less sugar in our almond flour carrot cake recipe than a normal cake recipe. That and the fact that the cream cheese frosting (or this coconut whipped cream for dairy free people) sweetens up the cake plenty on it's own!

      Does Almond Flour take longer to bake?

      Baked goods with almond flour definitely do better if you leave them to cool in the pan for about 20 minutes at least before removing. They can be more delicate because of the almond flour which is also why we use 4 eggs to basically glue the ingredients together. (eggs are baking glue)

      a piece of carrot cake with frosting and a fork

      It also helps a lot if you both grease the pan and use parchment paper. This just really helps when you remove the cake to make sure the middle section doesn't stick. When you are ready to remove the cake, you can just use a butter knife to gently separate the sides from the pan and then carefully flip out onto the counter like a regular cake. Tadahhhh!

      Healthier Carrot Cake

      Just because a dessert has a vegetable in it does not mean it's good for you. Do I care? Not at all. Carrot cake will always be one of my favorites and I don't care that it's generally not healthy. It's delicious and I will keep my tradition of eating carrot cake the night before my birthday (which is in the spring) and then ALSO eating it for breakfast the next day. There is nothing better than carrot cake with cream cheese frosting and a cup of coffee in the morning.

      hand taking a bite out of carrot cake

      That being said, I also don't thing healthier has to taste worse. This almond flour carrot cake recipe is one of my favorite carrot cake recipes and yet has way less sugar in it than a regular carrot cake. Loads of sugar just isn't always necessary especially when you have sweetness coming from the almond flour and the carrots themselves.

      Hope you enjoy this as much as we did!

      Tag us on Instagram @grabthemangos and give us a rating and review right here in the comments! And don't forget to pin and save it for next time!

      This amazing almond flour cake is a classic carrot cake recipe using almond flour and buttermilk. This is the BEST carrot cake recipe- fluffy, moist, and so easy to make. Gluten free with a dairy free option, and healthier with less sugar! Pinterest Pin

      More Sweet recipes for you to love

      • Classic Carrot Cake Cupcakes
      • Almond Flour Almond Cookies
      • Sweet Potato Blueberry Muffins
      • Healthy Deviled Eggs
      • Almond Flour Brownies
      a piece cut from the cake

      Actually Amazing Almond Flour Carrot Cake

      Yield: 6 people
      Prep Time: 15 minutes
      Cook Time: 30 minutes
      Cool Time: 20 minutes
      Total Time: 1 hour 5 minutes

      This amazing almond flour cake is a classic carrot cake recipe using almond flour and buttermilk. This is the BEST carrot cake recipe- fluffy, moist, and so easy to make. Gluten free with a dairy free option, and healthier with less sugar!

      Ingredients

      • 1 cup Almond Flour
      • 2 tablespoon Coconut Flour
      • 1 teaspoon Baking Powder
      • 1 teaspoon Baking Soda
      • ½ cup Milk (whole, almond, or oat) + 1 tablespoon Apple Cider Vinegar
      • 4 Eggs
      • 3 Medium Carrots shredded
      • ½ cup Sugar
      • 1 teaspoon Cinnamon (plus extra for sprinkling on top)
      • 1 teaspoon Nutmeg
      • 1 teaspoon Allspice
      • ½ teaspoon Ground Cloves
      • 1 teaspoon Vanilla
      • Pinch of Salt
      • *Cream Cheese Frosting*
      • ½ Block of Cream Cheese (4oz)
      • 1 cup Powdered Sugar
      • 2 tablespoon Milk
      • ¼ cup Butter

      Instructions

      1. Preheat your oven to 350 and prepare a greased 9 inch cake pan with the bottom lined with parchment paper.
      2. In a glass measuring cup, combine the milk and apple cider vinegar and set aside.
      3. In a small mixing bowl combine the almond flour, coconut flour, baking powder, baking soda, and spices.
      4. In a separate mixing bowl, combine the eggs, sugar, and vanilla and blend together until smooth.
      5. Add the flour mixture to the egg mixture and blend well.
      6. Fold in your shredded carrots.
      7. And finally add in the buttermilk that you had set aside.
      8. Mix this all up thoroughly and pour into the prepared cake pan.
      9. Bake for 30 minutes or until a toothpick inserted into the center comes out clean.
      10. Let it cool for at least 20 minutes before attempting to remove.
      11. To make the cream cheese frosting, whip the butter and cream cheese together until smooth and creamy and add the milk.
      12. Slowly add the powdered sugar and blend well.
      13. Spread over the top of the cake after removing from the cake pan. (optional: sprinkle extra cinnamon over the frosting and swirl in)
      14. Enjoy!

      Notes

      *You can also use a delicious this Coconut Whipped Cream from Minimalist Baker as your topping if you want this to be completely dairy free*

      Recommended Products

      As an Amazon Associate and member of other affiliate programs, I earn from qualifying purchases.

      • Pyrex Glass Mixing Bowl Set (3-Piece)
        Pyrex Glass Mixing Bowl Set (3-Piece)
      • Silicone Spatulas Set
        Silicone Spatulas Set
      • Non-Stick Parchment Paper
        Non-Stick Parchment Paper
      • Round Cake Pan, 9 inch
        Round Cake Pan, 9 inch
      Nutrition Information:
      Yield: 6 Serving Size: 1
      Amount Per Serving: Calories: 421Total Fat: 23gSaturated Fat: 8gTrans Fat: 0gUnsaturated Fat: 13gCholesterol: 147mgSodium: 459mgCarbohydrates: 48gFiber: 4gSugar: 40gProtein: 9g

      Nutritional information is not always 100% accurate.

      © Miriam Reeves
      Cuisine: American / Category: Dessert

      Healthy Deviled Eggs- No Mayo, No Avocado

      April 2, 2020

      over head shot of 9 deviled eggs neatly lined up

      Deviled eggs are an Easter essential. This Easter will definitely be a weird one for most of us, but at least we can always count on some good treats to make at home. If we don't have good food, is it even a holiday? Fortunately eggs are pretty cheap and fairly easy to find right now. This healthy deviled eggs recipe is our favorite- it has no mayo, is full of good spices and flavors, and is perfect for all those Easter eggs you painted with your kids (or on your own, we don't judge) that you now need to eat.

      over head shot of 9 deviled eggs neatly lined up

      Healthy Deviled Eggs without Mayo

      These healthier deviled eggs are made with Greek yogurt instead of crap tons of mayo. I don't know about you but, I like mayo on sandwiches or in small quantities, sure. When recipes start calling for full multiple scoops of mayo mixed in, I start to vomit in my mouth a bit. I've heard this mayo in everything is a Midwestern thing, but I grew up in the south where butter is king, not mayo. So what can I say!

      side shot of healthier deviled eggs with pretty piped filling

      Using Greek Yogurt

      In this healthy deviled eggs recipe, we combine plain whole milk Greek yogurt with the classic spices, plus vinegar and honey to still capture that tangy taste that a good deviled egg should have. I always use plain whole milk Greek yogurt because it is so creamy and rich but with only it's natural sugars, not added ones. It is perfect for baking and cooking with, not to mention just add a drizzle of honey for a yummy breakfast in the mornings. I'm pretty sure we have that every morning at this point. Definitely a kid favorite as well.

      Toppings for Deviled Eggs

      • Crumbled Bacon
      • Crumbled Blue Cheese
      • Chopped Fresh Parsley
      • Crumbled Goat Cheese
      • Pomegranate Seeds
      • Balsamic Glaze Drizzle
      • Feta Cheese
      • Smoked Paprika
      hand piping deviled egg filling into the eggs

      There are so many good topping ideas out there but these are some of our favorite toppings for our healthy deviled eggs!

      How to make Deviled Eggs

      Using hard boiled eggs, cut them the long way down in half. Get the cooked yellow yolk out of the whites in each half. This is a lot easier than you might think by just lightly squeezing the egg white so the yolk pops out. Then cream those yolks together with the Greek yogurt and spices to make you delicious deviled egg filling.

      hands poping the cooked egg yolks out into a bowl
      bowl of yellow cooked egg yolks

      Do Deviled Eggs Go Bad?

      Eggs that you buy from the store are perishable so they should always be kept refrigerated. Deviled eggs should be kept in an air tight container in the fridge until you are ready to eat them. Two days is the generally time frame you should keep for when to eat deviled eggs by. We normally will make them the day of or the day before Easter so that they get eaten up fairly quickly after preparing them.

      a bite taken out of the deviled eggs

      Hope you enjoy this recipe as much as we do!

      Tag us on Instagram @grabthemangos and give us a rating and review right here in the comments! And don't forget to pin and save it for next time!

      This healthy deviled eggs recipe is so easy to make and has no mayo or avocados in it. Just clean eating in a deviled egg with greek yogurt instead!

      More Sweet recipes for you to love

      • Quiche with Sweet Potato Crust
      • Carrot Cake Cupcakes
      • Split Pea Soup with leftover Easter Ham
      • Lemon Oat Energy Balls
      • Blueberry Sweet Potato Muffins
      over head shot of 9 deviled eggs neatly lined up

      Healthy Deviled Eggs- No Mayo, No Avocado

      Yield: 12
      Prep Time: 20 minutes
      Cook Time: 12 minutes
      Total Time: 32 minutes

      This healthy deviled eggs recipe is so easy to make and has no mayo or avocados in it. Just clean eating in a deviled egg with greek yogurt instead!

      Ingredients

      • 6 Eggs
      • ¼ cup Greek Yogurt
      • 1 teaspoon Vinegar (we like rice vinegar but white vinegar works as well)
      • ½ tablespoon Honey
      • 1 teaspoon Garlic Powder
      • ½ teaspoon Paprika
      • ½ teaspoon Onion Powder
      • ½ teaspoon Salt
      • Pinch of Cayenne Pepper

      Instructions

      1. Place your eggs into a pot and cover with water and 1 teaspoon baking soda.
      2. Bring to a boil and once the water is boiling, let it boil for 12 minutes.
      3. Place the cooked, hot eggs into ice water and let them cool.
      4. Peel the shells off carefully.
      5. Cut the eggs each in half the long way down.
      6. Take the cooked egg yolk out of all of them and put in a bowl.
      7. Mix the egg yolks with the Greek yogurt, vinegar, honey, and spices until creamy.
      8. Scoop the creamy egg yolk mixture into the egg white part again (or pipe it in) and sprinkle with toppings or just serve right away and enjoy!

      Recommended Products

      As an Amazon Associate and member of other affiliate programs, I earn from qualifying purchases.

      • Deviled Egg Trays with Snap On Lids
        Deviled Egg Trays with Snap On Lids
      • Nonstick Saucepans/Pots and Pans Set
        Nonstick Saucepans/Pots and Pans Set
      Nutrition Information:
      Yield: 12 Serving Size: 1
      Amount Per Serving: Calories: 43Total Fat: 2gSaturated Fat: 1gTrans Fat: 0gUnsaturated Fat: 1gCholesterol: 93mgSodium: 134mgCarbohydrates: 1gFiber: 0gSugar: 1gProtein: 4g

      Nutritional information is not always 100% accurate.

      © Miriam Reeves
      Cuisine: American / Category: Snacks

      Blueberry Sweet Potato Muffins (gluten free)

      March 30, 2020

      a blueberry sweet potato muffin with brown sugar on top

      Ok, we are all at home and want something yummy to snack and munch on... in come these blueberry sweet potato muffins. So easy to make and naturally sweetened and healthy. Addictively delicious, especially with a little dark brown sugar sprinkled on the top before baking- drooling. The sweet potato gives the muffin a super soft texture, mixed with some maple and lemon, then add the blueberries for the perfect little breakfast treat.

      a blueberry sweet potato muffin with brown sugar on top

      Healthy, Gluten Free Sweet Potato Muffins

      That's right! These blueberry sweet potato muffins gluten free, oil free, dairy free, and made with maple syrup instead of sugar. I don't have anything really against sugar actually, but the maple syrup gives these muffins an even better flavor. I mean, sweet potatoes and maple just go together don't they?

      hand reaching for a blueberry sweet potato muffin

      What could be better than a healthy treat that actually tastes like warm brown sugar and blueberries? So good.

      How to make Sweet Potato Muffins

      The great thing about these muffins is that they can be made in one bowl. First you want to roast your sweet potato. Pre-heat the oven to 400, peel and dice your sweet potato, and spread on a baking sheet to roast for 25 minutes.

      pan of roasted sweet potato and a carton of blueberries
      hands mixing a bowl of sweet potato muffin batter with blueberries

      Once your potato is done, let it cool slightly for about 10 more minutes. Put the sweet potato in a bowl and add your eggs, maple syrup, vanilla and lemon juice and blend with electric beaters until smooth. Then you can add your almond flour, coconut flour, baking powder, salt, and baking soda and mix well into a creamy batter. Fold in your blueberries (every time I say "fold in" I think of Schitt's Creek) and then scoop ¼ cup into a greased cupcake tin. Bake at 350 for 25 minutes. You can sprinkle some dark brown sugar on tops before baking for a little extra sweet caramelized flavor on top.

      hand holding up a muffin with a bite in it

      Can you freeze sweet potato muffins?

      You can totally make bigger batches of these and freeze some for later. They freeze well for about 3 weeks. When you are ready to de-thaw and eat them, just leave them out on the counter and you can warm them up in the microwave or in the oven at 350 for about 7-10 minutes. Enjoy!

      overhead shot of blueberry sweet potato muffins on a plate and blueberries scattered

      Tag us on Instagram @grabthemangos and give us a rating and review right here in the comments! And don't forget to pin and save it for next time!

      These healthy gluten free blueberry sweet potato muffins are so easy to make and so yummy! Made with almond flour and maple syrup for a healthy clean eating muffin recipe.

      More Sweet recipes for you to love

      • 21 Most Comforting Drinks
      • Quiche with Sweet Potato Crust
      • No Bake Lemon Oat Energy Balls
      • Almond Flour Brownies
      a blueberry sweet potato muffin with brown sugar on top

      Blueberry Sweet Potato Muffins (gluten free)

      Yield: 10-12
      Prep Time: 35 minutes
      Cook Time: 25 minutes
      Total Time: 1 hour

      These healthy gluten free blueberry sweet potato muffins are so easy to make and so yummy! Made with almond flour and maple syrup for a healthy clean eating muffin recipe.

      Ingredients

      • 1 Medium Roasted Sweet Potato
      • 2 Eggs
      • ⅓ cup Maple Syrup
      • ½ teaspoon Vanilla
      • Juice from ½ a Lemon (around 1 Tbsp)
      • 1 cup Almond Flour
      • 2 tablespoon Coconut Flour
      • Pinch of Salt
      • 1 teaspoon Baking Powder
      • ½ teaspoon Baking Soda
      • 1 cup Blueberries

      Instructions

      1. Pre-heat oven to 400.
      2. Peel your sweet potato, and dice into smaller pieces. Spread out on a greased pan and roast in the oven for 25 minutes.
      3. Let those cool slightly for about 10 minutes.
      4. Place the cooked sweet potato into a mixing bowl along with your eggs, maple syrup, vanilla, and lemon juice. Blend with an electric mixture until smooth.
      5. Add in your almond flour, coconut flour, baking powder, baking soda, and pinch of salt. Blend into a creamy batter.
      6. Fold in your blueberries.
      7. Using a ¼ cup, scoop the batter into a greased cupcake tin and bake at 350 for 25 minutes.
      8. Sprinkle the tops with dark brown sugar before baking if you want!
      9. Let them cool completely for at least 30 minutes so that they don't fall apart when you take them out of the tin. Enjoy!

      Recommended Products

      As an Amazon Associate and member of other affiliate programs, I earn from qualifying purchases.

      •  10 Piece Measuring Cups and Spoons Set 
         10 Piece Measuring Cups and Spoons Set 
      • Nonstick Bakeware 12-Cup Muffin Tin With Grips 
        Nonstick Bakeware 12-Cup Muffin Tin With Grips 
      Nutrition Information:
      Yield: 12 Serving Size: 1
      Amount Per Serving: Calories: 123Total Fat: 6gSaturated Fat: 1gTrans Fat: 0gUnsaturated Fat: 5gCholesterol: 31mgSodium: 134mgCarbohydrates: 16gFiber: 2gSugar: 10gProtein: 4g

      Nutritional information is not always 100% accurate.

      © Miriam Reeves
      Cuisine: American / Category: Breakfast

      21 Most Comforting Drinks to Make at Home

      March 24, 2020

      21 most comforting drinks

      It's a weird time in the world right now. I won't get into all that but because it's such a weird time, I think we all could use some comfort and help with self care. My favorite form of easy self care is making a really yummy special drink for myself. Because I have small kids and probably shouldn't drink all damn day- these are almost all non-alcoholic. These are the 21 BEST most comforting drinks to make when you just need a breather and some "treat yo-self" attitude but also need to stay home to do it. Hope you enjoy!

      21 most comforting drinks to make at home. Make yourself cozy and relaxed and sip of these easy drinks.

      21 Most Comforting Drinks to Make at Home

      Do you ever feel like you need to just BECOME a weighted blanket? Then these drinks are for you. The 21 best, most comforting drinks on the net that you can make at home yourself when you just need some lovin' in a cup.

      Photo Credit: www.kitchentreaty.com

      Vanilla Turmeric Golden Milk Latte

      Even if you aren't looking for something with health benefits (which this drink is full of btw), this drink will warm you to your toes and comfort your soul. So full of flavor, reminiscent of chai, and totally customizable.

      Photo Credit: calmeats.com

      Anti-Inflammatory CBD Infused Turmeric and Ginger Honey Latte (Vegan, Dairy-Free)

      Need some CBD in your life? Feel like the whole world needs some CBD... because I sure do. This latte is infused with calming CBD, tumeric, ginger, and honey. Golden, calming goodness in a mug!

      Homemade Hot Chocolate Mix - Dairy Free

      If you want a warm and comforting drink that is ready for you whenever you need it, this one is it. Only 3 ingredients, just stir in the homemade mix with your warm milk of choice, and enjoy a creamy and rich hot chocolate!

      Photo Credit: peaceloveandlowcarb.com

      Keto Hot Buttered Rum Mix

      If you're looking for an amazing, warm, and cozy drink without all the carbs and sugar, this is the one! Even the name "hot buttered rum" just sounds like something we all need in our lives right now.

      Photo Credit: anyreasonvegans.com

      Elderberry Iced Tea for Immunity And Health

      We can't forget about the comforting iced teas of the world. Some sunshine and a refreshing elderberry iced tea to help you relax and give your immune system a boost- yes please!

      Photo Credit: anyreasonvegans.com

      Healthy Matcha Ginger Frosty Recipe - Any reason vegans

      While we are talking about iced drinks, let's talk about this healthy matcha frosty! Match- good. Ginger- good. Frosty- goooood. Indulge and feel good about it with this one.

      Photo Credit: www.insidetherustickitchen.com

      Italian Hot Chocolate – Thick and Decadent

      A good homemade Italian Hot Chocolate is a classic that should be tried and kept in every home. Basically the definition of comforting. Drink this and then take a nap- you're welcome.

      Photo Credit: www.vegrecipesofindia.com

      kahwa | kashmiri kahwa | how to make kahwa tea

      Kahwa Tea is a mild green tea that will warm you right up and get you feeling all sorts of cozy. With fragrant spices, saffron, and almonds, this tea is so unique and out of this world good.

      Photo Credit: crayonsandcravings.com

      Pink Velvet Hot Chocolate Recipe

      Looking for something whimsical and happy as well as comforting? Pink Velvet hot chocolate is Here. For. You. I'm pretty sure this can help relieve any stress you might be feeling, I mean look at it!

      Photo Credit: moonandspoonandyum.com

      Cherry Lavender Moon Milk Recipe (Vegan)

      Speaking of whimsical and magical... enter this cherry lavender moon milk. Even the name just sounds relaxing and other worldly! And lavender is always a flavor worth trying.

      Photo Credit: cookingwithjanica.com

      Iced Strawberry Matcha Latte Recipe

      Matcha and fresh strawberry puree? I'll take it all thanks! So pretty looking and absolutely tasty and refreshing. Relax and sip on this one!

      Photo Credit: moonandspoonandyum.com

      Almond Rose Chai Tea Latte (Vegan)

      I love Chai tea already but almond and rose chai tea latte? Sign me up and get it in my belly. So good and perfect for getting under a blanket and just sipping and breathing.

      Photo Credit: inthekitch.net

      How to Make a London Fog

      Ever heard of a London Fog? This drink will make you think you are in the Great British Baking Show and if that doesn't make you happy and relaxed, I don't know what will. Made with a base of earl grey tea and layered with frothy hot milk. Comfort in a mug.

      Photo Credit: twobittart.com

      Cardamom Rose Latte

      So many of these drinks have such amazing fragrant flavor combos. The flavor and aroma of cardamom and rose together alone will relax you, not to mention the amazing flavor in this latte!

      Photo Credit: shivanilovesfood.com

      Masala Chai (Indian Spiced Tea) Recipe

      Masala Chai... is there anything better? Chai is a go to comfort drink, kick back drink, delicious and amazing drink for so many people and this recipe is the real deal.

      Photo Credit: savorandsavvy.com

      Crockpot Caramel Latte

      Want something you can put in the crockpot and then drink all day? I want to drink this caramel latte all day, that's for sure. YUM!

      Photo Credit: www.rhiansrecipes.com

      Red Wine Hot Chocolate (Vegan)

      If you want a comforting warm drink that also has alcohol in it to really get you feeling good, then this is your recipe my friend. Red wine in hot chocolate is about as good as it gets!

      Photo Credit: www.aimeemars.com

      Whipped Coffee Recipe (Dalgona Coffee)

      One of the latest trends that I can actually get behind is this AMAZING whipped coffee. Looking for something new to drink in the mornings (or afternoons, or evenings, or any time at all)? Let it be this whipped coffee!

      Photo Credit: www.sweetteaandthyme.com

      Health Boosting Cinnamon Ginger Tea | Sweet Tea & Thyme

      Ginger and cinnamon are the definition of warm, flavorful, comfort inducing spices. This tea is healthy and amazingly delicious!

      Photo Credit: montanahappy.com

      Yummy Cinnamon Apple Tea Latte

      Cinnamon and apples... name a better duo. Such a classic and yummy flavor combination, you are sure to love this tea latte!

      Photo Credit: www.ohhowcivilized.com

      How to Make the Best Bubble Tea (Boba Tea)

      And finally, we could never leave an amazing bubble tea out of this list of comforting drinks. Craving this one as we speak! The tapioca balls, the flavor, all of it makes for a relaxing and happy time.

      Easy Oven Baked Honey Mustard Chicken Thighs

      March 14, 2020

      a wooden platter of chicken thighs with lemon and honey mustard sauce

      Some easy oven baked chicken thighs are such a perfect weeknight dinner and easily made into a fancy weekend dinner. This recipe uses honey mustard to get a nice sticky and delicious, perfectly seared and baked, chicken thigh. Honey mustard is such an easy thing to make and with a little bit of butter to add even more flavor, this chicken thigh recipe stays juicy and tender and never dry. A no fuss, easy, filling meal.

      a wooden platter of chicken thighs with lemon and honey mustard sauce

      Should you pan sear your chicken thighs first?

      This is technically optional. You can definitely just glaze your chicken thighs and pop them into the oven to bake and on a hectic, need to just get dinner made, type of night this is what I do. But if you have just a few extra minutes, I highly recommend pan searing your chicken thighs first.

      fork sticking into an oven baked chicken thigh

      Still an easy oven baked chicken thigh recipe, but pan searing them quickly first gets that crispy golden brown topping on your chicken without having to bake too long and risk drying it out in the oven to get it.

      How to pan sear chicken

      Pan searing takes only a few minutes and then you can glaze and pop them right into the oven. Using a cast iron skillet gives the best results but any skillet will work well. If you're new to using cast iron in cooking, check out this whole article about using and taking care of a cast iron skillet by Bon Appetit Magazine.

      Just place about a tablespoon or 2 of oil (grapeseed, avocado, or olive oil work well) in the pan and heat over medium to high heat. Once the pan is nice and hot (but the oil is not burning), place you chicken thighs in.

      easy honey mustard sauce in a glass cup with a spoon

      Get a crispy golden brown coating on one side and when the meat releases fairly easily, that's when you know it;s time to flip and do the same on the other side. If you notice your meat really sticking to the pan, that means you need to give it another minute or so. As it sears, it will start to release a little better.

      Remember, when you are just searing your chicken thighs, you aren't trying to cook through. This only takes a few minutes on each side. Once they have a golden brown coating on each side, drizzle and spread your honey mustard sauce over the tops and place your skillet in the oven to bake at 400.

      hand drizzling honey mustard over the chicken thighs

      How long does it take to bake chicken thighs at 400?

      These chicken thighs take about 25 minutes to bake in the oven. If you are using chicken thighs with the bone in, however, then add about 10 more minutes to that bake time. You want the internal temp of the chicken to reach 165F.

      Do you need to flip chicken when baking?

      Simple answer, no you do not. This easy oven baked chicken thigh recipe is just that- easy and simple. No flipping, just sear (optional) and then bake (not optional). Super delicious!

      platter of chicken thighs with a glass of homemade honey mustard sauce

      This easy oven baked chicken thighs recipe really is so simple to make and yet is good enough to go from simple weeknight dinner to a fancier upgrade on the weekend if you pair with something like our Roasted Asparagus with Parmesan and White Wine. No matter when you make it or what you pair it with, enjoy!

      Tag us on Instagram @grabthemangos and give us a rating and review right here in the comments! And don't forget to pin and save it for next time!

      This easy oven baked chicken thighs recipe is covered in honey mustard sauce and is juicy and tender. A healthy and delicious meal that you can make for dinner tonight!

      More Sweet recipes for you to love

      • Healthy Chicken Salad with Greek Yogurt
      • Easy Asian Chicken Tacos
      • The BEST Chicken Noodle Soup
      • Cajun Chicken Meatballs
      • Crunchy Thai Chicken Salad
      a wooden platter of chicken thighs with lemon and honey mustard sauce

      Easy Oven Baked Honey Mustard Chicken Thighs

      Yield: 5
      Prep Time: 15 minutes
      Cook Time: 25 minutes
      Total Time: 40 minutes

      This easy oven baked chicken thighs recipe is covered in honey mustard sauce and is juicy and tender. A healthy and delicious meal that you can make for dinner tonight!

      Ingredients

      • 5 Chicken Thighs (I used boneless, skinless)
      • 3 tablespoon Butter
      • 3 tablespoon Honey
      • 2 tablespoon Yellow Mustard

      Instructions

      1. Pre-heat your oven to 400.
      2. In a glass measuring cup melt your butter. Add the honey and mustard to the melted butter and mix well.
      3. If you are pan searing to get that golden brown crispy edging to your chicken thighs, place 2 tablespoon of oil (olive, grapeseed, or avocado oil work well) into a skillet and heat over medium to high heat. *(If you are not pan searing, skip to #6)*
      4. Once pan is hot, place chicken thighs in (be careful of any oil popping and turn down the heat a bit if needed).
      5. Let them get golden brown for about 2-3 minutes on each side. If you have trouble with the chicken sticking, let it sear a little longer (another minute or so) and then it should release more easily.
      6. Pour the honey mustard sauce over it and spread evenly.
      7. Bake in the skillet in the oven at 400 for 25-30 minutes (add 10 more minutes if you are using bone-in chicken thighs).
      8. Dip in some more of that yummy honey mustard sauce if you want and enjoy!
      Nutrition Information:
      Yield: 5 Serving Size: 1
      Amount Per Serving: Calories: 381Total Fat: 25gSaturated Fat: 10gTrans Fat: 0gUnsaturated Fat: 15gCholesterol: 185mgSodium: 349mgCarbohydrates: 11gFiber: 0gSugar: 10gProtein: 31g

      Nutritional information is not always 100% accurate.

      © Miriam Reeves
      Cuisine: American / Category: Main Dish

      Extra Fluffy Cinnamon Pancakes

      March 10, 2020

      stack of fluffy buttermilk pancakes with butter and syrup

      These are our absolute favorite extra fluffy cinnamon pancakes! They have that buttermilk fluffiness mixed with a little bit of chewiness to make them perfect. The rest of the family usually doesn't even wait for them all to be done cooking before they start eating them.

      stack of fluffy buttermilk pancakes with butter and syrup

      What does buttermilk do in pancakes?

      The mixture of ACV (apple cider vinegar) and some milk forms a homemade buttermilk giving these pancakes that amazing flavor. When you mix the buttermilk with baking soda these pancakes get an extra rise that makes them so fluffy.

      stack of pancakes with cinnamon sticks and a fork taking a slice out

      Always try to get the unpasteurized and unfiltered ACV that has what's called the "mother" in it. This is all the floaty stuff at the bottom that you shake up. The pancakes and most recipes will work just fine without this detail but to have it is much healthier. The "mother" in ACV is strands of proteins, enzymes, and healthy bacteria that your body will love getting.

      How to make Fluffy Pancakes

      In a glass measuring cup, combine the milk and the Apple Cider Vinegar to form the buttermilk mixture that makes these pancakes so so freaking good! Set that aside to get all frothy and buttermilk-y.

      Combine the rest of the ingredients in a nice big mixing bowl and add the buttermilk mixture last forming the pancake batter. Be careful not to over mix. They will be so much more rich and fluffy if you let it be after combining. Let that buttermilk do it's thang!

      How do you know when to flip a pancake?

      pancake in a pan with bubbles ready to flip

      See those bubbles forming and beginning to pop on the top of the pancake in the above picture? As soon as you see those little bubbles on the top of the pancake batter in the pan begin to form and pop, it's time to flip your flapjack!

      Once you've made these pancakes, you'll never go back to box mixes again! They even reheat well. Just pop them in the toaster and they taste as good as fresh.

      overhead shot of pancakes with cinnamon and butter and syrup

      We love to add chocolate chips, peanut butter chips, blueberries, or really anything on hand into the batter before cooking. Almond butter or some powdered sugar on top is absolutely delicious as well. Make these extra fluffy cinnamon pancakes your own and enjoy!

      Tag us on Instagram @grabthemangos and give us a rating and review right here in the comments! And don't forget to pin and save it for next time!

      these super fluffy cinnamon pancakes are so delicious and made with a homemade buttermilk and loads of cinnamon flavor. Pinterest pin.

      More Sweet recipes for you to love

      • Healthy Banana Oat Pancakes
      • Almond Flour Strawberry Pancakes
      • Sausage + Spinach Egg Cups
      • Gluten Free Pumpkin Cinnamon Rolls
      stack of fluffy buttermilk pancakes with butter and syrup

      Extra Fluffy Cinnamon Pancakes

      Yield: 4 people
      Prep Time: 10 minutes
      Cook Time: 5 minutes
      Total Time: 15 minutes

      These super fluffy cinnamon pancakes are so delicious and made with a homemade buttermilk and loads of cinnamon flavor!

      Ingredients

      • ¾ cup milk
      • 2 tablespoon Apple Cider Vinegar
      • 1 cup flour
      • ½ teaspoon baking soda
      • 1 teaspoon baking powder
      • 1 teaspoon nutmeg
      • 2 teaspoon cinnamon
      • 1 egg
      • 2 tablespoon maple syrup

      Instructions

      1. Using a liquid measuring cup combine the apple cider vinegar and milk and set aside. 
      2. In a separate bowl, combine the rest of the ingredients and stir together.
      3. Add the milk and vinegar mixture to the bowl and mix well until combined.
      4. Heat a small dollop of butter on the pan or griddle on medium to low heat.
      5. Once butter is melted completely, use a ¼ cup measuring cup to spoon batter onto the pan. 
      6. Cook on medium to low heat for about 3 min on each side or until cooked through. 
      7. Serve hot with butter and maple syrup (almond butter also a tasty option).
      Nutrition Information:
      Yield: 4 Serving Size: 4 people
      Amount Per Serving: Calories: 189Total Fat: 3gSaturated Fat: 1gTrans Fat: 0gUnsaturated Fat: 1gCholesterol: 50mgSodium: 323mgCarbohydrates: 35gFiber: 2gSugar: 6gProtein: 6g

      Nutritional information is not always 100% accurate.

      © Miriam Reeves
      Cuisine: American / Category: Breakfast

      No Bake Lemon Oat Energy Balls Recipe

      March 9, 2020

      a muffin liner with lemon oat energy balls in it and lemons in the background

      This no bake energy ball recipe is filled with lemon (a favorite flavor of mine), chia seeds, dates, and hearty oats. Everyone needs a great snack to just pick up and eat. And in my opinion, everyone needs a nice sweet one! The dates give this recipe a good amount of sweet without any refined sugar. Just energy and tasty lemon flavor in this 5 minute recipe. Lemon energy balls are so great for on the go, kids (they always want a snack right as your leaving the house right?), at work right around 3pm (snore), after a workout... etc. Whip up a batch and try not to eat them all in one sitting.

      a muffin liner with lemon oat energy balls in it and lemons in the background

      Medjool Dates vs. Regular Dates

      A lot of people have this question when they make anything with dates. Should you use Medjool dates or just regular dates, and what is the difference?

      overhead shot of energy balls

      There actually is a difference between the two. Medjool dates are a fresh fruit and are found in the produce section of the store (I get mine at Aldi's- love that store). Medjool dates have a rich and caramel like flavor and are soft and easy to use in recipes like this no bake energy balls recipe.

      Regular dates, "Deglet Noor" dates, have a more firm flesh. They are picked dry, hydrated, and then sold in the grocery section at the store. Still a great thing to add to your diet, but I prefer Medjool dates for this recipe for the flavor and texture.

      one energy ball and squeezed lemons

      Health Benefits of Dates

      There are quite a lot of health benefits in eating dates.

      • High in Fiber, slows the digestion and can lower the possibility of sugar levels spiking after eating.
      • Helps to keep you from getting constipated.
      • A great alternative to refine sugar. Dates have a low glycemic impact and can help manage blood sugar levels.
      • Dates contain a brain booster- choline. This is a B vitamin that helps with better memory and learning.
      • Helps to maintain bone mass.
      • Loaded with antioxidants.
      • And finally (probably didn't even get them all in here), they can really help with labor. That's right, like birthing a human being out of your body ladies! (note: it may not put you in labor, but eating them leading up to labor has a lot of benefits) You can find more on this gem over at One Strong Mama. I used them for my second labor and delivery (wish I had with my first) and let's just say it was a 42 hour labor, 1 hour of pushing, no epidural, back labor, and my son came out 9lbs 7.5oz. Huge freaking baby (worth it!) especially considering I am like 5'4" and like 120lbs normally. And because of the information and healthy pregnancy I had working with One Strong Mama- it was an amazingly good experience. Not one tear. HOW?! I swear they are magical birthing goddesses.

      Back to the recipe though...

      hand reaching for a lemon oat energy bite

      How do you make no bake energy balls?

      This no bake energy balls recipe is filled with lemon and oats. They taste like lemonade in a bite sized edible portion. Awesome!

      Using a food processor or something like a Vitamix or NutriBullet, blend your dates (pitted) and the juice form one lemon. This will form a kind of paste. Add in your rolled oats and chia seeds and blend until it's fully combined.

      So easy! Now just take around a tablespoon amount (a cookie scooper works well too) and roll into a ball using your hands.

      a bite taken out of an energy ball

      Note: if you don't like full chunks of rolled oats in your bites, simple blend them into more of a powder before hand and add them in like that.

      You should also note, depending on what you are using to blend, you may need to scrape down the sides and work the dates into a blended smooth paste a couple of times.

      Other than that, this no bake, 5 minute, lemon and oat energy balls recipe is so yummy and will keep in the fridge in an air tight container for 1-2 weeks. Enjoy!

      cupcake liner full of no bake energy balls

      Tag us on Instagram @grabthemangos and give us a rating and review right here in the comments! And don't forget to pin and save it for next time!

      This healthy no bake energy balls recipe is so easy to make, only 4 ingredients, and is filled with lemon, oats, and chia seeds.  Perfect as a snack for kids, breakfast, after a workout or anytime! Totally gluten free and vegan.

      More Sweet recipes for you to love

      • Peanut Butter + Banana Baked Granola
      • Chickpea Orange Bars with Glaze
      • Healthy Chocolate Chip Banana Bread
      • Sausage + Spinach Egg Muffins
      a muffin liner with lemon oat energy balls in it and lemons in the background

      No Bake Lemon Oat Energy Balls Recipe

      Yield: ~12 balls
      Prep Time: 5 minutes
      Additional Time: 2 minutes
      Total Time: 7 minutes

      This healthy no bake energy balls recipe is so easy to make, only 4 ingredients, and is filled with lemon, oats, and chia seeds. Perfect as a snack for kids, breakfast, after a workout or anytime! Totally gluten free and vegan.

      Ingredients

      • 10 Medjool Dates (pitted)
      • 1 Lemon
      • 2 tablespoon Chia Seeds
      • 1 cup Rolled Oats

      Instructions

      1. In a food processor, Vitamix, or NutriBullet, blend your pitted dates (don't forget to take the pits out) and the juice from your one lemon.
      2. Blend until smooth like paste- may need to scrape the sides down a couple times to get everything incorporated.
      3. Add your oats and chia seeds and blend until fully mixed in.
      4. Take about a tablespoon amount into your hands and form into a ball.
      5. Keep these lemon oat energy balls in the fridge in an air tight container for up to 2 weeks. Enjoy!
      Nutrition Information:
      Yield: 12 Serving Size: 1
      Amount Per Serving: Calories: 93Total Fat: 1gSaturated Fat: 0gTrans Fat: 0gUnsaturated Fat: 1gCholesterol: 0mgSodium: 1mgCarbohydrates: 21gFiber: 3gSugar: 14gProtein: 2g

      Nutritional information is not always 100% accurate.

      © Miriam Reeves
      Cuisine: American / Category: Snacks

      Healthy Chicken Salad Recipe with Greek Yogurt

      March 3, 2020

      wooden bowl of healthy chicken salad recipe

      Dreaming of summer over here as the weather turns warmer (it's a balmy 40F this week). This is what we like to call our first fake spring in Minnesota and if you haven't figured out why we are moving to Hawaii, that's your first clue. Either way, when it's not quite warm enough to start grilling chicken kabobs (our neighbors did though... in the snow), it's a perfect time for an easy healthy chicken salad recipe with Greek yogurt. This recipe is such a good spring time, "I can taste the sunshine," meal especially if you pair with some fresh strawberries.

      wooden bowl of healthy chicken salad recipe

      Can you use plain Greek yogurt instead of mayo in your healthy chicken salad recipe?

      Short and simple answer, yes! Definitely try substituting some plain Greek yogurt for things like mayonnaise and/or sour cream.

      strawberries with chicken salad and a lettuce wrap

      We use plain Greek yogurt a substitute for sour cream on tacos and burritos, as our favorite topping on our Healthy Beef Chili Recipe or our White Chicken Chili. We also use it as a substitute for mayo on a lot of things like this healthy chicken salad recipe.

      It works so well because of the tangy flavor and the similar creamy consistency. Basically, instead of an absurd amount of mayo (yuck) or sour cream, some plain Greek yogurt in your chicken salad or other recipes gives you a boost of protein and probiotics along with a nice rich creamy flavor.

      all the ingredients in a healthy chicken salad recipe with greek yogurt

      How do you keep chicken salad from getting watery?

      Ok, no one wants a gross watery chicken salad making your bread soggy and your life suck. No one needs that. The best way to keep your chicken salad from getting watery is to serve it right away.

      hands shredding chicken with a forks on a wooden cutting board

      It's those dang delicious veggies that cause the problems here. When they are all chopped up, they leak water into your chicken salad. So the longer it sits around waiting for you to either eat it up or push it to the way back of the fridge to be forgotten for months, the more watery it will get.

      chicken salad all mixed up in a wooden bowl

      BUT, if you do want to save it and keep it in the fridge for a later date, you have a couple of options.

      1. Don't add the veggies until you are ready to serve.
      2. If it got watery anyways, add another dollop or two of Greek yogurt to thicken it back up.
      hand reaching for a lettuce wrap with strawberries

      Let's make this healthy chicken salad recipe with Greek yogurt and yummy spices!

      Tag us on Instagram @grabthemangos and give us a rating and review right here in the comments! And don't forget to pin and save it for next time!

      This simple and delicious clean eating chicken salad recipe is so yummy! No grapes in this recipe, no mayo, just Greek yogurt, yummy spices and veggies. pinterest pin

      More Sweet recipes for you to love

      • Healthy Crock Pot Beef Chili
      • Cajun Chicken Meatballs
      • Watermelon Goat Cheese Salad
      • Dairy Free Chicken Gyros
      wooden bowl of healthy chicken salad recipe

      Healthy Chicken Salad Recipe with Greek Yogurt

      Yield: 4 people
      Prep Time: 15 minutes
      Total Time: 15 minutes

      This simple and delicious clean eating chicken salad recipe is so yummy! No grapes in this recipe, no mayo, just Greek yogurt, yummy spices and veggies.

      Ingredients

      • 2-3 Chicken Breasts (cooked and shredded)
      • ½ cup Greek Yogurt
      • 1 tablespoon Dijon Mustard
      • 1 teaspoon Smoked Paprika
      • 1 teaspoon Onion Salt
      • 1 teaspoon Garlic Powder
      • 1 tablespoon Honey
      • Salt and Pepper to taste
      • ½ cup Chopped Celery
      • 2 shredded Carrots
      • ⅓ cup Diced Yellow Onion

      Instructions

      1. Cook your chicken breasts all the way through. I normally do this on a pan on the stove over medium heat with a little bit of olive oil.
      2. Shred your chicken using 2 forks to pull apart the meat or you can also use an electric beater in a bowl.
      3. Once your chicken is all shredded, add your spices, Greek yogurt, and honey and mix well.
      4. Add your diced veggies in when you are ready to serve and mix up well.
      5. Serve on sandwiches or lettuce wraps and add some sliced strawberries for a little something extra. Enjoy!
      Nutrition Information:
      Yield: 4 Serving Size: 1
      Amount Per Serving: Calories: 211Total Fat: 4gSaturated Fat: 1gTrans Fat: 0gUnsaturated Fat: 2gCholesterol: 78mgSodium: 738mgCarbohydrates: 12gFiber: 2gSugar: 8gProtein: 32g

      Nutritional information is not always 100% accurate.

      © Miriam Reeves
      Cuisine: American / Category: Main Dish

      Slow Cooker Healthy Beef Chili Recipe

      March 1, 2020

      a spoon scooping up healthy beef chili

      Let me start off by saying, slow cookers/crock pots are the absolute best! We all know this, but it needed to be stated again because, really, they are. Whenever I can sense the day is going to be massively crazy or we'll be out all day and tired when we get home, the crock pot comes out and that's that for dinner. This slow cooker healthy beef chili recipe is one of our favorites to make for an easy delicious dinner. Full of goodies and totally customizable for what's in your fridge.

      Is homemade chili healthy?

      Let's start off with this quick question. Chili gets a bad rap as being greasy and unhealthy. The stuff in can is normally not great. That does tend to be greasy and gross and kind of resembles dog food honestly. (obviously there are better brands than others) But nothing beats a good homemade chili and even a newbie cook can make this simple recipe.

      crock pot/slow cooker full of veggies and ground beef

      A homemade chili is loaded with veggies, protein, and tons of flavor and nutrients. Basically it's a win win. A homemade healthy beef chili recipe is one of the best comfort foods that is actually good for you.

      Best veggies to use for a healthy beef chili recipe?

      Chili is one of those really great recipes because you can use just about any vegetable in it and it will taste great. Our favorite veggies to use for a really awesome slow cooker chili are:

      • Carrots
      • Zucchini (so good- my favorite)
      • Onions
      • Bell Peppers
      • Jalapenos (if you like it hot)
      • Corn (hubby is not a fan but the rest of us are, so you be the judge)
      • Kale (chopped up nicely)
      • Sweet Potatoes
      • Mushrooms

      Honestly, use what you have and go to town!

      a bowl full of healthy beef chili and greek yogurt with a lime wedge

      What is the best secret ingredient for beef chili?

      The BEST secret ingredient for a spectacular slow cooker healthy beef chili recipe is a little bit of coffee flavor in my opinion. It brings out the best in the chili flavors. This recipe has smoked paprika, chili powder, oregano, cumin, tumeric, and just a bit of espresso powder (instant coffee works too).

      The coffee just brings this recipe over the top. There are a lot of award winning "secret ingredient" chili's out there but this secret ingredient tops them all. LOVE IT!

      hand holding a bowl of chili and about to take a bite

      Browning Ground Beef

      Even though it is a slow cooker recipe, you always want to brown your meat first. This gives the chili better flavor, lets you drain the grease, and most importantly makes sure it is cooked thoroughly before touching any of the other veggies.

      bowl of chili with lime wedges in front of a crock pot

      Browning ground beef is super simple, one of those basics everyone should know. But if you don't, here it is.

      In a large skillet or frying pan, place your ground beef (thawed). A little bit of water can sometimes help it break up easier or be a little more fine but you don't need it. Heat the beef over medium to high heat while continuing to break it up and stir. Do this until no pink is left and the meat is cooked through (about 3- 5 minutes depending on how much meat you are cooking). Strain the grease from the pan in a strainer over the sink and then add to your chili ingredients in the crock pot. Easy and simple!

      Well, let's make some healthy beef chili!

      Tag us on Instagram @grabthemangos and give us a rating and review right here in the comments! And don't forget to pin and save it for next time!

      This healthy beef chili recipe is made in the crock pot and is so delicious and easy to make! Full of veggies and spices plus a secret ingredient.

      More Sweet recipes for you to love

      • Dairy Free White Chicken Chili
      • Coconut Broccoli Cheddar Soup
      • Gluten Free Cornbread Muffins
      • Cajun Chicken Meatballs

      If you are looking for a great Dairy Free Sour Cream recipe to top your chili with, Erin over at The Wooden Skillet has one of our favorites!

      a spoon scooping up healthy beef chili

      Slow Cooker Healthy Beef Chili Recipe

      Yield: 6 people
      Prep Time: 15 minutes
      Cook Time: 5 hours
      Total Time: 5 hours 15 minutes

      This healthy beef chili recipe is made in the crock pot and is so delicious and easy to make! Full of veggies and spices plus a secret ingredient.

      Ingredients

      • 1 lb Ground Beef
      • 1 Zucchini
      • 2 Carrots
      • 1 Yellow Onion
      • 1 Green Bell Pepper
      • ½ cup Diced Mushrooms
      • 1 tablespoon Chili Powder
      • 1 teaspoon Smoked Paprika
      • 1 teaspoon Instant Coffee OR Espresso Powder
      • 1 teaspoon Tumeric
      • 1 teaspoon Oregano
      • 2 Bay Leaves
      • 1 28oz can Crushed Tomatoes
      • 1 cup Chicken Broth
      • Salt and Pepper to taste

      Instructions

      1. Brown you ground beef in a large frying pan or skillet.
      2. Dice up your veggies.
      3. Add the browned meat and the veggies to the crock pot along with the crushed tomatoes, chicken broth, spices, and bay leaves. Stir all together well.
      4. Set the crock pot to high for 5 hours. (low if longer than that, but don't leave longer than 8 hours)
      5. Remove the bay leaves and serve with a dollop of Greek yogurt, cilantro, avocado or even a squeeze of lime and enjoy!
      Nutrition Information:
      Yield: 6 Serving Size: 1
      Amount Per Serving: Calories: 285Total Fat: 14gSaturated Fat: 5gTrans Fat: 1gUnsaturated Fat: 7gCholesterol: 68mgSodium: 569mgCarbohydrates: 17gFiber: 5gSugar: 9gProtein: 24g

      Nutritional information is not always 100% accurate.

      © Miriam Reeves
      Cuisine: American / Category: Main Dish

      Freaking Good Almond Flour Brownie Recipe

      February 26, 2020

      a thick almond flour brownie covered in melted chocolate chips and chopped pecans

      BROWNIES!!! Only the best dessert. People love this dessert so much that they mix it with other desserts. Cheesecake, oreos, brookies (a brownie made like a cookie), etc. So of course we needed an amazing almond flour brownie recipe like this one. Fudgy, easy to make, made with almond flour of course, and in this recipe honey as it's sweetener! Get ready to make a double (triple?) batch of these babies.

      How do I substitute regular flour for almond flour in a recipe?

      Substituting regular flour for almond flour when you're baking is not simply a cup for cup ratio. Almond flour is heavier and holds more moisture. It can actually be a really good substitution in those easy baked goods like brownies, cookies, tart crusts, etc. But if you are making something with yeast that requires more finesse and technique, almond flour needs a little more than just a direct substitution because of it's complete lack of gluten.

      hand holding up a thick brownie

      That being said, I LOVE making desserts and recipes with almond flour. I think it can, in the right recipe, add to the flavor and texture beautifully. Normally, if you are substituting almond flour, add just a little bit more of your rising agent. This helps to make up for the extra weight of your batter or dough due to the almond flour.

      In this recipe, I also added a little bit of coconut flour to help them keep from getting too raw and runny tasting. With the moisture that almond flour naturally holds, just a little bit of coconut flour helps to balance that out.

      a super rich fudge brownie with pecans on top

      Do I need to refrigerate Almond Flour?

      The shelf life of almond flour will definitely be extended if you store it in the fridge, as will coconut flour. Almond flour is a very moist flour and so keeping it in the cold will help to keep it fresh longer. That being said, you won't ruin your almond flour by keeping it in the pantry.

      hand reaching for a brownie

      Is blanched or unblanched almond flour better?

      Blanched almond flour and unblanched almond flour have the same nutritional benefits and properties. Unblanched is just using the entire almond so can have a courser texture than blanched. Blanched is more commonly used in baking for that reason. Blanched almond flour is also more commonly used in things like pastries because it had a lighter color. Use either for this recipe!

      What is the best cocoa powder to use in brownies?

      Our FAVORITE cocoa powder to use is actually cacao powder and we get it from Costco. It gives a much more rich chocolaty taste to baked goods and that sort of red-ish tint from being a more raw unprocessed version of cocoa. Highly recommend!

      hand mixing up some brownie batter

      The Best Almond Flour Brownie Recipe

      So let's make these! Pre-heat your oven to 350. In a large mixing bowl, cream together your room temperature butter and honey. Cream for at least 2-3 minutes until it's really smooth and lighter in color than when you started. I would recommend doing that whenever your directions say "cream together." It gives a really rich texture and flavor.

      Add your eggs and again, mix really well until smooth. In a separate bowl, mix together your almond flour, coconut flour, baking powder, cocoa powder, and little bit of salt. Add that dry mixture into your butter mixture and combine well. Make sure to use a spatula to scrape down the sides so that everything gets incorporated evenly.

      overhead shot of a bunch of cut brownies

      Grease a 9 inch by 9 inch baking pan and pour the batter in (it is a thicker batter). Bake for 25-30 minutes until a toothpick or a butter knife inserted in the middle comes out clean.

      * Optional: Toppings!! We love to top our brownies with chopped pecans and dark chocolate chips. Another good one is chopped up pretzels and dark chocolate chips. Simply top the batter and then bake the same way! *

      Tag us on Instagram @grabthemangos and give us a rating and review right here in the comments! And don't forget to pin and save it for next time!

      These AMAZING almond flour brownies are grain free, gluten free, refined sugar free, and um DELICIOUS! Healthy, fudgy, cocoa brownies with honey. A perfect dessert!

      More Sweet recipes for you to love

      • 3 Ingredient Fudge Brownies
      • Chickpea Cardamom Blondies
      • Orange Glazed Bars
      • Healthy Chocolate Chip Banana Bread
      a thick almond flour brownie covered in melted chocolate chips and chopped pecans

      Freaking Good Almond Flour Brownies

      Yield: ~9 brownies
      Prep Time: 10 minutes
      Cook Time: 25 minutes
      Total Time: 35 minutes

      These AMAZING almond flour brownies are grain free, gluten free, refined sugar free, and um DELICIOUS! Healthy, fudgy, cocoa brownies with honey. A perfect dessert!

      Ingredients

      • ½ cup Butter (softened)
      • ½ cup Honey
      • 2 Eggs
      • ¾ cup Almond Flour
      • 2 tablespoon Coconut Flour
      • ½ cup Cocoa Powder
      • 1 teaspoon Baking Powder
      • Pinch of Salt

      Instructions

      1. Pre-heat the oven to 350.
      2. In a large mixing bowl, cream together the butter and honey for at least 2-3 minutes until silky smooth and lighter in color than when you started.
      3. Add in the eggs and again, mix until nice and smooth.
      4. In a separate bowl, mix together the almond flour, coconut flour, cocoa powder, baking powder, and salt.
      5. Add the dry almond flour mixture to the butter mixture and mix together well. Be sure to scrape the sides and get everything together evenly.
      6. Grease a 9 X 9 inch baking pan and pour the batter in, spread evenly.
      7. Optional: add your toppings like chopped pecans, dark chocolate chips, crushed pretzels, etc. or leave plain.
      8. Bake for 25-30 minutes until a toothpick or butter knife inserted in the middle comes out clean.
      9. Let them cool before serving and enjoy!
      Nutrition Information:
      Yield: 9 Serving Size: 1
      Amount Per Serving: Calories: 245Total Fat: 17gSaturated Fat: 7gTrans Fat: 0gUnsaturated Fat: 8gCholesterol: 68mgSodium: 168mgCarbohydrates: 21gFiber: 2gSugar: 16gProtein: 5g

      Nutritional information is not always 100% accurate.

      © Miriam Reeves
      Cuisine: American / Category: Dessert

      Oven Roasted Asparagus with Parmesan + White Wine

      February 23, 2020

      overhead shot of oven roasted asparagus with butter and garlic and parmesan cheese melted on top

      Anything with Parmesan cheese on it is basically delicious. Change my mind. This oven roasted asparagus with Parmesan AND white wine with some butter and garlic is just the absolute best thing. I seriously never even expected this recipe to taste quite this good. It was a one try and done, it's perfect, type of recipe testing. I couldn't change a thing about it because I couldn't stop eating it. Hands down, best roasted asparagus recipe I've ever tried.

      Baked Asparagus with Parmesan Cheese

      This oven baked asparagus is loaded with shredded Parmesan cheese. This is important for this recipe, use the shredded Parmesan, not the powdered kind. It turns out so gooey, and melty, and just amazing. I'll probably tell you this recipe is amazing 45 more times so bare with me. Using the powdered parmesan will honestly still taste good but the texture will be more grainy paste than buttery melted goodness.

      not baked yet, asparagus with butter and parmesan

      Baking asparagus and getting that perfect roasted veggie is one of the best ways to cook asparagus in my opinion. It's easy, simple, and gets the best results. The worst thing- over cooked asparagus. It gets soggy and gross and no one wants that. This recipe gets that cooked and tender, but still a little crunchy, perfect asparagus.

      plate of parmesan roasted aspargus and glasses of white wine

      To make this recipe, start by pre-heating your oven to 375. Place a few dabs/slices of butter on the bottom of the dish and the asparagus right over the top. Make sure to cut the "butts" off the asparagus first because they tend to be way to annoying to chew because of their stringy texture.

      Sprinkle your minced garlic over the top of the asparagus as evenly as you can. Then the Parmesan on top of that. Finally, the best part, sprinkle the wine over it all and bake in the oven for 20 minutes. So good, I'm craving it now!

      chef sprinkling wine over the asparagus

      What's the best wine to use in cooking?

      I am super far from a wine connoisseur over here, but when it comes to cooking, your favorite white wine will do the trick. However, for your oven roasted asparagus with Parmesan I do have a particular type of wine that I LOVE to use. A honey mead wine (so technically not a white wine), is so so yummy to use with the asparagus and Parmesan pairing so perfectly. If you have that one or can find it, use it. Otherwise use a slightly sweeter white wine that you personally like and enjoy!

      holding a glass of wine with roasted asparagus

      Tag us on Instagram @grabthemangos and give us a rating and review right here in the comments! And don't forget to pin and save it for next time!

      This oven roasted, baked asparagus is roasted in butter, with garlic, Parmesan cheese, and white wine thrown in. This is the best asparagus recipe ever! Super simple and easy to make.

      More Sweet recipes for you to love

      • Bacon Wrapped Asparagus with Balsamic Glaze
      • Cajun Chicken Meatballs
      • Sweet Potato Gnocchi
      • Watermelon and Goat Cheese Salad
      overhead shot of oven roasted asparagus with butter and garlic and parmesan cheese melted on top

      Oven Baked Asparagus with Parmesan + White Wine

      Yield: 5 servings
      Prep Time: 10 minutes
      Cook Time: 20 minutes
      Total Time: 30 minutes

      This oven roasted, baked asparagus is roasted in butter, with garlic, Parmesan cheese, and white wine thrown in. This is the best asparagus recipe ever! Super simple and easy to make.

      Ingredients

      • 1 Bundle of Asparagus
      • 2 minced Garlic Cloves
      • 4 tablespoon Butter
      • ½ cup Shredded Parmesan
      • ¼ cup White Wine (or Honey Mead Wine)

      Instructions

      1. Pre-heat your oven to 375.
      2. In a shallow baking dish, place the butter in small slices on the bottom, spread out evenly.
      3. Cut the butts off the asparagus (about 1 inch off the bottoms) and place the asparagus on top of the butter evenly in the pan.
      4. Sprinkle your minced garlic over the top as evenly as you can.
      5. Top that with the shredded Parmesan cheese.
      6. Finally, drizzle the white wine (or honey mead) over the top and bake for 20 minutes in the oven.
      7. Let it cool slightly before serving up and enjoy the best asparagus ever!
      Nutrition Information:
      Yield: 5 Serving Size: 1
      Amount Per Serving: Calories: 123Total Fat: 11gSaturated Fat: 7gTrans Fat: 0gUnsaturated Fat: 3gCholesterol: 30mgSodium: 210mgCarbohydrates: 1gFiber: 0gSugar: 0gProtein: 3g

      Nutritional information is not always 100% accurate.

      © Miriam Reeves
      Cuisine: American / Category: Side Dishes

      Baked Egg Cups with Sausage + Spinach

      February 19, 2020

      egg cups with sausage and spinach on a plate together

      These baked egg cups are the perfect meal prep for breakfasts if you're into that kind of thing. We honestly, ate most of our "meal prep" for these on the day we made them. Apparently we aren't all that great at actually rationing the meal prep to last the week. Either way, if you can resist eating all of your baked egg muffins in one day, then you can have them for the whole week. And these are SO good (hence why we ate them all in one day)!

      Can you meal prep eggs?

      Eggs are a complete protein. Basically they are the ultimate breakfast food and a great addition to other meals too. So why wouldn't you want to make them into portable, easy little muffin cups?

      stacked baked egg muffins with a hand picking one up

      You can definitely meal prep eggs! Making them into delicious baked egg cups is such a quick, easy, and customizable meal prep idea. They are easily portable (eat in the car- yes thanks!), they are quick to grab and heat up, and they are actually healthy for you and perfect for a good breakfast.

      overhead shot of coffee with egg cups for breakfast

      How to make Sausage Egg Muffins

      Making these little egg muffin cups is so easy. In a mixing bowl, beat your eggs and Greek yogurt together until smooth and creamy. Then add your green bell pepper, onions, spinach, and diced sausage and mix together well. In a muffin or cupcake tin, spray the insides of each cup really well with non stick cooking spray.

      hand holding a baked egg cup

      How do you make egg cups not stick?

      If you have an older tin or you just really don't want to deal with sticking egg muffins, then use cupcake paper liners. Place them inside the cupcake tin like you would for cupcakes and then spray those with non stick spray instead. This will make sure your baked egg cups don't stick.

      one egg cup with a bite taken out of it

      Bake these at 375 for 20 minutes. Let them cool and set when they are done before pulling them out of the tin. Once you get them out, you can keep them in the fridge for up to one week and you can just reheat in the microwave for about 30 seconds. Easy peasy! And so delicious.

      Tag us on Instagram @grabthemangos and give us a rating and review right here in the comments! And don't forget to pin and save it for next time!

      These baked egg cups (egg muffins) are baked in a muffin tin and are so easy to make and perfect for meal prepping breakfast for the week. Healthy and delicious!

      More Sweet recipes for you to love

      • Strawberry Almond Flour Pancakes
      • Mango + Aloe Green Smoothie
      • Banana Oat Pancakes
      • Carrot Cake Overnight Oats
      egg cups with sausage and spinach on a plate together

      Baked Egg Cups with Sausage + Spinach

      Yield: 10
      Prep Time: 15 minutes
      Cook Time: 20 minutes
      Total Time: 35 minutes

      These baked egg cups (egg muffins) are baked in a muffin tin and are so easy to make and perfect for meal prepping breakfast for the week. Healthy and delicious!

      Ingredients

      • 9 Eggs
      • ½ cup Greek Yogurt
      • 1 Green Bell Pepper (diced)
      • 6 Breakfast Sausage Links (diced)
      • 1 Yellow Onion (diced)
      • 1 cup Spinach (chopped)
      • Salt + Pepper to taste

      Instructions

      1. Pre-heat oven to 375.
      2. In a mixing bowl, whisk together your eggs and Greek Yogurt until smooth and creamy.
      3. Add in diced green bell pepper, diced yellow onion, diced sausage, and chopped spinach. (make sure your sausage is cooked beforehand- either precooked sausage or simply cook it like normal before dicing and adding to mixture)
      4. Mix together well.
      5. In a muffin/cupcake tin, spray non-stick cooking spray into each tin cup well. *see notes*
      6. Pour your egg mixture equally into each tin cup. It helps to use a spoon to make sure that the veggies and sausage are making it into each cup and not just the eggs.
      7. Bake for 20 minutes and let cool for a few minutes before removing.
      8. Add some salt and pepper to taste and enjoy! *see notes for storing and reheating*

      Notes

      *if you want to double up and make sure your egg cups don't stick, use a cupcake paper liner and spray the inside of it before pouring eggs in*

      *egg cups will keep for a week in the fridge and reheat for 30 seconds in the microwave*

      Nutrition Information:
      Yield: 10 Serving Size: 1
      Amount Per Serving: Calories: 128Total Fat: 8gSaturated Fat: 3gTrans Fat: 0gUnsaturated Fat: 5gCholesterol: 180mgSodium: 252mgCarbohydrates: 3gFiber: 1gSugar: 2gProtein: 10g

      Nutritional information is not always 100% accurate.

      © Miriam Reeves
      Cuisine: American / Category: Breakfast

      Strawberry Almond Flour Pancakes

      February 11, 2020

      stack of almond flour pancakes with icing and strawberries

      Almond flour pancakes are one of the best uses for almond flour. Seriously soft and delicious pancakes, loaded with strawberries and then topped with some coconut whipped cream or, if you're feeling flirty, icing! Do I need to say more? I don't, but I will. These strawberry almond flour pancakes are perfect for a healthy but sweet breakfast that is so easy to make! (hint: Valentine's day breakfast in bed anyone?) Wink wink!

      How do you make Almond Flour Pancakes from scratch?

      These pancakes are super healthy and delicious. With only 6 simple ingredients and just one bowl. So let's begin! In a mixing bowl, combine your almond flour and baking powder. Add in your eggs, maple syrup, and Greek yogurt and stir well until a thick batter forms. Fold in your strawberries and you are ready to start frying.

      cracking an egg into a bowl for strawberry pancakes
      hand mixing up pancake batter with strawberries

      So making these pancakes is super easy. Frying them is easy as well, but here are couple of tips when you do it:

      • Make them only about ¼ cup big so they don't fall apart. Almond flour is delicious but doesn't hold together as well as regular wheat flour.
      • Cook on a lower heat setting and place the lid on. This helps them cook through a little better before you even flip them.
      • If they seem like they are already falling apart when you try to get the spatula under them, let them cook with the lid on a bit longer to help them firm up.

      By doing these things, frying up some almond flour pancakes is no problem.

      pancakes with icing and a bite taken out of them with strawberries

      Can you substitute Almond Flour for regular flour?

      If you're thinking you can just make your regular old pancakes and substitute equally almond flour for regular flour, let me just save you that heart break. It does not work. Almond flour creates a much more lose structure in the batter than wheat flour does.

      What you can do is play around with it. This recipe has only almond flour, but we purposefully put 2 eggs in for binding (eggs are like glue in baking) and some Greek yogurt to get a more thick structure going.

      fork in a bite of pancakes with some strawberries

      Does almond flour burn easily?

      Almond flour does burn more easily than regular wheat flour. You may even notice that these pancakes will get a darker color than that traditional golden brown on the outsides. Don't worry! This is just the tips of the almond flour getting hot and changing color, the pancake is not burnt or over cooked. This is why, again though, I definitely recommend cooking these at a lower temperature. The plus side, though is that almond flour holds more moisture so you don't have to worry about dry pancakes.

      hand pouring icing over strawberry almond flour pancakes

      How is almond flour good for you?

      Almond flour is better for you than most other flour substitutes or alternatives. It is great for blood sugar levels, is rich in nutrients, low in carbs, helps to reduce bad cholesterol, and yet has an overall sweeter taste. Almond flour has a lot of Vitamin E and magnesium, which is one of the main reasons I like to stay stocked in it and use it whenever I can.

      hand about to take a bite of pancakes with strawberries

      Refined wheat (normal wheat flour) is high in carbs, but low in fat and fiber (the opposite of almond flour). This means that normal wheat flour can spike your blood sugar and let it crash, making you crave more sweet sugary things to fix the problem. So while there are health benefits to normal wheat flour and I don't recommend dropping it unless you need to, almond flour is a nice, healthier, alternative to something like these almond flour pancakes to mix into your diet. Remember it's all about balance! Feel good about you eat and enjoy your strawberry pancakes!

      Tag us on Instagram @grabthemangos and give us a rating and review right here in the comments! And don't forget to pin and save it for next time!

      These strawberry almond flour pancakes are the best, easy, fluffy pancakes ever! A healthy pancake recipe with Greek yogurt and strawberries mixed in.

      More Sweet recipes for you to love

      • Extra Fluffy Pancakes
      • Banana Oatmeal Pancakes
      • Super Easy Dutch Baby
      • Almond Flour Cookies
      stack of almond flour pancakes with icing and strawberries

      Strawberry Almond Flour Pancakes

      Yield: 6 pancakes
      Prep Time: 5 minutes
      Cook Time: 7 minutes
      Total Time: 12 minutes

      These strawberry almond flour pancakes are the best, easy, fluffy pancakes ever! A healthy pancake recipe with Greek yogurt and strawberries mixed in.

      Ingredients

      • 1 cup Almond Flour
      • 1 teaspoon Baking Powder
      • 2 Eggs
      • 1 tablespoon Maple Syrup
      • ¼ Greek Yogurt
      • 1 cup Diced Strawberries
      • Optional Icing:
      • ½ cup Powdered Sugar
      • 1 tablespoon Milk
      • ½ teaspoon Vanilla

      Instructions

      1. In a mixing bowl, whisk together your almond flour and baking powder.
      2. Add in your eggs, maple syrup, and Greek yogurt and combine until a thick batter forms.
      3. Fold in your diced strawberries.
      4. Spray a frying pan with non-stick olive oil spray or a little bit of butter, and heat over medium to low heat.
      5. Using a ¼ cup, scoop the batter onto the pan.
      6. Place the lid on top, make sure the heat is close to low, and let it cook for about 2-3 minutes.
      7. When you are ready to flip, cook the other side for a minute or so and then remove from the heat and onto a plate.
      8. Top with more strawberries, coconut whipped cream, maple syrup, or our optional icing for a sweeter treat, and enjoy!
      Nutrition Information:
      Yield: 6 Serving Size: 1
      Amount Per Serving: Calories: 192Total Fat: 11gSaturated Fat: 1gTrans Fat: 0gUnsaturated Fat: 9gCholesterol: 63mgSodium: 110mgCarbohydrates: 18gFiber: 3gSugar: 14gProtein: 7g

      Nutritional information is not always 100% accurate.

      © Miriam Reeves
      Cuisine: American / Category: Breakfast

      Mango + Aloe Green Smoothie Recipe

      February 6, 2020

      green smoothie with mangoes

      This Mango Aloe Green Smoothie Recipe packs a detoxifying, digestion-soothing punch! It's made with aloe vera juice, frozen mangos, spinach, and kale to boost your immunity and hydrate your skin!

      Green smoothie recipes are everywhere!! And for a good reason, they are amazing. One, a good green smoothie recipe is a great way to get your kids to eat a solid handful of leafy greens in the morning (or any time of day). My kids essentially feel like they are eating ice cream for breakfast. Two, you can pack all those goodies into a delicious tasting cup instead of skipping and grabbing donuts instead (note: we have NO problems with a donut breakfast over here). And three, there are just so many different flavors and recipes for green smoothies out there, it would be hard not to find one or two that you love the taste of. That being said, this is our absolute favorite.

      Are green smoothies really that good for you?

      While there is a lot of debate over whether green smoothies are good or bad, and I can't speak for every single recipe out there, I believe they have benefits like the ones I've said above. They are great for getting those leafy greens into your body. Salads get tiring and no one really wants a salad for breakfast. You could, I guess, just take a handful of spinach straight to the face with your morning coffee, but you might as well just slap a "psychopath" label across your forehead. So what works? Green smoothie recipes.

      overhead shot of green smoothies with kale and mangoes

      So let's break it down:

      Green Smoothie Benefits:

      Green smoothies are high in vitamins E and C as well as Iron, Fiber, and Antioxidants. All those leafy greens that are generally in green smoothies (they make it green after all), are loaded up with vitamins most people are deficient in. (I am not a doctor or a nutritionist- just talking about general stuff here, everyone is different).

      Kids especially can commonly be anemic because they just don't eat a lot of greens and iron rich foods. Enter this particular green smoothie recipe. We started making these almost every morning for my kids who turned out to be very low in Iron. A few months after letting them drink these smoothies with their breakfast most mornings, they were nice and "regular" and no longer anemic at all. So you can see, green smoothies can definitely have their place in your diet with big health benefits.

      green smoothie recipe with mangoes and kale in 2 cups

      Fruit is also a super great way to start your day off. It has energy that will help you through the day, potassium, fiber, and vitamins and minerals loaded in it. Basically, it's always good to have some fruit with your breakfast. Mango's in particular are an amazing fruit. They help with digestion, gut health, lowering cholesterol... and so much more!

      Cons of Green Smoothies:

      Now the cons of green smoothies have more to do with how you use them and what your intent is with drinking them. The smoothies themselves are great for you. The problem comes when you start replacing meals with them, doing cleanses, thinking they will give you your weight loss goals on their own, etc.

      a blender full of green smoothie ingredients

      I believe you should really listen to your body and eat intuitively. If drinking a green smoothie some mornings does not sound appealing, then don't do it. If it gives you energy and makes you feel better then make one right now! Don't think this is a one stop shop for suddenly being a perfectly healthy person. Not everything is perfectly healthy and not everything should be. Make a big pitcher of smoothie and drink as much as you want with your eggs and toast in the morning and save the rest for a different time. Don't make it complicated for yourself. Obsessing over food is never healthy, treat a delicious green smoothie like this one as a delicious energy boosting treat that is going to treat your body well.

      hand holding a green smoothie

      This post may contain affiliate links. If you click and buy, I may make a commission at no cost to you. See my policy for more information.

      Our Favorite Mango Green Smoothie Recipe

      Now that we've covered those questions, let's make the dang smoothie! In a food processor or blender combine one cup of frozen mangoes, one cup of Aloe juice (we get our from Thrive, keep reading to find out why), one cup of your favorite tropical juice (we use pineapple most often), one cup of spinach, and one cup chopped kale. Blend this all together until smooth. You may have to stop and go with this, mixing and scraping the sides, depending on the power of your blender. Add one more cup of frozen mangoes once that first part is blended fully, and blend all together until smooth. Add half of a teaspoon of ginger (optional) to give it a bit of a kick.

      Benefits of drinking Aloe:

      We add aloe vera juice to this mango green smoothie recipe because my husband and our kids tend to have a lot of digestion problems and aloe is really helpful for that in particular. Drinking Aloe helps with alkalinity (pH levels), hydration, constipation (like I said helped my kids with this a lot), and a few other benefits as well.

      hand pouring aloe juice into a blender for a green smoothie recipe

      If you don't have Aloe juice, you can get it from Thrive Market for a really good price. Otherwise you can also just add two cups of your favorite tropical juice (instead of the one) and skip the Aloe. But I highly recommend getting some!

      Tag us on Instagram @grabthemangos and give us a rating and review right here in the comments! And don't forget to pin and save it for next time!

      This is a simple, easy green smoothie recipe that tastes good, can be just for you or for kids, and is great with breakfast in the morning! Healthy, great for energy, and full of spinach and kale. PInterest pin

      More Sweet recipes for you to love

      • Peanut Butter + Banana Granola
      • Carrot Cake Overnight Oats
      • Tahini Walnut Granola
      • Healthy Banana Bread
      green smoothie with mangoes

      Mango + Aloe Green Smoothie Recipe

      Yield: 3-4 cups
      Prep Time: 10 minutes
      Total Time: 10 minutes

      This is a simple, easy green smoothie recipe that tastes good, can be just for you or for kids, and is great with breakfast in the morning! Healthy, great for energy, and full of spinach and kale.

      Ingredients

      • 2 cups Frozen Mangoes (split for easier blending)
      • 1 cup Aloe Vera Juice
      • 1 cup Tropical Fruit Juice (pineapple, guava, etc...)
      • 1 cup Spinach
      • 1 cup Chopped Kale
      • Optional: ½ teaspoon Ginger

      Instructions

      1. In a blender or food processor, blend 1 cup of frozen mangoes, kale, spinach, aloe juice and tropical fruit juice. Depending on the power of your blender, you may need to scrape the sides as you go and mix a few times to get everything incorporated.
      2. Once it's nice and smooth, add the last cup of frozen mangoes and the optional ginger and blend until smooth and done.
      3. Save whatever you don't drink in the fridge for a different day. Enjoy!
      Nutrition Information:
      Yield: 4 Serving Size: 1
      Amount Per Serving: Calories: 110Total Fat: 1gSaturated Fat: 0gTrans Fat: 0gUnsaturated Fat: 0gCholesterol: 0mgSodium: 81mgCarbohydrates: 26gFiber: 3gSugar: 21gProtein: 3g

      Nutritional information is not always 100% accurate.

      © Miriam Reeves
      Cuisine: American / Category: Smoothies

      Baked Cajun Chicken Meatballs

      February 1, 2020

      cajun chicken meatballs stacked together with peppers

      Chicken meatballs are my faaaaavorite! Seriously, so good. I do not like beef. I have come to terms with this. If I can use anything else, I totally will. Chili? Chicken. Tacos? Chicken or Carnitas (pork). Even things like lasagna- ground pork sausage. Beef just is not great in my opinion. I'm not even a big fan of steak. What can I say! These chicken meatballs are the absolute best. I make them for every appetizer, party, throw them in pasta dishes, everything! Full of my Cajun seasoning and totally gluten free (no bread crumbs here guys).

      Ground Chicken Meatballs

      Ground chicken is really sticky. I'll be honest, it can be weird to work with if you've never bought it before. But the flavor for things like meatballs is so good. Cajun flavoring especially goes really well with the ground chicken, because the ground chicken really lets the Cajun seasoning shine through. Beef tends to just overtake it.

      plate full of chicken meatballs and a fork going through one of them

      So how to combat the fact that this gets sticky? Use a cookie scooper. Use some olive oil spray (like what you use to spray pans with), spray the cookie scraper and scoop your meatballs into perfect little balls of Cajun goodness. Easy peesy, not so tricky after all right?

      Chicken Meatballs without Breadcrumbs

      Meatballs are normally made with breadcrumbs. This helps them to turn into those little balls instead of pancaking and falling apart. These, however, are totally gluten free chicken meatballs. And, honestly, even if you don't have to be gluten free for sensitivity or celiacs, these are great and you should make them.

      close up of the cajun meatball texture with a meatball cut in half

      Using almond flour to give it that proper meatball texture, these are super yummy and perfect without breadcrumbs. So no weird ingredients to make meatballs without breadcrumbs. Just almond flour instead.

      So let's make these! Pre-heat your oven to 400. In a large mixing bowl, combine your ground chicken, spices, eggs, and almond flour. Using clean hands or a spoon (I normally use my hands), mix everything together really well. Like I said before, this can get super sticky so just fair warning. Once it's all mixed together, wash your hands off and grab your cookie scooper.

      overhead shot looking down at a plate full of cajun chicken meatballs with peppers around it

      Now, while the cookie scooper method is definitely the easiest, if you don't have one don't worry. I didn't for a long time and the age old method of just making meatballs with your hands works just fine. Your hands will get sticky, but c'est la vie.

      Another option is using a table spoon scoop. Same method, just spray with some cooking spray before each scoop and start scooping.

      side view of a mountain of meatballs

      Make approximately 1- 1 ½ inch balls (or about a table spoon size). Lay them out on a pan lined with parchment paper and bake in the oven for 20 minutes.

      How do you know when meatballs are done?

      Twenty minutes at 400 degrees should do the trick. But if you are baking at a different elevation or your oven is a little off temp, it might be different. So how do you tell they are done and cooked through?

      Two ways: use a thermometer and check the middle of the meatball for a temp of 165 F, or cut a meatball in half (one in the center of the pan) and make sure there's no more raw pink meat.

      fork stabbing a meatball

      Once they are done baking, let them cool a bit before moving them. Enjoy with some yummy dips or in pasta!

      Tag us on Instagram @grabthemangos and give us a rating and review right here in the comments! And don't forget to pin and save it for next time!

      These baked chicken meatballs are filled with ground chicken, Cajun seasoning, and no breadcrumbs! Totally gluten free and healthier. A super easy recipe that can be used with dips and in pasta dishes.

      More Sweet recipes for you to love

      • Fried Zucchini Fritters
      • Hawaiian Mahi Mahi
      • Ramen Noodle Soup
      • Gluten Free Cornbread Muffins
      cajun chicken meatballs stacked together with peppers

      Baked Cajun Chicken Meatballs

      Yield: 12
      Prep Time: 15 minutes
      Cook Time: 20 minutes
      Total Time: 35 minutes

      These baked chicken meatballs are filled with ground chicken, Cajun seasoning, and no breadcrumbs! Totally gluten free and healthier. A super easy recipe that can be used with dips and in pasta dishes.

      Ingredients

      • 1 lb Ground Chicken
      • 1 tablespoon Cajun Seasoning
      • 1 teaspoon Chili
      • 1 teaspoon Garlic Powder
      • 1 teaspoon Ground Black Pepper
      • 1 Egg
      • ¼ cup Almond Flour

      Instructions

      1. Pre-heat oven to 400.
      2. In a mixing bowl, combine all of your ingredients together well. (will get sticky!)
      3. Using a cookie scooper, tablespoon scoop, or clean hands, make your meatballs. Note: if you are using a scooper, spray with cooking spray before each scoop to make it easier and not stick.
      4. Place the meatballs on a pan lined with parchment paper and bake for 20 minutes.
      5. Make sure meatballs are done using a thermometer to check the center for 165 F or check the inside by cutting a center meatball in half.
      6. Let them cool and set when done and enjoy!
      Nutrition Information:
      Yield: 12 Serving Size: 1
      Amount Per Serving: Calories: 94Total Fat: 6gSaturated Fat: 1gTrans Fat: 0gUnsaturated Fat: 4gCholesterol: 56mgSodium: 308mgCarbohydrates: 1gFiber: 0gSugar: 0gProtein: 10g

      Nutritional information is not always 100% accurate.

      © Miriam Reeves
      Cuisine: American / Category: Side Dishes
      • « Go to Previous Page
      • Page 1
      • Page 2
      • Page 3
      • Page 4
      • Page 5
      • Go to Next Page »

      Primary Sidebar

      gluten free recipes

      Vegan Quinoa Bowl in a white bowl

      Vegan Quina Bowls

      Reuben dip in a cast iron skillet with a wood woven charger under the pan

      Ultimate Reuben Dip - With Deli Corned Beef

      glass of the best dairy free eggnog with almond milk and sprinkled nutmeg and a cinnamon stick

      The Best Dairy Free Eggnog with Almond Milk

      bowls of creamy dairy free roasted butternut squash soup

      Roasted Butternut Squash Soup - dairy free

      I'm Renee and welcome! Grab the Mangos focuses on affordable, simple, and easy-to-make recipes. Let's make delicious food together with easy steps and simple ingredients so you have one less stress in your life.

      More about me →

      NEW RECIPES

      • Christmas Tree Cupcakes on a white wood surface.
        Christmas Tree Cupcakes
      • Wood bowl of Christmas Trail Mix.
        Christmas Trail Mix: The Ultimate Holiday Snack Mix
      • Apple cider donut Bundt cake on a wood cake stand.
        Apple Cider Bundt Cake (Gluten Free Option Included)
      • pumpkin spice syrup in a jar with a lid and tag and a jar without a lid.
        Homemade Pumpkin Spice Syrup Recipe: A Perfect Fall Treat

      TREADING RECIPES

      • stack of heath bar cookies with one bite taken out.
        Heath Bar Cookies
      • holding a wood bowl of gnocchi.
        Best Gnocchi Recipe
      • mahi mahi in a cast iron skillet with mango chunks and cilantro
        Hawaiian Style Mahi Mahi Recipe
      • rolled out pizza dough
        Super Easy Pizza Dough

      Footer

      ↑ back to top

      About

      • About
      • Privacy Policy
      • Disclaimer

      Newsletter

      • Sign Up! for emails and updates

      Contact

      • Contact

      As an Amazon Associate, I earn from qualifying purchases.

      Copyright © 2020 Brunch Pro on the Brunch Pro Theme